| Hangar |
Aircraft |
Category |
Date |
Preview |
| David Duckett | Guillows Series 2000 - PBY Catalina | Build | 18-Apr-06 18:49 | 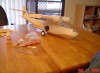 |
| Views : 3060 |
| The clear parts have beecovered with a mask and the brand name is Parma. You paint four coats of it onto the CLEAN pieces allowing each coat to dry very thoroughly before applying the next one. It goes on milky and dies to the haze you see here on the rea |
| David Duckett | Guillows Series 2000 - PBY Catalina | Build | 18-Apr-06 18:29 | 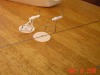 |
| Views : 3152 |
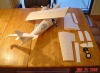
| For these I fill the halves of the plastic piece with filler along with the wire and fill the other half with filler and let them very thoroughly dry. It's best to remove any excess filler as you do this but it can be sanded away when it's dry. When each |
| David Duckett | Guillows Series 2000 - PBY Catalina | Build | 18-Apr-06 18:21 | 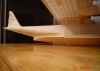 |
| Views : 2210 |
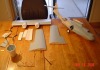
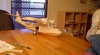
| In the mornings over coffee, and after the cats are fed, I'll spend that time looking at it all and trying to see if there's anything I forgot to do. |
| David Duckett | Guillows Series 2000 - PBY Catalina | Build | 18-Apr-06 18:16 | 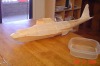 |
| Views : 2335 |
| Lay it on damp and it will naturally do this. All you have to do is dope it top and bottom. In this particular case I had to cut a slit it the area where the curve is the greatest and starts outward . Otherwise all I had to do was wait for it to dry and t |
| David Duckett | Guillows Series 2000 - PBY Catalina | Build | 18-Apr-06 18:10 | 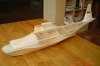 |
| Views : 2276 |
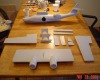
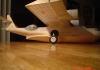
| Works this way, too. The plans say to cover part of the base of the fin with tissue and cover the front part of it with two plastic pieces. Later you glue the top portion of the fin to the stabilizer and that entire structure is the glued to the base on t |
| David Duckett | Guillows Series 2000 - PBY Catalina | Build | 18-Apr-06 17:52 |  |
| Views : 2294 |
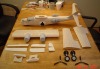
| On the right you can see the extra stringers and lightweight filler combined at the place where the plastic piece meets the wood and on the left you can see why you do it. It doesn't look possible but one piece covers the first section. The secret is to p |