| Build Thread, Page :
1 [ 2 ] 3 4 5 (96 posts, 20 posts per page, 5 pages in total)
|
[ < Prev ] [ Next > ] |
| SteveM, Image # 21637 | 13 Mar 11 20:10 |
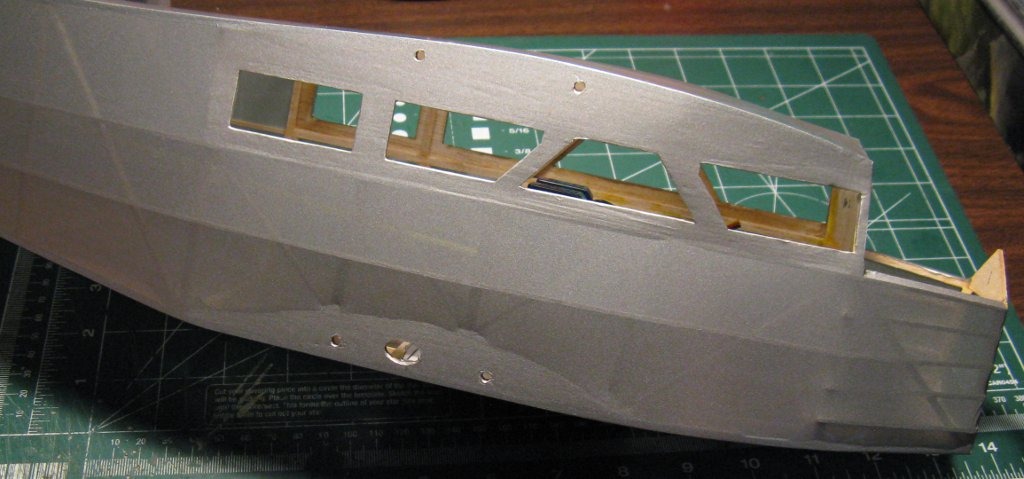
Starting to wonder if I really do want clear windows. |
| SteveM, Image # 21636 | 13 Mar 11 20:08 |
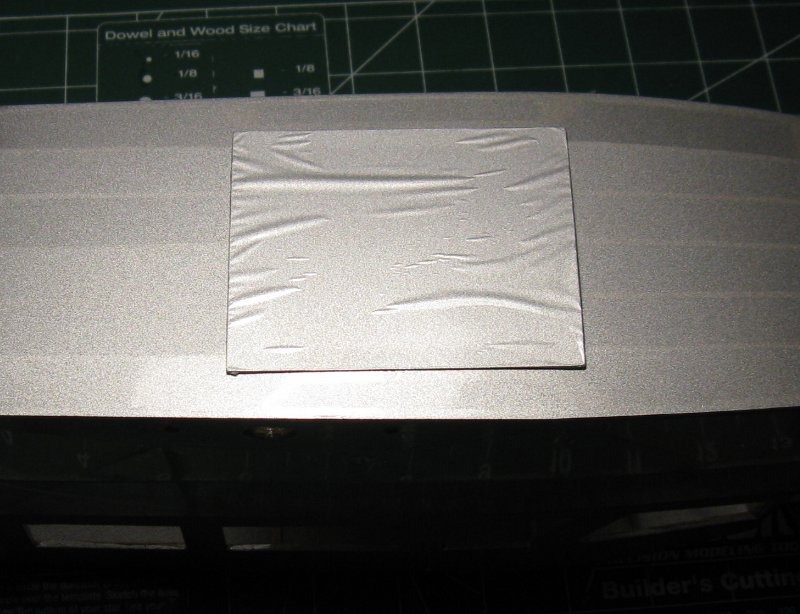
I thought I could cover the access hatch with Solite, but as you can so it just doesn't stick so I'll have to use spray paint. |
| SteveM, Image # 21635 | 13 Mar 11 20:07 |
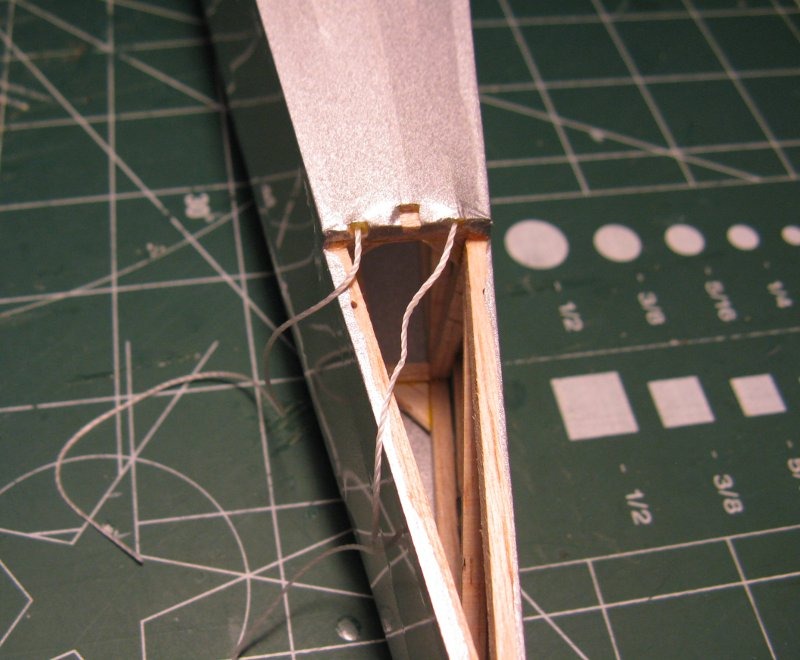
I like how it turned out here at the fuselage exit point. |
| SteveM, Image # 21634 | 13 Mar 11 20:06 |

The LHS carries much of the Model Shipways products so I grabbed this 0.028" Nylon rigging line to use for my pull-pull rudder so as no not use up any of the kit supplied rigging line in case there wasn't enough provided for both uses. |
| SteveM, Image # 21599 | 11 Mar 11 19:42 |
Small pieces of Sullivan cable tubing guide the rudder pull-pull lines where they exit the fuselage. The plans give no guidance on this exit so I borrowed ideas from the builds of others. |
| SteveM, Image # 21598 | 11 Mar 11 19:40 |
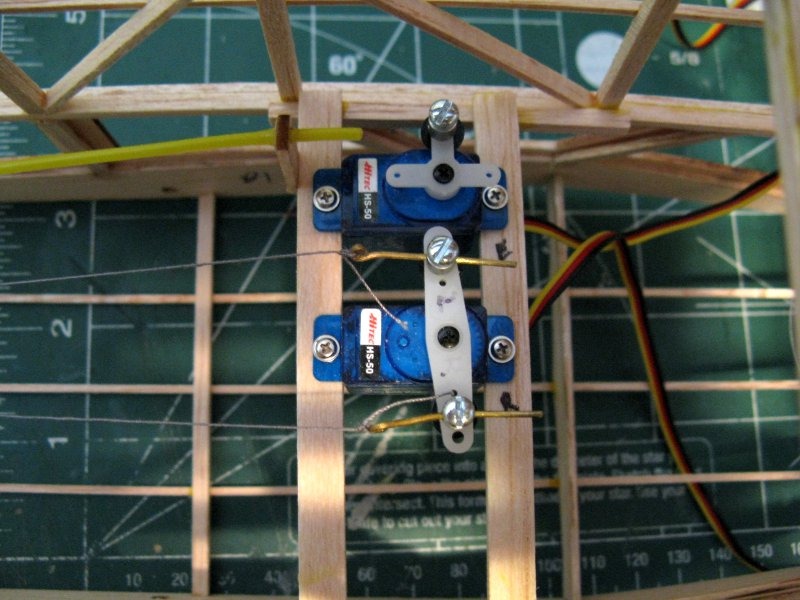
Thread is temporary till I find something more suitable. Brass rod provieds a means to tighten and rough trim. |
| moostang51, Comment for image # 21528 | 08 Mar 11 17:30 |
| I consider scratching your head, "scratch building." You could use 1/64 or 1/32 baltic ply for the gussets. Hell of a lot stronger and more gluing area and it'll still keep the weight down. Keep at it, it looks great. |
| SteveM, Comment for image # 21528 | 08 Mar 11 17:10 |
| You know, it did occur to me that some of what I'm having to do is like scratch building, but when scratch building you generally have a solid set of plans. This just doesn't meet the quality I expect from a kit and the assembly has a ton of weak butt joints so I'm starting to go back and add gussets so they'll stop falling apart on me. |
| moostang51, Comment for image # 21528 | 08 Mar 11 17:01 |
| I saw that page when I typed in Dumas 1815 plan errors. The initials "swm" sought of gave it away. Basically it seems like you have to scratch build to make it rc compatible. I know it's a PITA but you'll be giving a big heads up to future builders and maybe Dumas will take heed and make the necessary adjustments. |
| SteveM, Comment for image # 21528 | 08 Mar 11 16:10 |
| Ok, but I'll still check with you should I happen upon an extra Guillow's B-29.
In case I didn't post it previously, I'm tracking all of the errors that I find in this kit here: http://swm1.com/models/dumas_dh89.html |
| John M Oshust, Comment for image # 21529 | 08 Mar 11 14:08 |
| Sweet |
| SteveM, Image # 21529 | 08 Mar 11 13:56 |
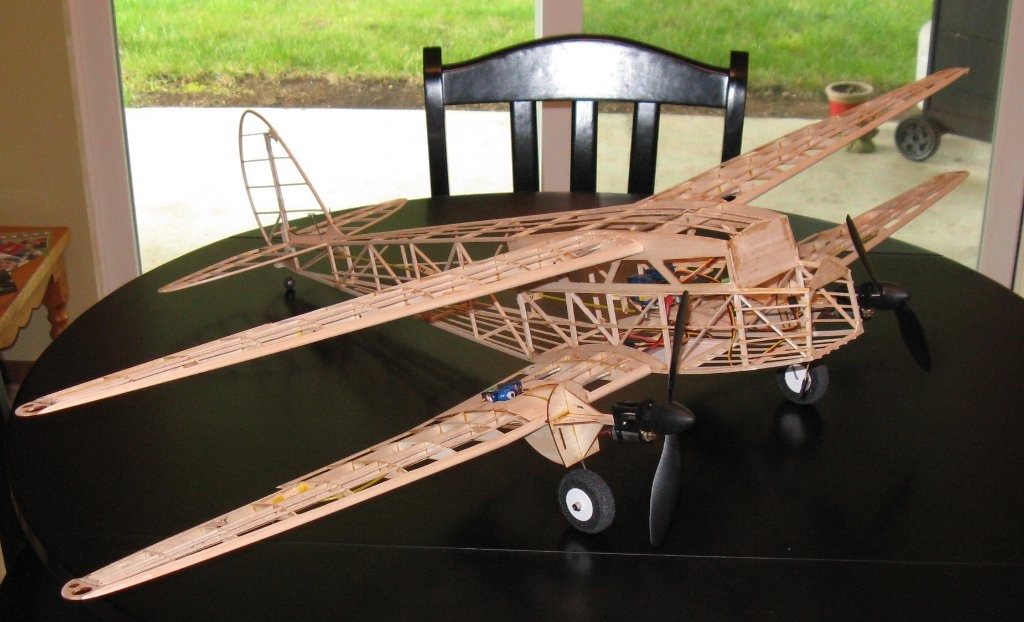
Everything seems to fit together nicely. The directions say that the next step is to cover, but I need to figure out the rudder pull-pull lines first. The directions never address installing the pull-pull lines. Weight as shown here is 8.65 oz. |
| David Duckett, Comment for image # 21528 | 08 Mar 11 13:29 |
| Thanks, but I'll pass. The one from Todays Hobbies was enough for me. |
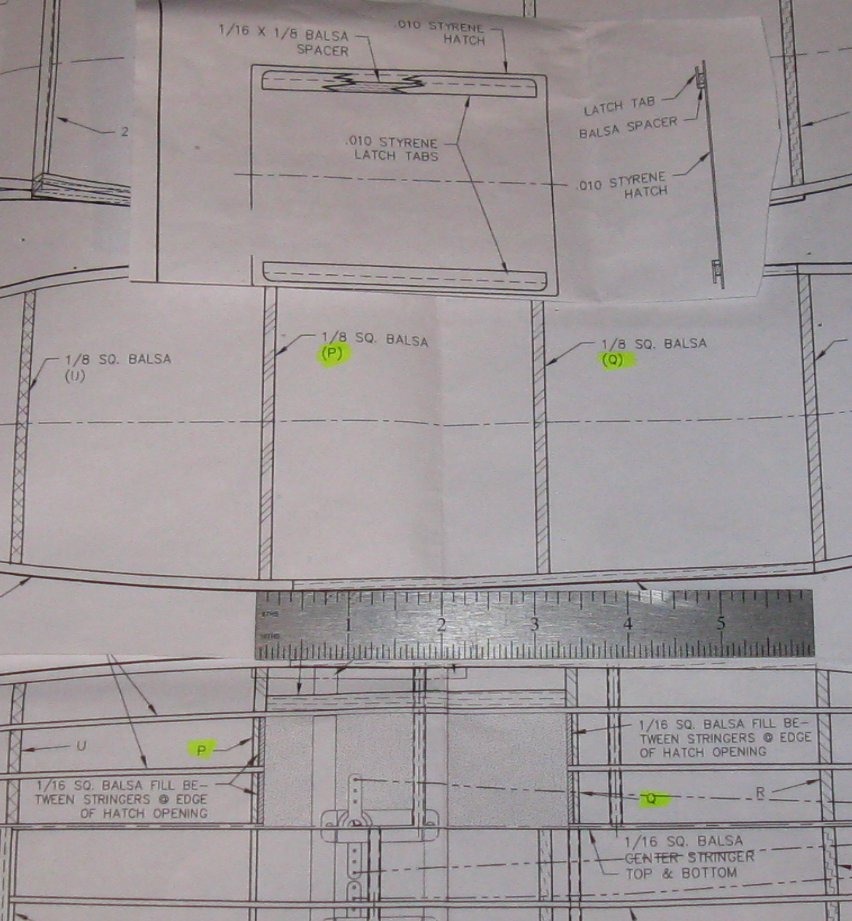
| SteveM, Comment for image # 21528 | 08 Mar 11 10:43 |
| The fuselage is built using the plans just above the 6" machinist's scale, showing parts P and Q to be 3" on center. Below you see they are about 3-5/16" between centers. The plan for the battery hatch uses the 3-5/16" spacing so if you built it to plans it won't fit into the fuselage. Further complicating matters is that the width of the hatch in the bottom plan is 2-3/8" and in the hatch plan they have you build the latch tabs for a 2-7/16" opening. As if that wasn't enough, the hatch opening is built up to a thickness of 1/8", but the tabs on the battery hatch are for a 1/16" opening! At this point it'll be a miracle if I can keep my disgust in check long enough to finish instead of binning it. DD, I have a Dumas kit number 501 F-4D Phantom that is all yours if you want it. |
| SteveM, Image # 21528 | 08 Mar 11 10:36 |
This being my second Dumas kit I was prepared for incorrect and incomplete instructions, but I wasn't ready for so many errors in the plans. |
| SteveM, Image # 21527 | 08 Mar 11 10:34 |
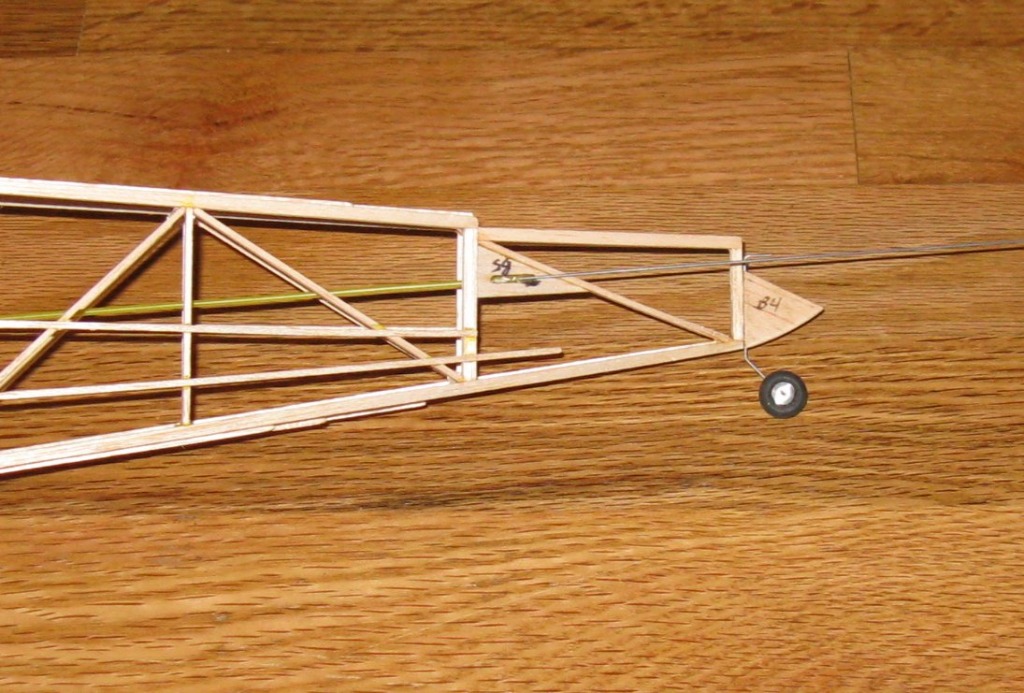
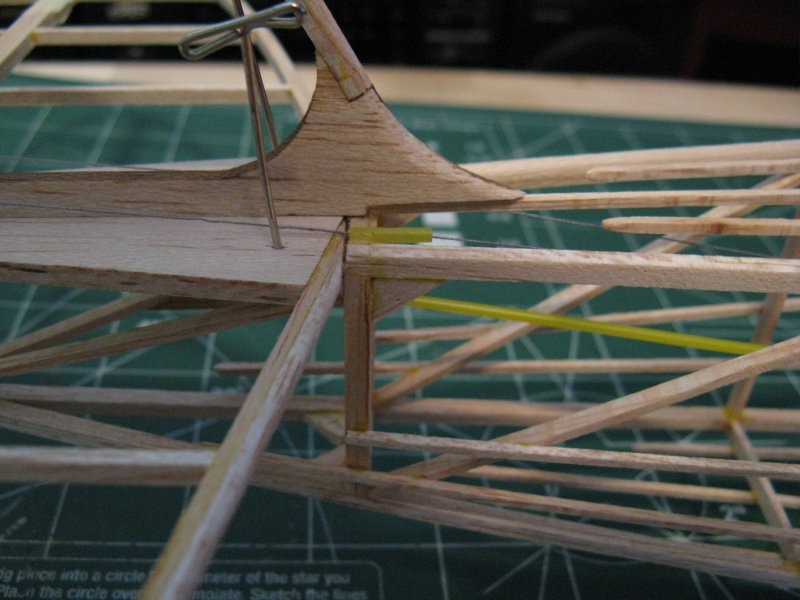
Tailwheel assembly installed. |
| SteveM, Comment for image # 21485 | 07 Mar 11 12:20 |
| Thanks Poppy, I'm determined to keep making forward progress even if a bit slow. |
| poppy, Comment for image # 21485 | 06 Mar 11 21:37 |
| It's coming along nicely. |
| SteveM, Image # 21485 | 06 Mar 11 17:32 |
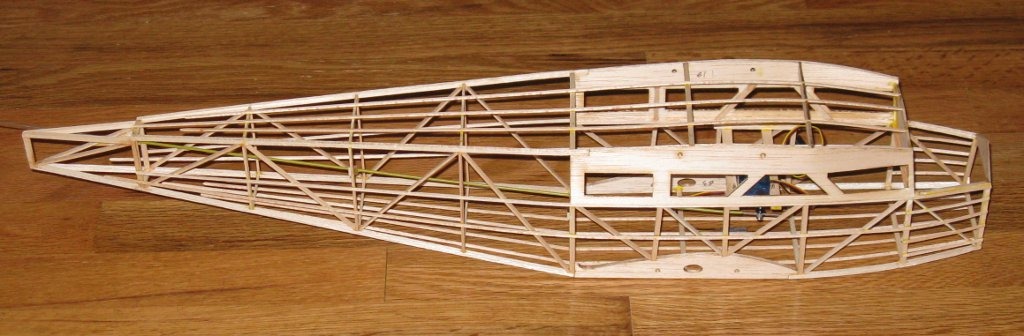
Moving at the speed of PVA glue meant adding these stringers took quite a while. It is the first time I've added fuselage stringers that didn't rest in a notch so it was slow going marking all the positions then holding them in position till the glue set. |
| SteveM, Comment for image # 21341 | 26 Feb 11 11:36 |
| Phil, not a problem, I can use all the brains I can get. About 11 months ago (has it really been that long?) I tested each motor at full throttle from a battery at 50% charge and measured 2.75A per motor for a total of 5.5A. Of course if I changed the prop or remeasured with a fully charged battery I could easily break the 7A limit of the Pixie-7P. The Pixie-20P is now discontinued so if I need to I'll have to find a used one or run two of the Pixie-7P ESCs. Before she maidens I'll be sure to perform a full check. |
| Build Thread, Page :
1 [ 2 ] 3 4 5 (96 posts, 20 posts per page, 5 pages in total)
|
[ < Prev ] [ Next > ] |
