| Build Thread, Page :
<< 26 27 28 29 30 31 32 (631 posts, 20 posts per page, 32 pages in total)
|
[ < Prev ] |
| David Duckett, Comment for image # 24786 | 26 Jan 12 02:04 |
| It's obviously causing you more pain than me. |
| John M Oshust, Comment for image # 24786 | 25 Jan 12 22:54 |
| Small hammers are required when "Easy Building"! Helps alleviate the pain! |
| Xanadu, Comment for image # 24786 | 25 Jan 12 22:45 |
| Interesting to read the instructions, so what in the world would you need a hammer for? Your building a balsa plane, not a steel component requiring some brute force. |
| poppy, Comment for image # 24784 | 24 Jan 12 11:11 |
| Whoa, that's a lot of formers. |
| David Duckett, Comment for image # 24784 | 24 Jan 12 08:29 |
| The bomb bay doors will remain shut:-) |
| BriandKilby, Comment for image # 24784 | 24 Jan 12 08:09 |
| nice work dd, they had a couple variations of the lacaster payload, the dam buster and a 2000lb. bomb or something like that. any ideas? |
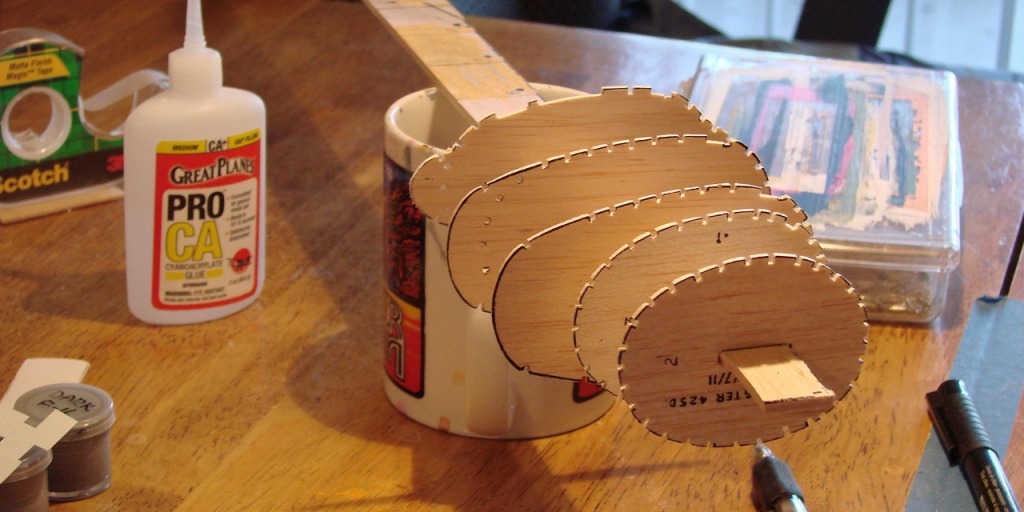
| David Duckett, Comment for image # 24780 | 24 Jan 12 07:55 |
| Actually, not all the wood is excellent. There's a bundle of 1/16" stringers but they're much too soft for me. They could probably be used by those who build for flight. Likewise the 5 sheets of dark green tissue in the kit. |
| David Duckett, Comment for image # 24780 | 24 Jan 12 07:48 |
| I'm not a big fan of the hype, either, but it's the plane I want so...The wood is excellent and I had only three small breaks which were easliy glued back together. I used a "notcher" for all the notches. |
| lukebozek1, Comment for image # 24780 | 24 Jan 12 07:41 |
| This is one of their most expensive kits, how was the quality of the wood? Your formers look very good. Any breakage? |
| John M Oshust, Comment for image # 24780 | 24 Jan 12 07:39 |
| You just re-engineered the kit :) A kit that has revolutionized model building with its simplicity!! |
| David Duckett, Comment for image # 24784 | 24 Jan 12 07:20 |
| It somes with 5 canopies. The root rib is about 1/32" larger than the opening so a little bit of fitting will be in order. The top sub rib #9 will also have to have some cutting as it extends into the wing area. Normal stuff. |
| pfinn, Comment for image # 24784 | 24 Jan 12 07:07 |
| Does the wing root profile match up to the wing rib? |
| julinick, Comment for image # 24784 | 24 Jan 12 06:37 |
| David, did the kit come with a plastic canopy/canopies, or is this something you have to carve yourself? |
| David Duckett, Image # 24786 | 24 Jan 12 05:01 |

|
| David Duckett, Image # 24785 | 24 Jan 12 05:01 |
|
| David Duckett, Comment for image # 24784 | 24 Jan 12 04:22 |
| Thanks, it's 1/32 scale. I've learned over the years to always check such things. Except for that it seems to be going together OK. |
| stirling, Comment for image # 24784 | 24 Jan 12 03:55 |
| Coming along nicely David. Lets hope the rest is a little more straight forward. Makes you wonder how they got the guide lines so far out in the first place. What scale will she be? |
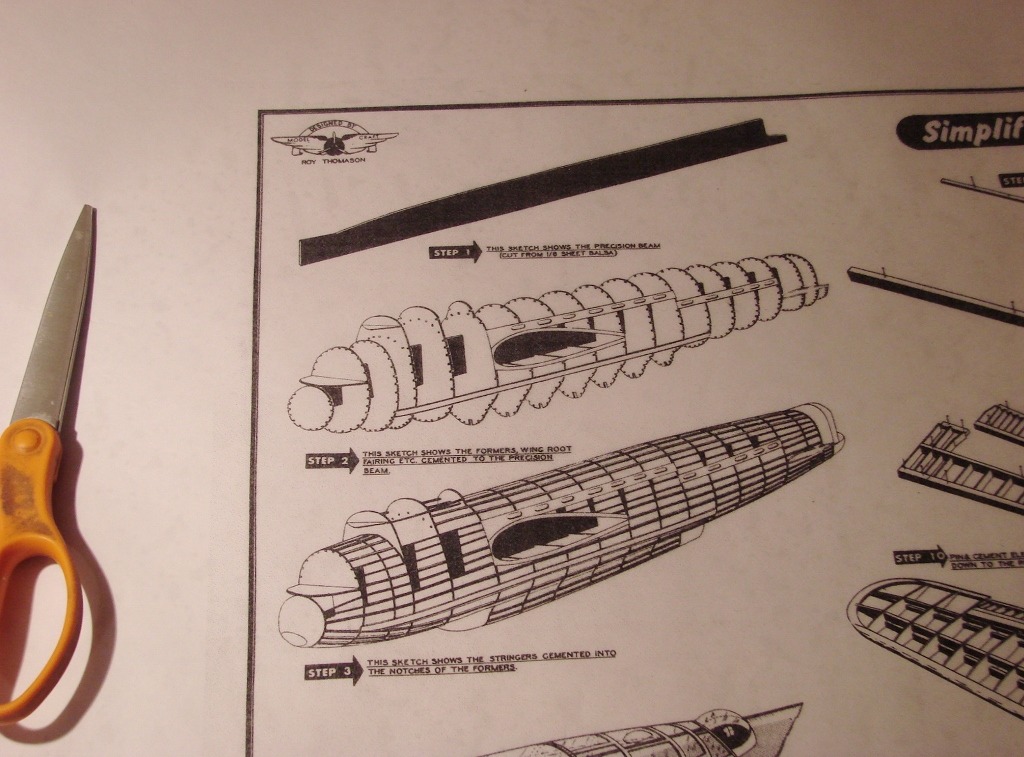
| David Duckett, Image # 24784 | 24 Jan 12 03:51 |
THe top sub formers are installed in the same manner. Wing and stabilizer outline parts are then added. There are 4 or 5 more small pieces to add before adding the stringers. |
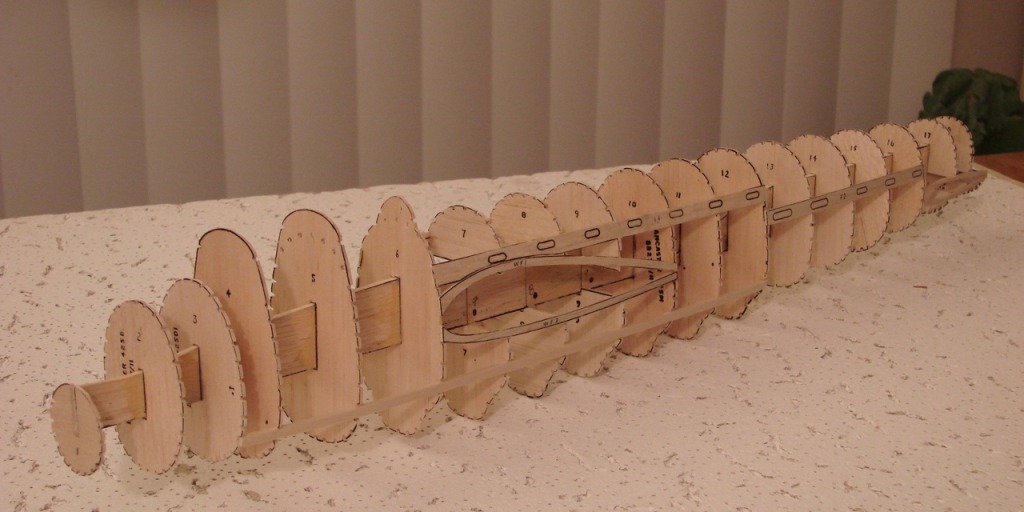
| David Duckett, Image # 24783 | 24 Jan 12 03:48 |
Once the formers front and back are in place, the 3/16" x 1/16" strip is glued into place on each side on the bottom. The remaining sub formers are then glued into place. |
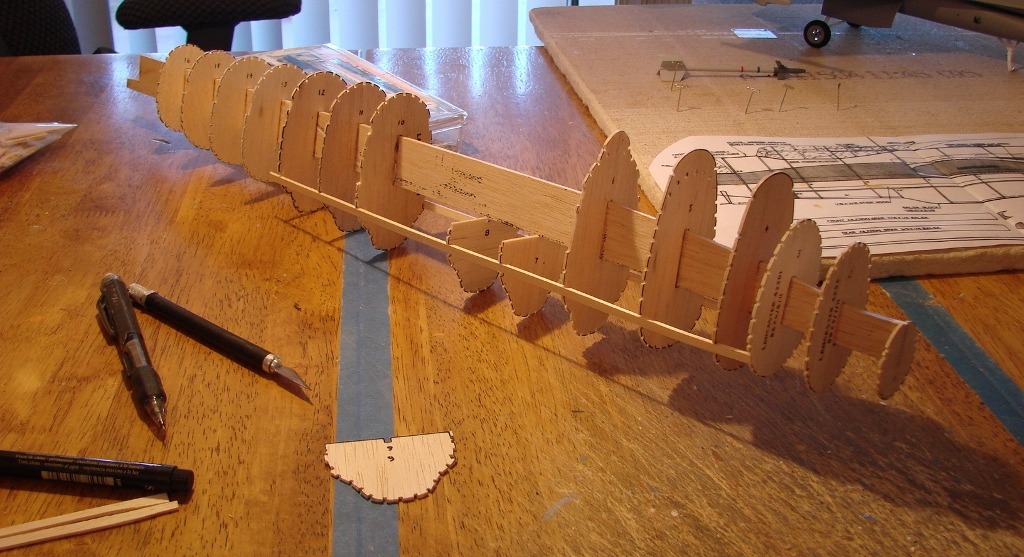
| David Duckett, Image # 24782 | 24 Jan 12 03:46 |
Then add the formers to the front. |
| Build Thread, Page :
<< 26 27 28 29 30 31 32 (631 posts, 20 posts per page, 32 pages in total)
|
[ < Prev ] |
