| Build Thread, Page :
1 2 3 4 5 [ 6 ] 7 (128 posts, 20 posts per page, 7 pages in total)
|
[ < Prev ] [ Next > ] |
| heywooood, Image # 39281 | 29 Aug 17 11:54 |
|
| heywooood, Comment for image # 39231 | 17 Aug 17 21:34 |
| I'll talk to Dr. Lothario and Gru about borrowing the shrink-ray... |
| Don C, Comment for image # 39231 | 17 Aug 17 14:44 |
| Can I ride right seat? |
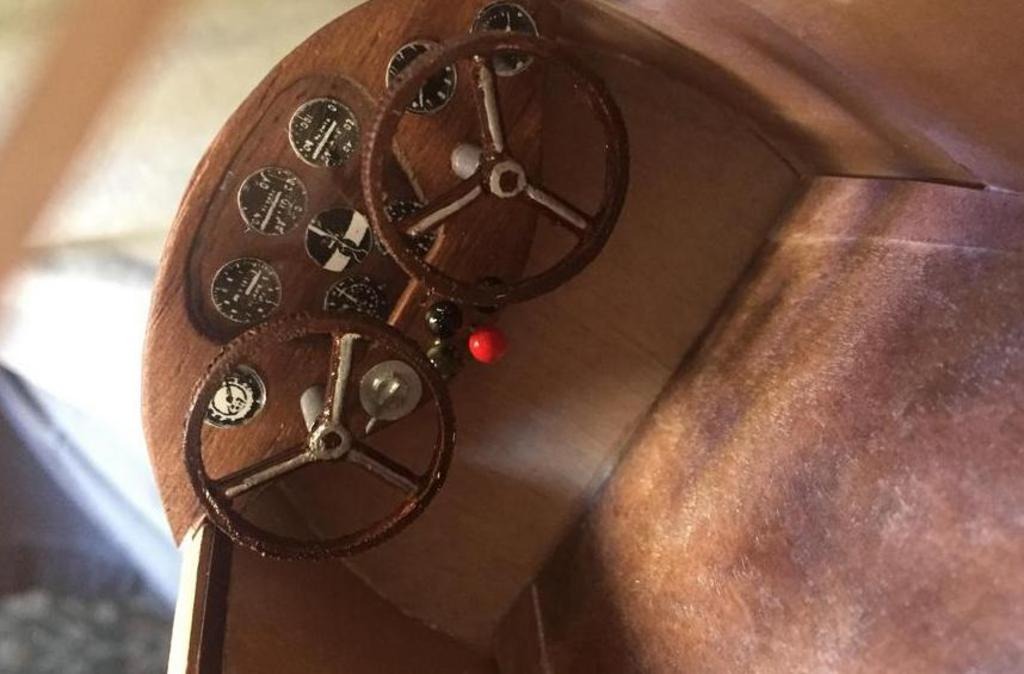
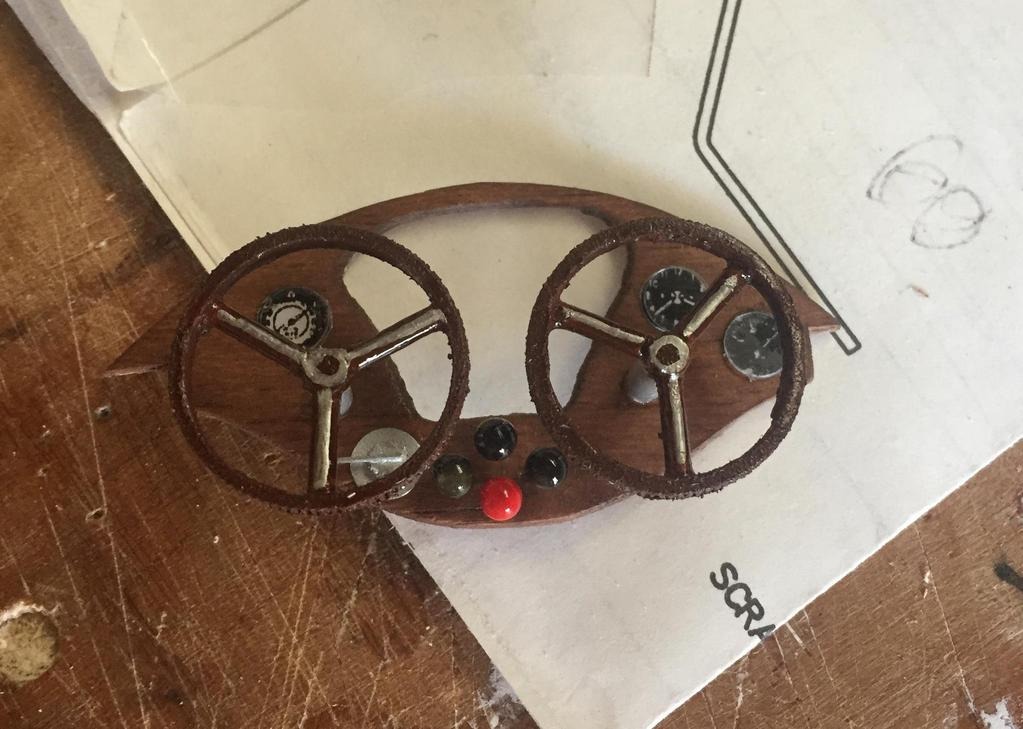
| heywooood, Comment for image # 39231 | 17 Aug 17 10:33 |
| control wheels fabricated from slicing a plastic bottle top with a razor knife, the hub and spokes are 1/8" dia. wood dowel for the hub and sanded toothpick sections for the spokes. The columns are aluminum tubing. I still need to add bezels and placards etc..also rudder pedals and so on |
| heywooood, Comment for image # 39231 | 17 Aug 17 10:25 |
| panel and cabin work in progress.. |
| heywooood, Image # 39231 | 17 Aug 17 10:23 |
|
| heywooood, Image # 39230 | 17 Aug 17 10:23 |
|
| Skyediamonds1985, Comment for image # 39204 | 14 Aug 17 23:08 |
| HW: your model looks great! I built an old Sterling R/C sized kit of the SR-7. Took great pains to fabricate the fairings along the wing struts and landing gears through use of resin mixed with micro balloons. Also did the complete interior. I used rolled up cotton wrapped in cloth, like small cigarettes and glued them together side by side to form the tucked and rolled back seat. Interesting thing is the arm rest in the back were recessed into the side cabin walls. |
| Skyediamonds1985, Comment for image # 39195 | 14 Aug 17 22:59 |
| HW: may I also add that Huey speaks with authority? He's the "go to" guy for anything Stinson and Gee Bee. I'd like to add too, for those who may not know what Huey means by "..hydraulic locking" is on almost all radial engines after shut down, the oil tends to pool up on the bottom cylinders. The next few days or so, should the pilot elect to start the engine without first "pulling the prop through" and drain the oil through the exhaust valves (& onto the ever-present oil pan under the engine), the lower pistons will hit the oil before reaching their limits of travel. This causes the piston rods (that's the "arm" connected to the pistons) to buckle and then break. You may recall from the old black and white movies of ground crew hand pulling the propellers of WW II fighters and bombers with radial engines prior to start. Doesn't look good on one's resume' to have blown a radial engine that could have easily been prevented. Great build, by the way. Good show! |
| Don C, Comment for image # 39204 | 12 Aug 17 23:36 |
| Interesting perspective. The motor looks like the kit I got from Dare that I used in my Solution. |
| heywooood, Image # 39204 | 12 Aug 17 23:04 |
|
| Huey V77, Comment for image # 39195 | 12 Aug 17 09:01 |
| Oh ya, the switch panel. Mine was very bland. There was a shelf across the bottom of the panel. To the far left was the mag switch, then light switches. Engine oil pressure and tamp were to the right of the control wheel. On the right side were the breakers and amp meter. Commercial aircraft were much more fancy, you can doll it up as much as you'd like. Flight instruments were arranged around the pilots control wheel with radios to the right of that. Some SR's have one door, some have two. Mine had two, it was field approved as it was once a jump plane. Oh ya, all the windows are glass. The pilots window rolled down. Had a right door I wanted to install that had a roll down window (from a SR10) but never got around to it. |
| Huey V77, Comment for image # 39195 | 12 Aug 17 08:41 |
| As far as the starter, instead of a complex start switch, stepping on the switch was less complex. When when engaging the starter, the mags are cut out and a "Shower of Sparks" ignition is energized. It fires the spark plugs at TDC for easier starting. Letting up on the switch engages the magnetos. |
| Huey V77, Comment for image # 39195 | 12 Aug 17 08:32 |
| HW, look at Dumas builds you'll see my Stinson. It's the last version known as a V77. It is the military version , AT19, civilianized. It had the Lycomming R680, 300 hp., and a gross weight of 4000 lbs as compared to 3800. The SR10 had the option of a Wright 350, most likely needed on floats. I'm sure the foot starter was common. The throttle was in the center of the panel about knee high. To the left is the mixture (red knob). To the right is the prop(blue), and right of the is Carb Heat. Directly below the throttle and just inside the face of the panel is the fuel selector. It is mounted about 6" above the floor on a pedistal, Left, Right, Off. I miss "Kermit", but not at 15gal/hr at 105kts with today's fuel prices. |
| heywooood, Comment for image # 39195 | 11 Aug 17 21:31 |
| Thanks Huey, so was it an SR10 that you flew?
I have an SR8 in FSX that I use for reference. It has the pneumatic flaps and the control knob is where you indicate it to be.
It has throttle, mixture, prop, and carb heat knobs in a group at the lower center of the control panel. The ignition switch on the -8 is on the panel also next to the nav light, panel light, batt, and generator switches.
Is the foot switch a -10 only variation? Or a pilot / owner modification?
I hope this outcome doesn't disappoint..;) |
| Huey V77, Comment for image # 39195 | 11 Aug 17 09:11 |
| Oh ya, there's a foot switch to the left of the pilots rudder peddles. It's the same as you will find in old jeeps. It's the starter switch. 3 or 4 primes, mash on the starter and count 3 blades then turn the magus to "Hot". Make smoke! Hopefully you pulled her through first! I always pulled 9 blades to make sure! Don't want any hydrolic locking going on.... |
| Huey V77, Comment for image # 39195 | 11 Aug 17 09:04 |
| FYI, the flap system is pneumatic , thy use vacuum from the intake to draw the flaps down. 37deg down. They are either up or full down. There is a valve to the right of the pilots knee that looks like a mag switch which rotates 90deg. I know this because of 400 hours flying one. |
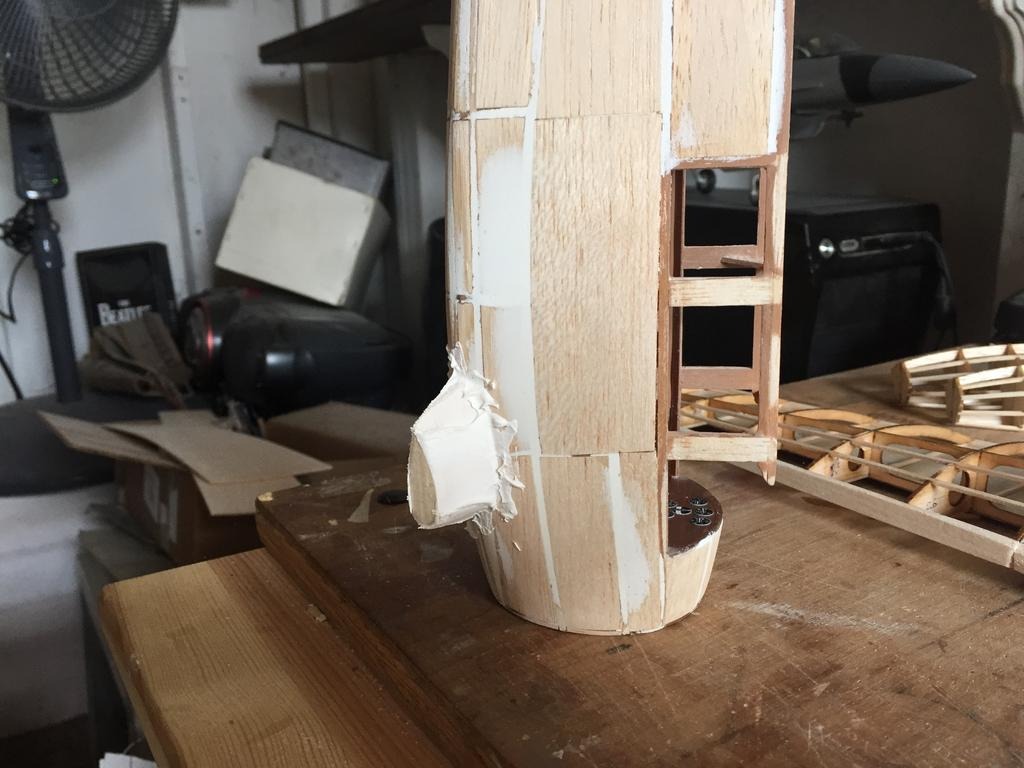
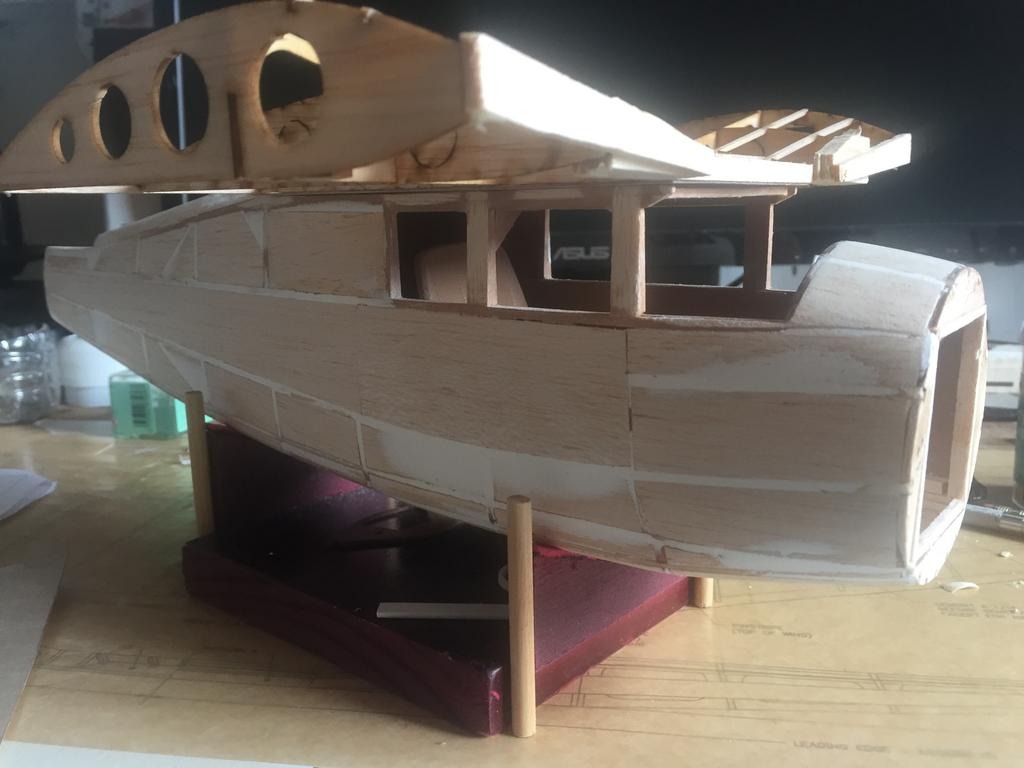
| heywooood, Comment for image # 39195 | 10 Aug 17 23:40 |
| this is the fully infilled fuselage already spackled and sanded smooth. Next comes the first coat of sealer. This cabin is large so I am detailing the interior with seats, panel, control yokes and levers, flap lever, fishing tackle, backpack, cooler, and a smallish dog figure if I can find one - sleeping if possible. I have a pilot that also came from Parkflyer.. |
| heywooood, Comment for image # 39196 | 10 Aug 17 23:37 |
| the engine is almost complete. The push rods and plug harness installed. All I will probably add is the serial number placard and the prop of course.. |
| heywooood, Comment for image # 39197 | 10 Aug 17 23:35 |
| the back of the engine with the prop shaft obviously. I use the kit prop shafts and bearing on all my projects, usually just concealing them with alum. tubing to give the appearance of proper shaft hardware |
| Build Thread, Page :
1 2 3 4 5 [ 6 ] 7 (128 posts, 20 posts per page, 7 pages in total)
|
[ < Prev ] [ Next > ] |
