| Build Thread, Page :
1 [ 2 ] 3 4 (65 posts, 20 posts per page, 4 pages in total)
|
[ < Prev ] [ Next > ] |
| John Cooper, Comment for image # 6609 | 19 Feb 08 20:29 |
| You should be able to get the 500 series planes to glide at least 20 feet, with a good steady hand launch. The heavier stock planes actually glide farther, from a hand launch, than one that has been lightened up. |
| scigs30, Comment for image # 6609 | 19 Feb 08 17:19 |
| Getting a freeflight scale model to fly is one of the toughest things one can do. It all starts from building. You have to build straight and some what light. You don't have much room play when it comes to weight. With electric and Rc you able to add a ton of detail and paint your model. Also RC is easier to trim so it is more forgiving. Rubber power is fun but it can definitely be frustrating at times. Guillow kits are great for beginners if you have some basic guidance during the building. Couple of things you must do to get one of these birds to fly. 1st you have to make a workable nose plug so you can add weight, down thrust and ease of winding the rubbers. Second you must increase the dihedral and add washout to the wings.Your covering is looking great. Next time you add color by ordering colored tissue from Easy built models or Peck Polymers. Good look everything looks great. |
| jgood, Comment for image # 6609 | 19 Feb 08 17:17 |
| Will certainly do a glide test. Hopefully I can find some longish grass. How long would you expect a stock Guillows balsa aircraft to glide from a hand launch? 10 feet? 20 feet? |
| SteveM, Comment for image # 6609 | 19 Feb 08 17:03 |
| All those directions remind me of why I have started looking into electric FF and aspirations of R/C. Many of the principles apply though, like a quality thrust button and proper balance and trim, but you have have the rest. Maybe I'm just too young to appreciate rubber power. |
| John Cooper, Comment for image # 6609 | 19 Feb 08 16:34 |
| Another point: Get the plane to glide properly before you try winding it up. For a low wing, a nice wide left turn is best. Because the propeller can affect the trim, the easiest way to do this, is take it off and replace it with an equivalent weight of clay. Once the glide trim is correct, you should only have to make thrust line adjustments. |
| hjlittman, Comment for image # 6609 | 19 Feb 08 16:27 |
| You may have to buy a larger field box ;) |
| jgood, Comment for image # 6609 | 19 Feb 08 16:26 |
| Thanks, too, John. Tabs sound like the way to go. It's great having all you pro's to ask! |
| jgood, Comment for image # 6609 | 19 Feb 08 16:24 |
| Thank you for that Howard. I sealed my tissue with Krylon, so I don't think I'll be able to warp the surfaces that way, do you? I'll try the tabs. I guess I should invest in some decent rubber and a winder too. I thought flying tissue covered rubbber powered aircraft would be lower cost than r/c, but I seem to be buying just as much stuff! |
| John Cooper, Comment for image # 6609 | 19 Feb 08 16:20 |
| A little paper tab is the quickest way to make the adjustment. However, I usually make the surfaces bendable by allowing the structure to crack where I want it to bend. I do this by reinforcing the balsa with tissue, where I am going to bend it. Then, very carefully, I crack the balsa between thumb and finger. This sounds like it will break something, but it gets good, neat results, that are also fairly rigid. For aileron trim, a big drag flap on the port wing is best. For a low wing plane you will almost certainly need one to handle the torque. |
| hjlittman, Comment for image # 6609 | 19 Feb 08 16:16 |
| P.S. Get rid of that green rubber band and get some 1/8 inch wide F.A.I tan rubber. Make a loop about 1-1/2 time the hook to peg length. Tie a square knot, then pull an overhand knot down on top of it. Lubricate the rubber. (I use STP silicone spray in a baggy.) Use a winder and stretch the rubber about twice it length, wind in half the turns then move toward the model finishing with the rest of the turns as you arrive at the nose (again, practice.) Lubricated, a single loop of 1/8" flat will take a max of about 97 turns per inch, a double loop about 69 turns per inch. Inspect the rubber each time before you wind and if you see the motor starting to chafe, replace it.
Hope this helps |
| hjlittman, Comment for image # 6609 | 19 Feb 08 16:08 |
| One method is to glue small, clear, acetate tabs to the rudder, elevator and one wing tip. These may be bent for adjustment. Another way is to simply breathe, heavily on them while bending gently. The heat and moisture of your breath will soften the tissue enough for a bend to set after a few moments drying. No kidding, but this does take a little practice (and patience in the bending.) The important thing is to have it balanced when you take it to the field. The starting point for all trimming is having the model balanced. The Guillow's 500 series Spitfire and Hurricane are known for being tail heavy. I have not built the Hurricane, but I had one Spitfire take 10 grams of ballast to get into balance. I also see you are using the stock thrust button. Check to see that the shaft does not have too much lateral slop in the hole. Anything more than barely visible is too much. If it is sloppy replace with a Dare or Peck (whichever fits the hole) thrust button so you will at least have a chance at thrust line adjustments. Good Luck! |
| jgood, Comment for image # 6609 | 19 Feb 08 15:30 |
| Thanks John!
How do you trim these models at the field, if you don't have movable control surfaces? Say I need to add some rudder in to tighten the turn, or put some up elevator into the mix? |
| John Cooper, Comment for image # 6618 | 16 Feb 08 23:09 |
| The covering looks great. For this size of plane, it is probably better to tack the wings on. I generally only make the wings removable for models over 20 inch wingspan. If you can, the best approach is to tack only balsa to balsa. That way, if the wings get knocked off, they don't rip a chunk of tissue off as well. |
| John M Oshust, Comment for image # 6618 | 16 Feb 08 20:04 |
| The tissue looks great to me. Tack the wings with CA save mass! |
| VP46, Comment for image # 6618 | 16 Feb 08 19:48 |
| tissue looks really good - - did the wing shrink like that with only the glue stick and water for the day? |
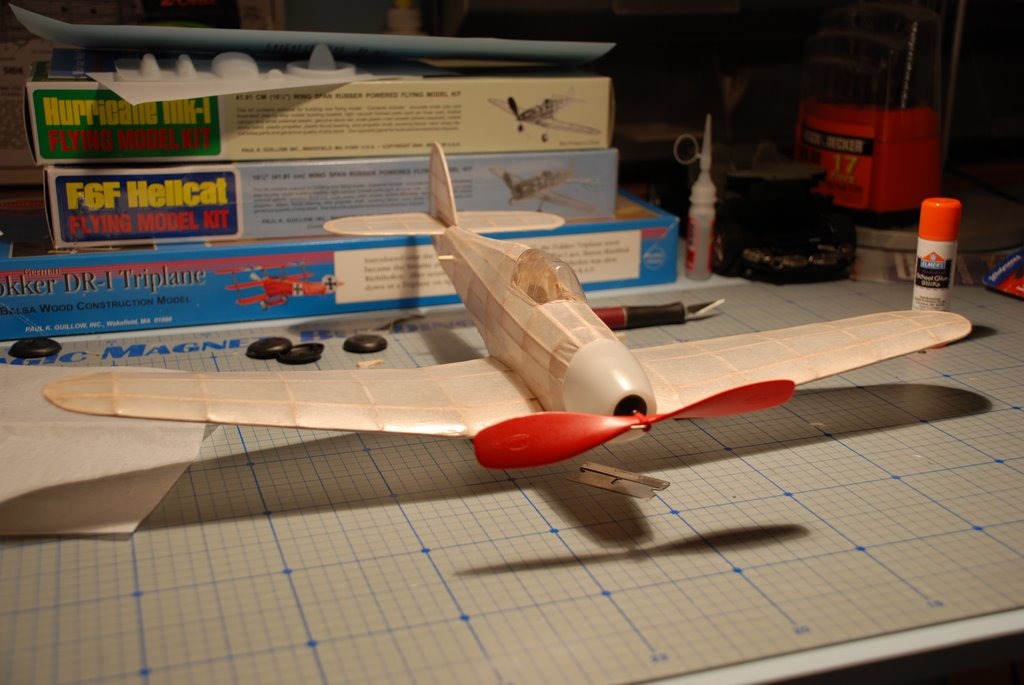
| jgood, Image # 6618 | 16 Feb 08 19:17 |
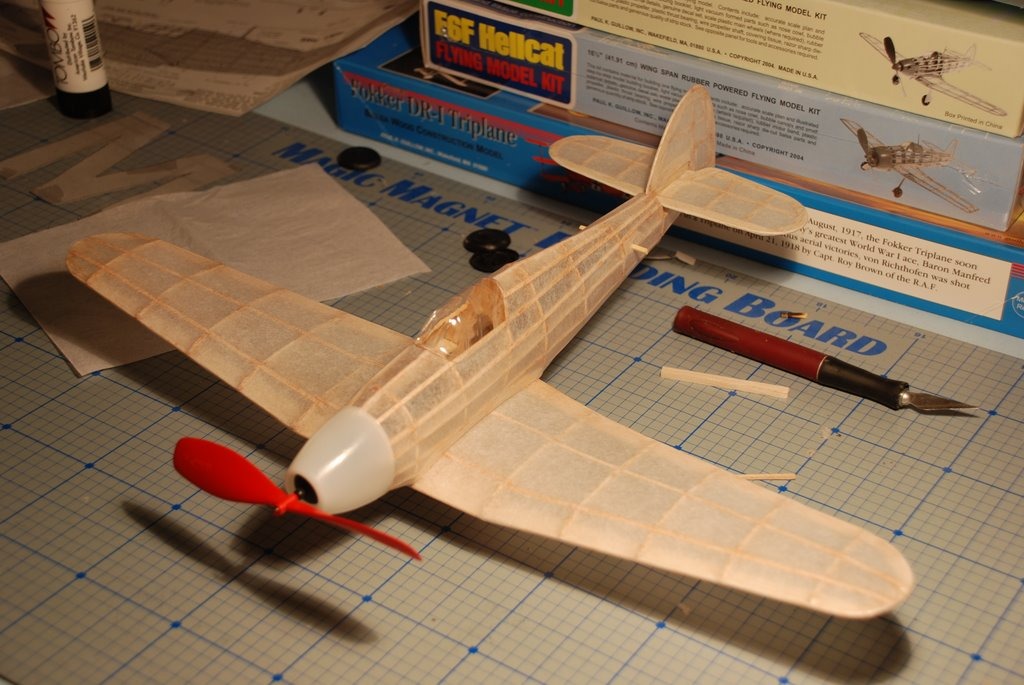
All covered, and two coats of satin Krylon. It's nowhere near a perfect job, but OK for now. How should I attach the wings? I was thinking of rubber bands, or magnets. Do you guys generally glue the wings on for free flight? What if something needs to be |
| jgood, Image # 6616 | 16 Feb 08 19:08 |
|
| John M Oshust, Comment for image # 6608 | 16 Feb 08 14:25 |
| The result is great! |
| John M Oshust, Comment for image # 6608 | 16 Feb 08 14:24 |
| This reult is great. What is the diminutive craft above the wing??? |
| John M Oshust, Comment for image # 6609 | 16 Feb 08 14:22 |
| James...The covering went well...I will bet you can make this fly! |
| Build Thread, Page :
1 [ 2 ] 3 4 (65 posts, 20 posts per page, 4 pages in total)
|
[ < Prev ] [ Next > ] |
