| Build Thread, Page :
<< 22 23 24 25 26 [ 27 ] 28 29 30 31 32 >> (677 posts, 20 posts per page, 34 pages in total)
|
[ < Prev ] [ Next > ] |
| bobgood, Comment for image # 43519 | 15 Oct 21 20:23 |
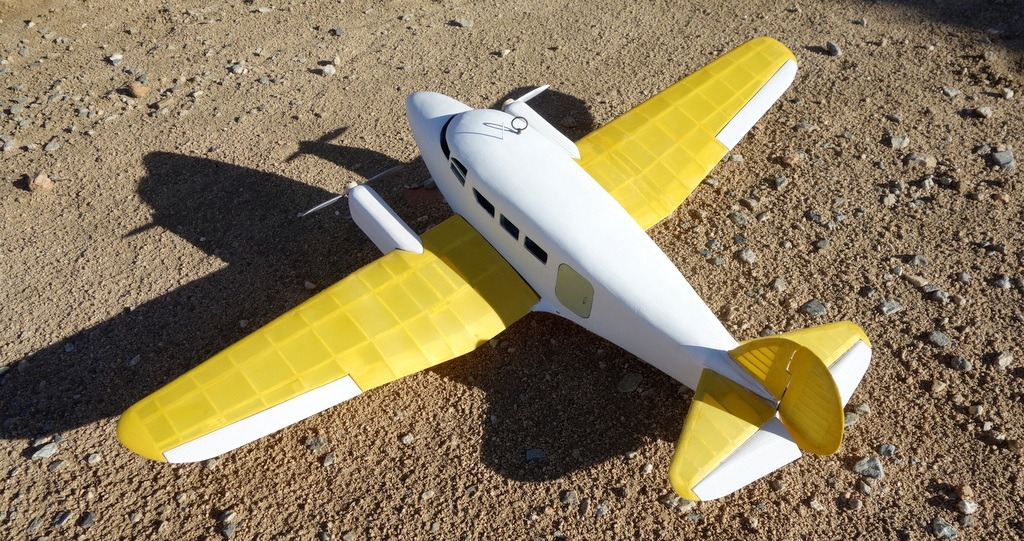
| Need to start thinking about the paint job! Not sure what primer to use on "doped" fabric. Just ordinary "primer"? Or do I need to use something else to pre-treat the doped surface? |
| bobgood, Image # 43519 | 15 Oct 21 16:39 |
|
| Don C, Comment for image # 43513 | 11 Oct 21 20:17 |
| It's well done, Bob. |
| bobgood, Image # 43513 | 11 Oct 21 18:35 |
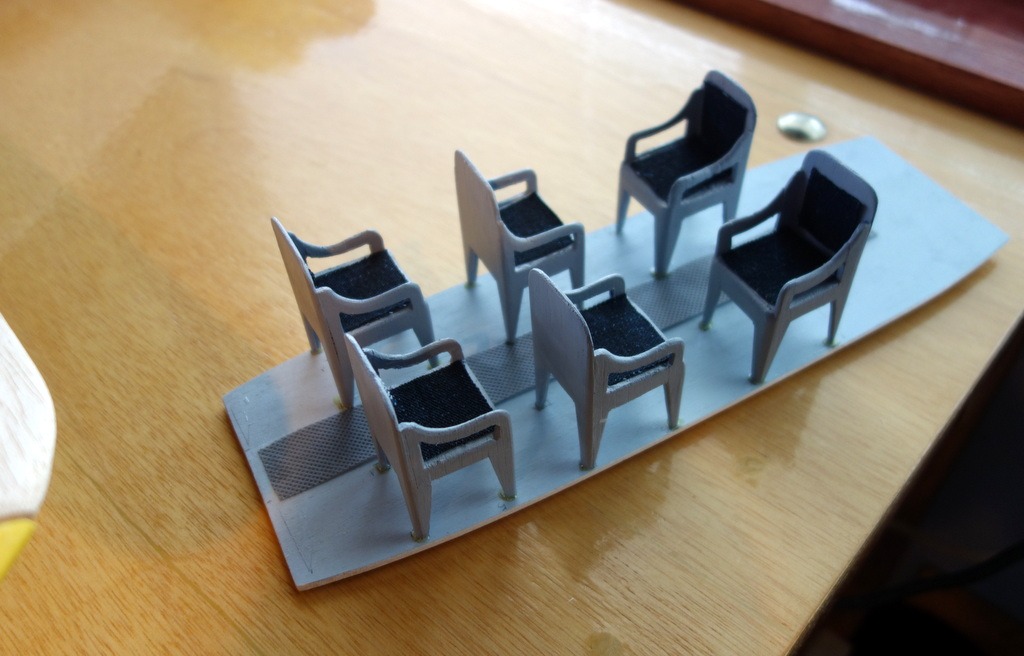
This is the seat assembly Don. |
| bobgood, Comment for image # 43502 | 11 Oct 21 15:38 |
| ...one screw holds the wing in place at the TE. The LE fits into the nose rib profile in the fuse. The floor with the seats can be removed if need be - it sits in place without any gluing or fixing. One 1" wood-screw holds each engine unit to the wings, on the underside, for easy removal too. I'm not sure where to purchase the two 1" dia. spinners for the props. Any suggestions? |
| bobgood, Comment for image # 43502 | 11 Oct 21 15:31 |
| Thanks Don - I simply felt that the scale was big enough at (1"= 1foot) to stand some simple chairs sitting on a 1/16" Bass wood floor. They are made out of 1/16" & 3/32" balsa. Jenny, (my other half) cut and fitted some seat covers to them. She used "old Jeans" material. I'll have my work cut-out when doing the final filling, sanding and painting. With our DD setting the standard that will be a tough job. |
| Don C, Comment for image # 43502 | 11 Oct 21 11:25 |
| So nice! How did you do that interior?(If it's not a trade secret). I went back and didn't see anything earlier. |
| jgood, Comment for image # 43502 | 11 Oct 21 09:48 |
| Very nice, Dad! |
| bobgood, Comment for image # 43502 | 10 Oct 21 23:38 |
| Thanks chaps! Good to have your words..... |
| heywooood, Comment for image # 43502 | 10 Oct 21 20:53 |
| well I can't stop gaazing at this model Bob |
| bsadonkill, Comment for image # 43502 | 10 Oct 21 17:55 |
| I like the interior detail, looking good. |
| bobgood, Comment for image # 43502 | 10 Oct 21 15:57 |
| That should have read as "Glazing" not gaazing! |
| bobgood, Image # 43504 | 10 Oct 21 15:56 |
Hope that this works! |
| bobgood, Image # 43503 | 10 Oct 21 15:56 |
|
| bobgood, Image # 43502 | 10 Oct 21 15:55 |
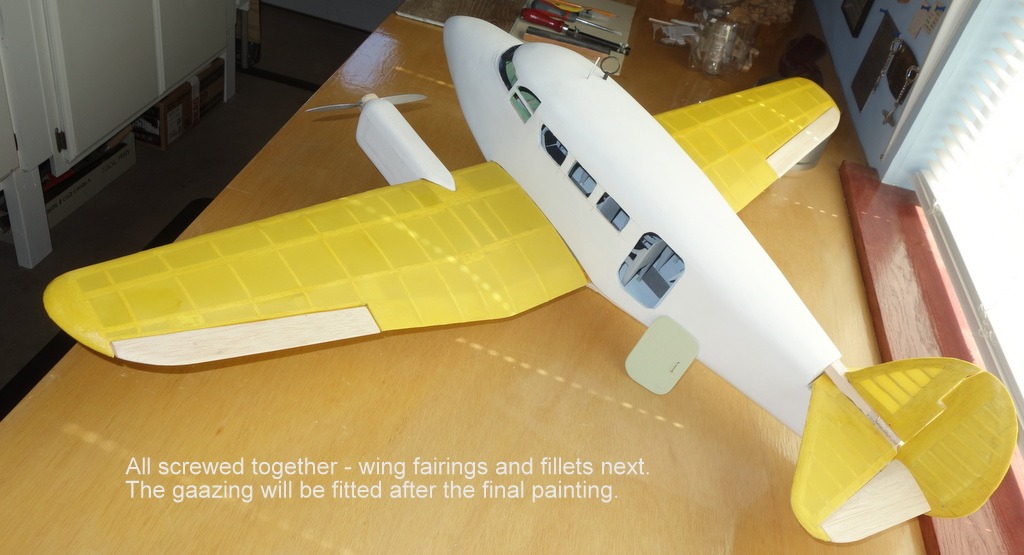
Back to Q6 after a few weeks off due to kitchen and other home jobs to be done. |
| bobgood, Comment for image # 43421 | 11 Sep 21 11:05 |
| Today we all remember the loss of life in the 911 Twin Towers attach. Thinking of them and their relatives. |
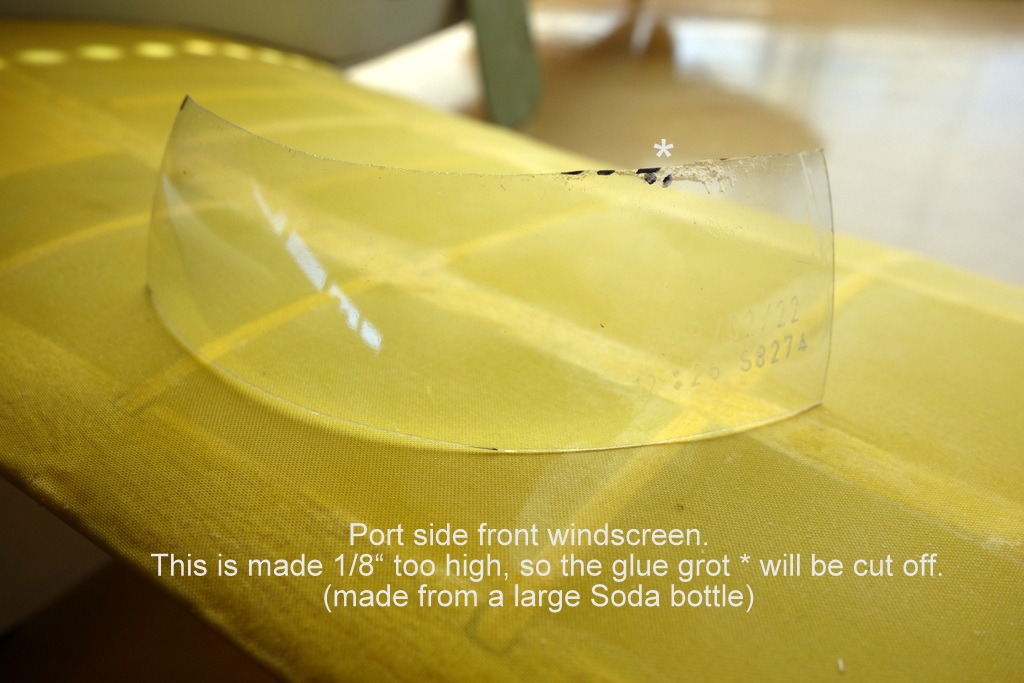
| bobgood, Comment for image # 43421 | 11 Sep 21 11:03 |
| Thanks Crob - I will look at that! |
| crob, Comment for image # 43421 | 11 Sep 21 10:23 |
| Would a section from a 2 L coke bottle work? Up around the cap almost looks like the same curve. |
| bobgood, Comment for image # 43421 | 10 Sep 21 13:02 |
| I did try heat-forming that 1/16" Acrylic sheet, for the front windshield, but I could not hack it - It when all over the place, but not where I wanted it! |
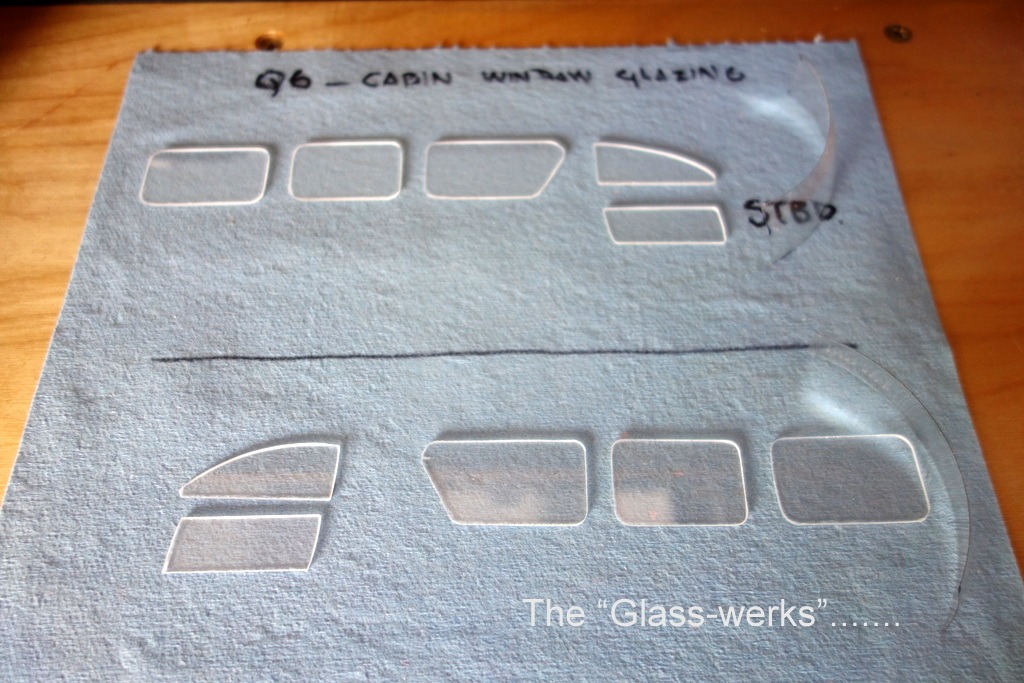
| bobgood, Comment for image # 43421 | 08 Sep 21 20:18 |
| All now glazed with 1/16" Acrylic sheet. Just that curved front screen to do......not sure how I will do that yet! |
| Build Thread, Page :
<< 22 23 24 25 26 [ 27 ] 28 29 30 31 32 >> (677 posts, 20 posts per page, 34 pages in total)
|
[ < Prev ] [ Next > ] |
