| Build Thread, Page :
<< 4 5 6 7 8 [ 9 ] 10 11 12 13 14 (267 posts, 20 posts per page, 14 pages in total)
|
[ < Prev ] [ Next > ] |
| bbaumer, Comment for image # 17223 | 27 Mar 10 05:36 |
| excellent illustration, how much flash are you leaving to act as a clamping surface? |
| Xanadu, Comment for image # 17225 | 27 Mar 10 04:44 |
| This one has such nice lines to it. |
| David Duckett, Image # 17225 | 26 Mar 10 19:26 |
The CA and zapper/kicker may seem like overkill but it works and stands up to the sanding and shaping. |
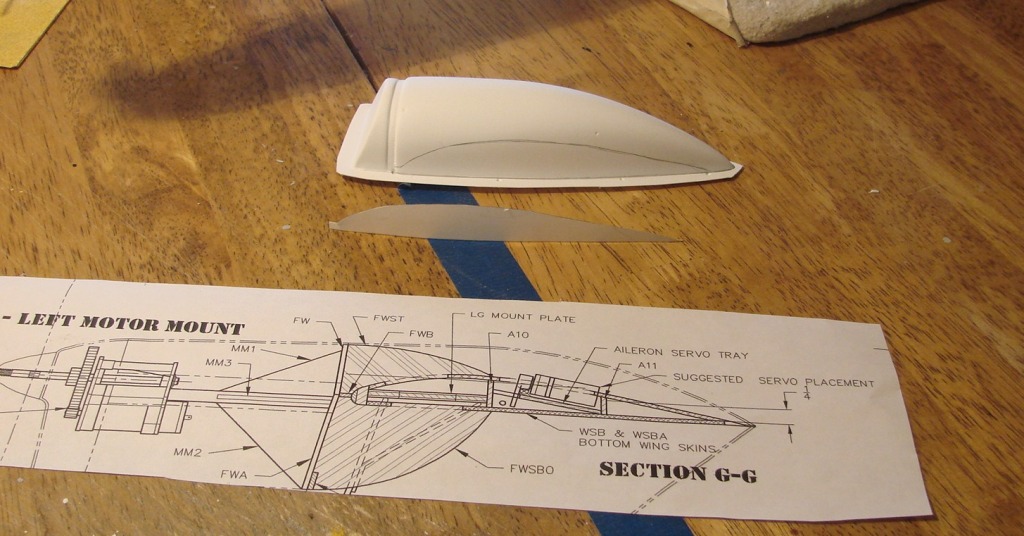
| David Duckett, Image # 17224 | 26 Mar 10 19:22 |
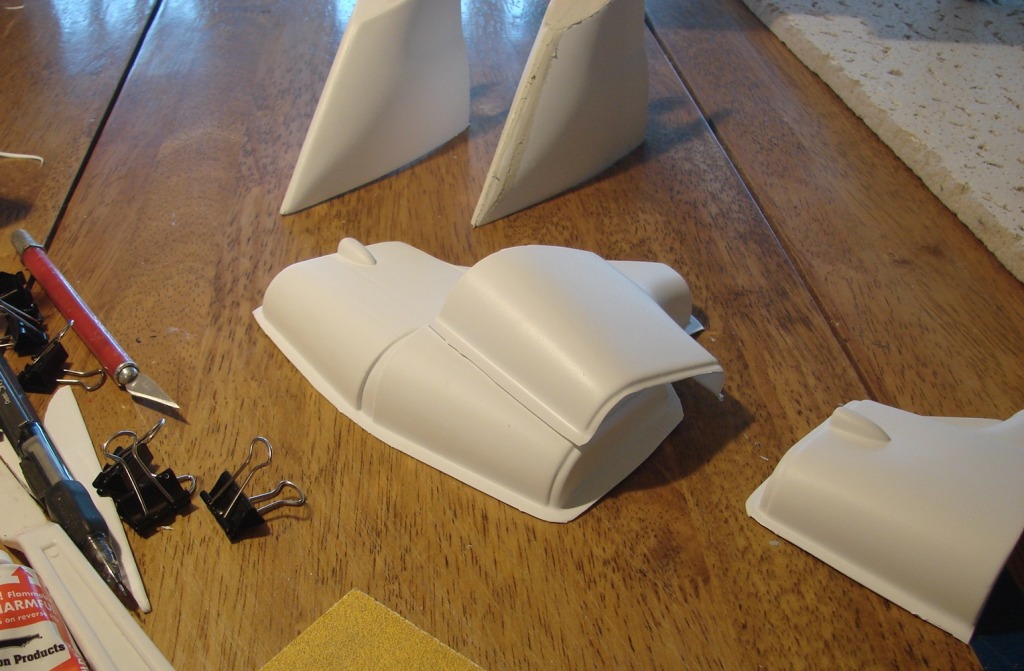
That's white putty on the one at top. The piece sitting on the other is molded wrong in that the edges are more round than 90* and that would leave a gap between the pieces when gluing together. The bottom piece is fine. The two front cowlings are also defective so a call to Dumas, who lives here, fixed that. |
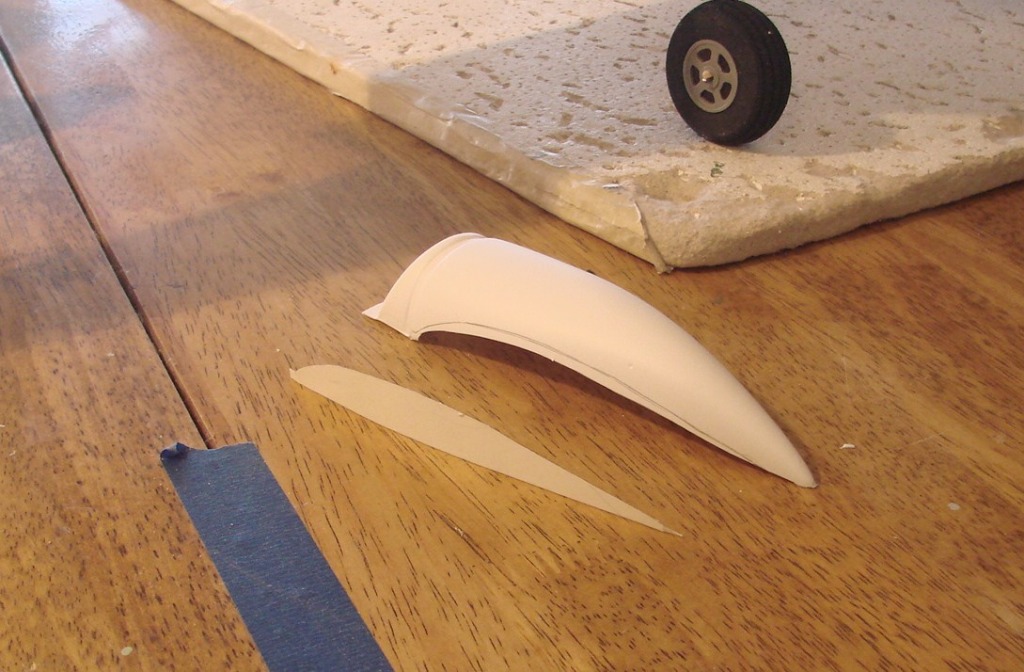
| David Duckett, Image # 17223 | 26 Mar 10 19:17 |
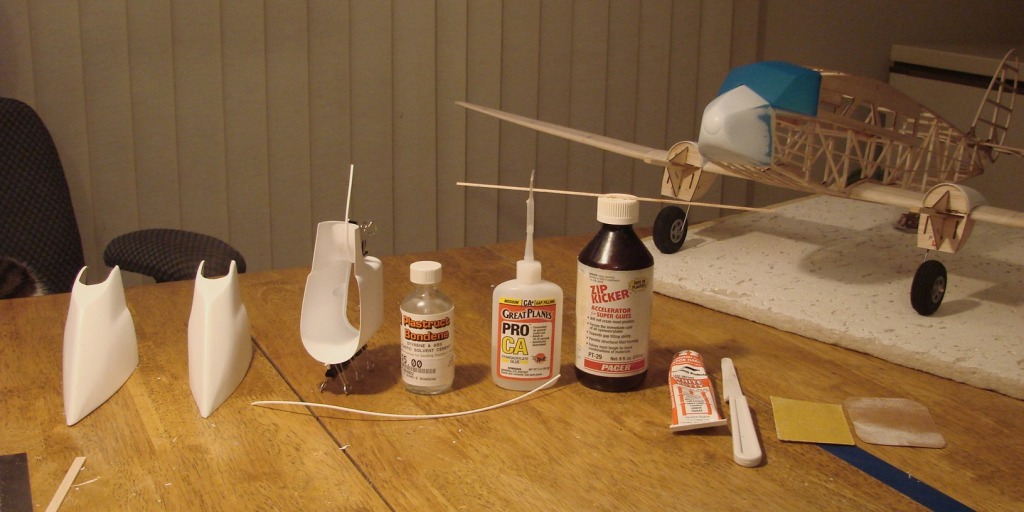
To glue the plastic pieces together: The two halves are clamped together and the plastic weld cement is applied and let cure for at least 15 seconds. I let it sit for at least 30 minutes. Then a styrene rod is bent to shape and glued into the groove where the two pieces are clamped and that sits for awhile, too. Then add a bead of medium CA on both sides of the rod inside the pieces and hit it with a shot of "zapper", accelerant, and let the whole thing sit overnite, clamps in place. Next day remove the clamps and trim off as much of the plastic as you can with good scissors which should leave about 1/16" or less of excess plastic. I found rough sandpaper to be the best way to remove the excess as it's quite tough after all the gluing. When it gets to a fairly smooth surface apply white putty with a spatlua and let it dry for about 30 minutes and then sand with 150 sandpaper. Any imperfections can be filled with regular filler and sanded with a finer grade sandpaper. The two finished pieces here have also been painted white along the seams. |
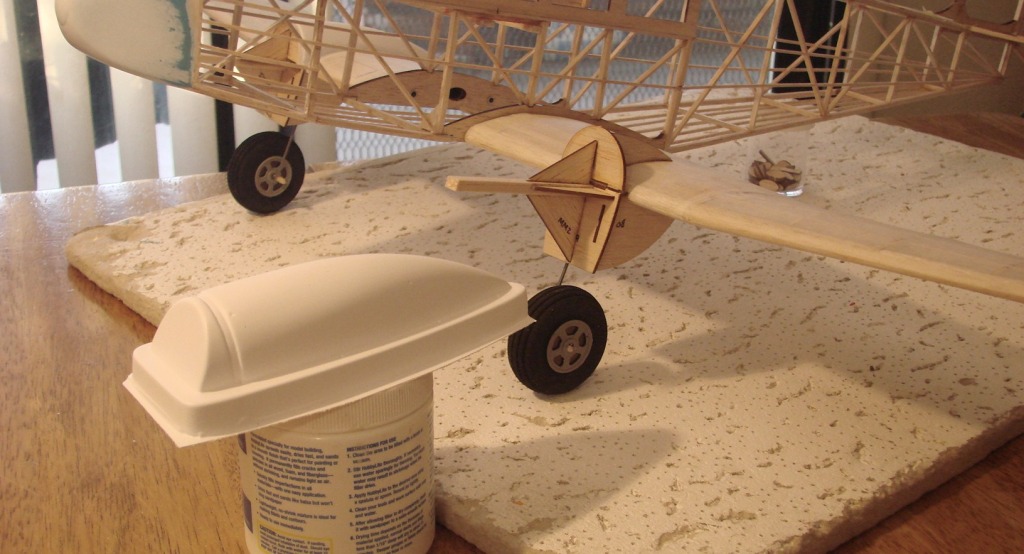
| David Duckett, Image # 17222 | 26 Mar 10 18:57 |
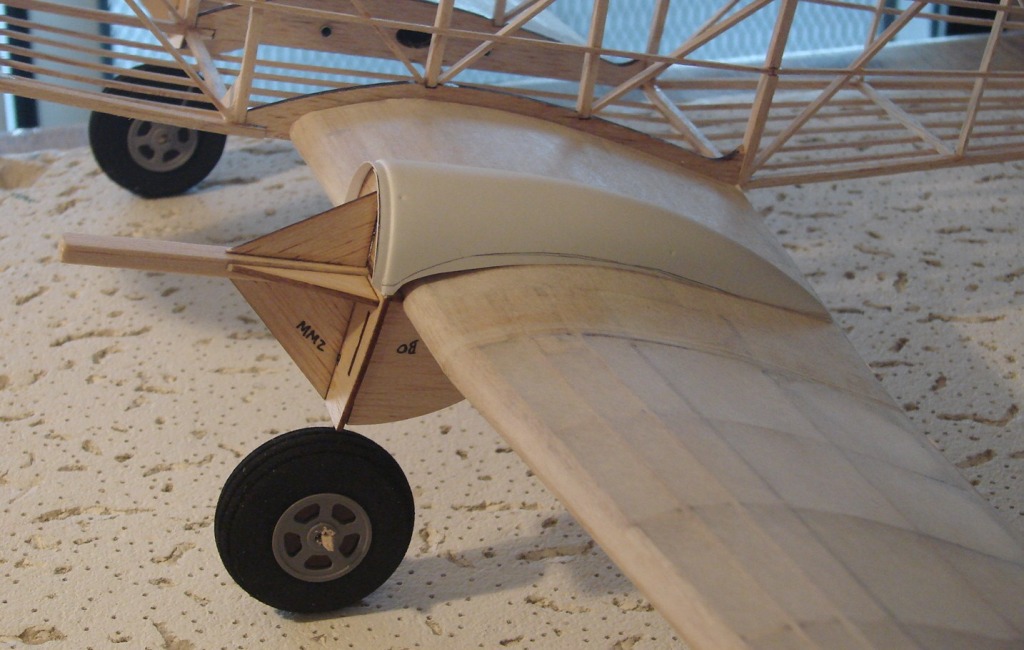
Well...it should have been a bit more shallow. This is easily fixed with wood and filler but it might be a problem on the flying versions. |
| David Duckett, Image # 17221 | 26 Mar 10 18:55 |
After the other one, I knew the pencil outline is too much so I cut the opening smaller. |
| David Duckett, Image # 17220 | 26 Mar 10 18:53 |
No patterns are provided so....I traced the rib outline onto the plastic. |
| frwyflyer, Comment for image # 17201 | 26 Mar 10 03:22 |
| Very Nice!! |
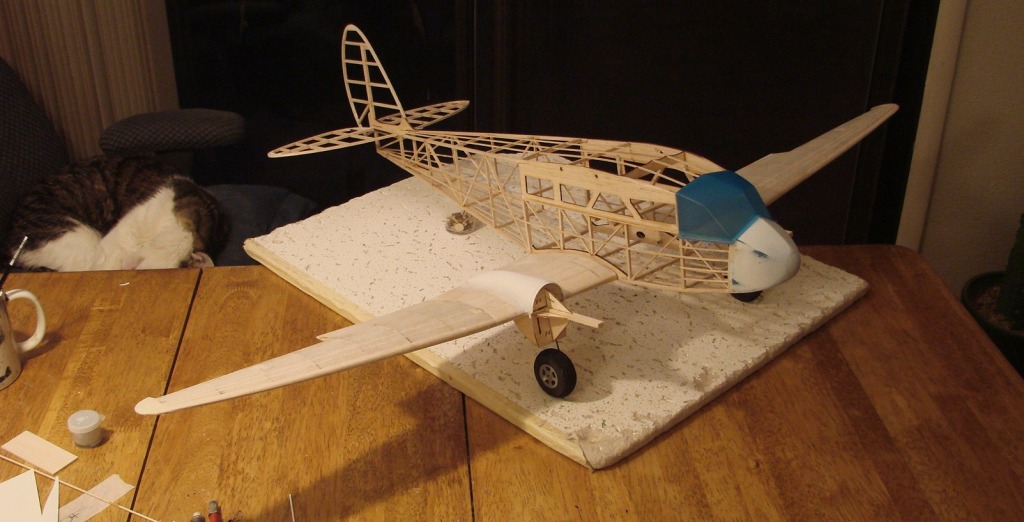
| David Duckett, Comment for image # 17201 | 26 Mar 10 02:43 |
| Thanks. As you can see he isn't much help. |
| TJH, Comment for image # 17201 | 26 Mar 10 02:37 |
| Looking good! I see you have a helper in the background, i have a few of them helping me as well. |
| David Duckett, Comment for image # 17181 | 26 Mar 10 02:09 |
| I had to cut one. |
| SteveM, Comment for image # 17181 | 25 Mar 10 22:52 |
| I've just realized that the plans show four each of R10 cut into sheet 1815-9, but mine has a big blank spot where one of them is supposed to be. Did you have to cut an R10 or did you get all four? |
| pfinn, Comment for image # 17201 | 25 Mar 10 18:49 |
| Nice!! |
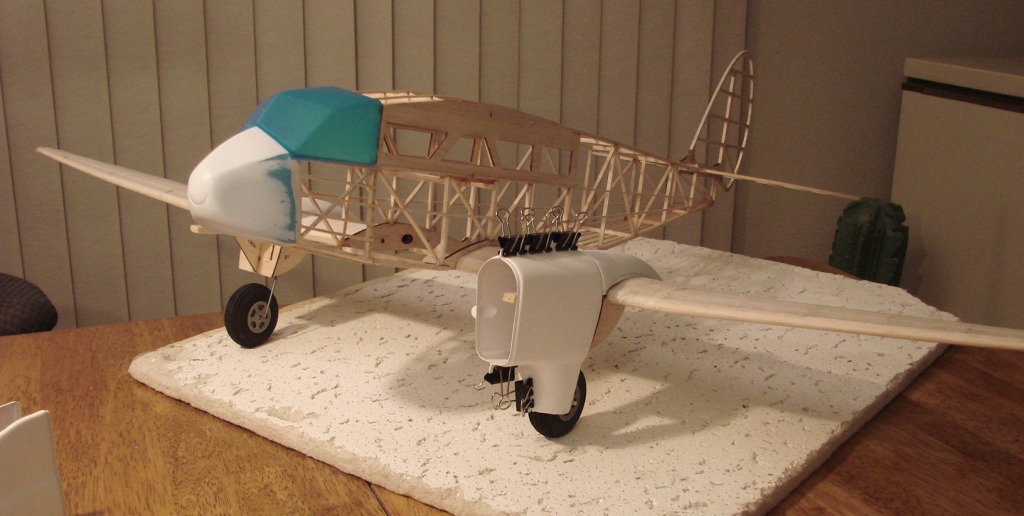
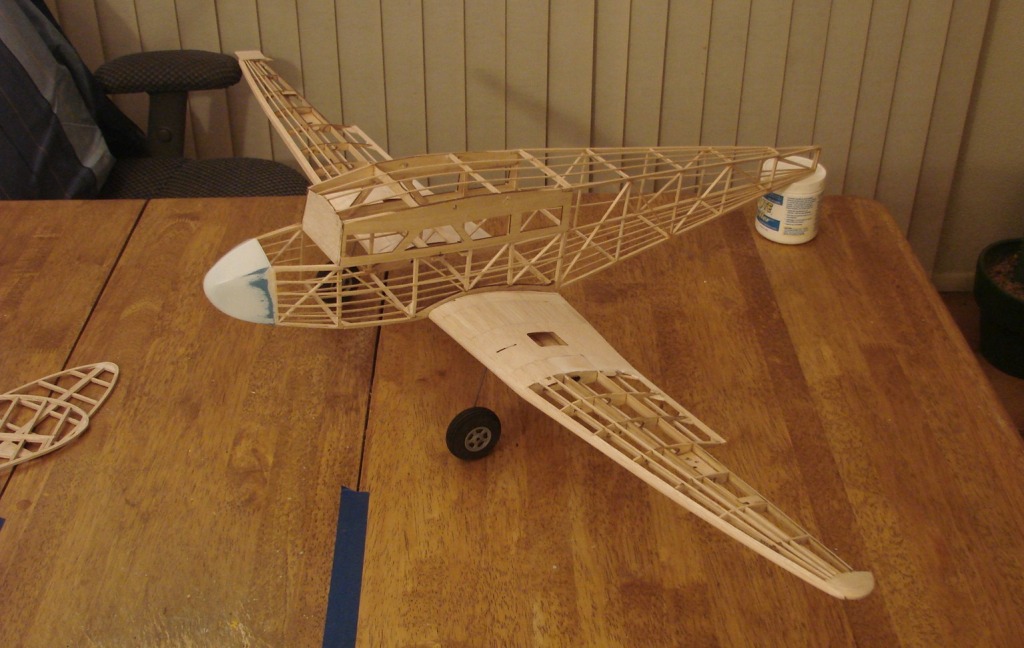
| David Duckett, Image # 17201 | 25 Mar 10 17:42 |
|
| David Duckett, Image # 17200 | 25 Mar 10 17:41 |
|
| David Duckett, Image # 17199 | 25 Mar 10 17:40 |

The wings were covered wet and a coat of clear nitrate dope was applied to all surfaces. The firewall/motor mount is glued in place. |
| David Duckett, Comment for image # 17181 | 25 Mar 10 07:06 |
| Onward through the fog!;-) This is my 4th Dumas kit and it seems the parts are correct even if the instructions/plans are different so I tend to go with the way the parts fit. |
| SteveM, Comment for image # 17181 | 25 Mar 10 06:16 |
| Last night I noticed that half of the time I am told to pin parts down but never directed to glue them. How ironic that one time they do tell you to glue something it is wrong. This is my second Dumas kit and I'm finding the directions equally error prone as the first, but I'll manage. |
| David Duckett, Image # 17183 | 25 Mar 10 02:23 |
Top of the wing sheeting is finished and leading edge on left wing has been sanded to shape. I'll cover the bottom wings today so I can build the nacelles on it. |
| Build Thread, Page :
<< 4 5 6 7 8 [ 9 ] 10 11 12 13 14 (267 posts, 20 posts per page, 14 pages in total)
|
[ < Prev ] [ Next > ] |
