| Build Thread, Page :
<< 6 7 8 9 10 [ 11 ] 12 13 14 (267 posts, 20 posts per page, 14 pages in total)
|
[ < Prev ] [ Next > ] |
| David Duckett, Comment for image # 17086 | 20 Mar 10 05:59 |
| Patches belongs to a really tough union. You should see his meal requirements! |
| David Duckett, Comment for image # 17085 | 20 Mar 10 05:56 |
| Thanks but no thanks. I guess I should have said "stringers" instead of formers relative to the nose piece. |
| JohnG., Comment for image # 17083 | 20 Mar 10 04:08 |
| Excellent build thread. Great reference for all who might follow your footsteps. |
| stirling, Comment for image # 17086 | 20 Mar 10 00:46 |
| Geez I wish I had a nice plush comfy chair like that to work on!!! Or is that just for Patches? |
| SteveM, Comment for image # 17085 | 19 Mar 10 18:43 |
| A thing of beauty. You sure you don't want me to send you some servos and other fixin's? |
| David Duckett, Comment for image # 17085 | 19 Mar 10 18:25 |
| ...wrap... |
| David Duckett, Image # 17086 | 19 Mar 10 18:24 |
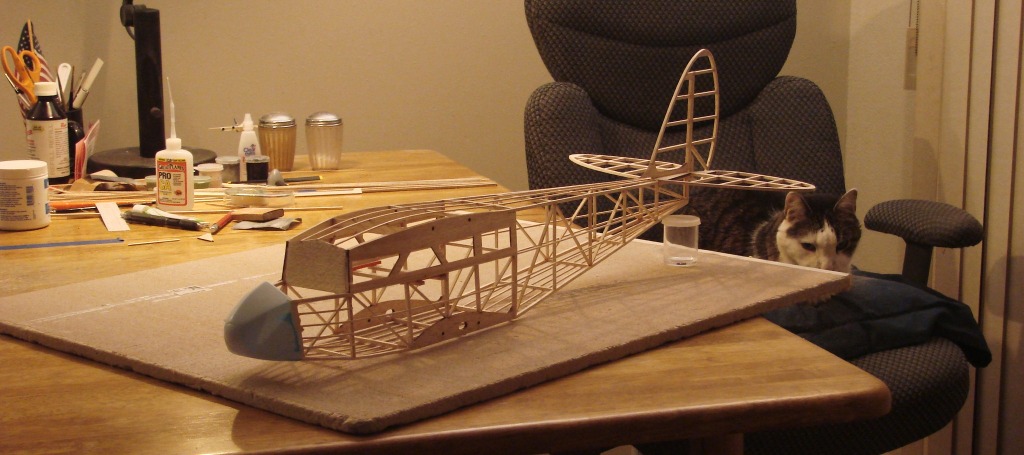
Patches and the Dragon |
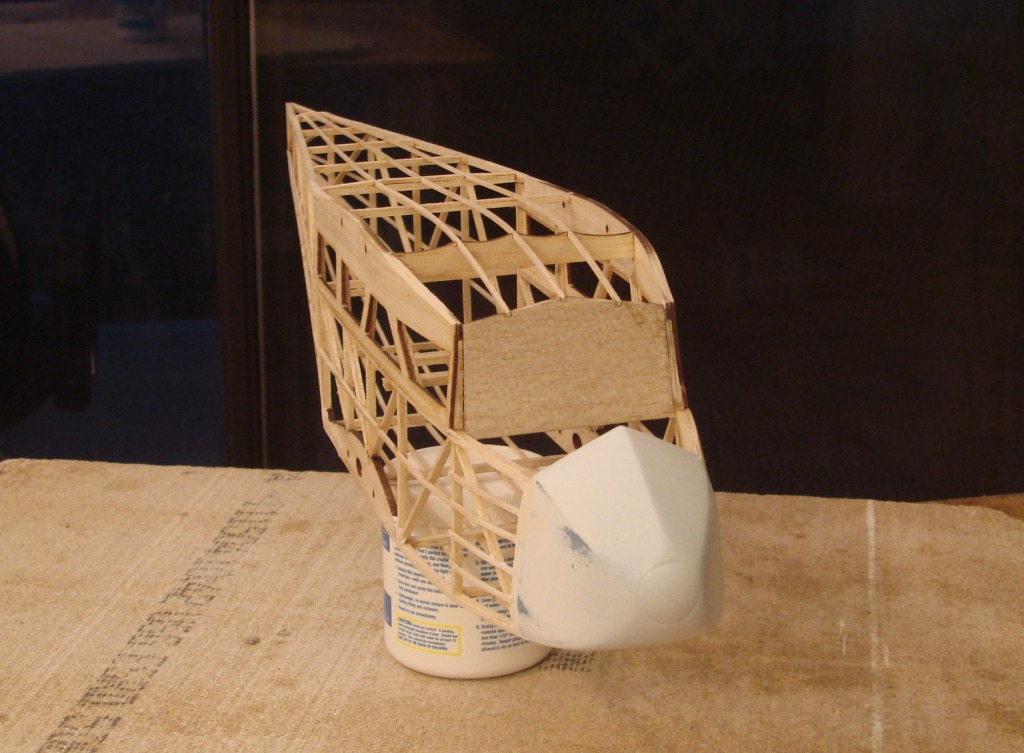
| David Duckett, Image # 17085 | 19 Mar 10 18:22 |
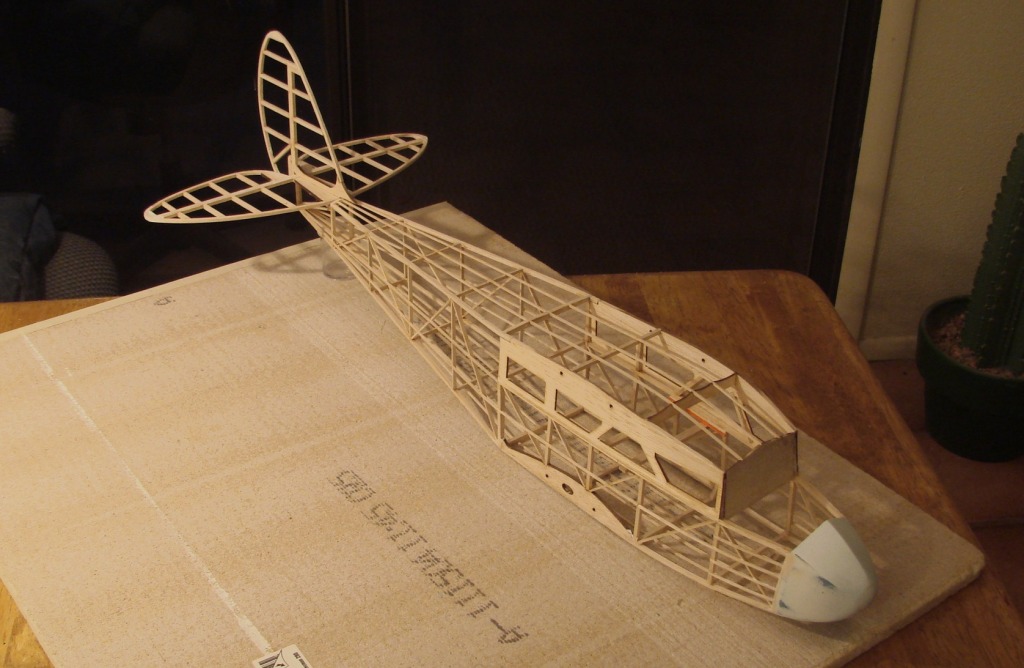
I removed the outside blue wray from the clear plastic nose piece and painted it with Top Flite white primer. I then glued it on to the 4 corners of the frame with plastic cement and used medium CA later. I glued the formers up to the edge of the piece and filled the spaces between the formers with 1/16" sticks. After light sanding I added some filler to make it all smooth and when that was dry and sanded I used just a spot or two of MIcro-Fill to finish. It needs just a light sanding and a couple of coats of dope to be ready to cover and at this point it weighs 1.8 oz or 53 grams. Although not to be used, I've put in the rails for the servos for strength and reference. |
| David Duckett, Image # 17084 | 19 Mar 10 18:13 |
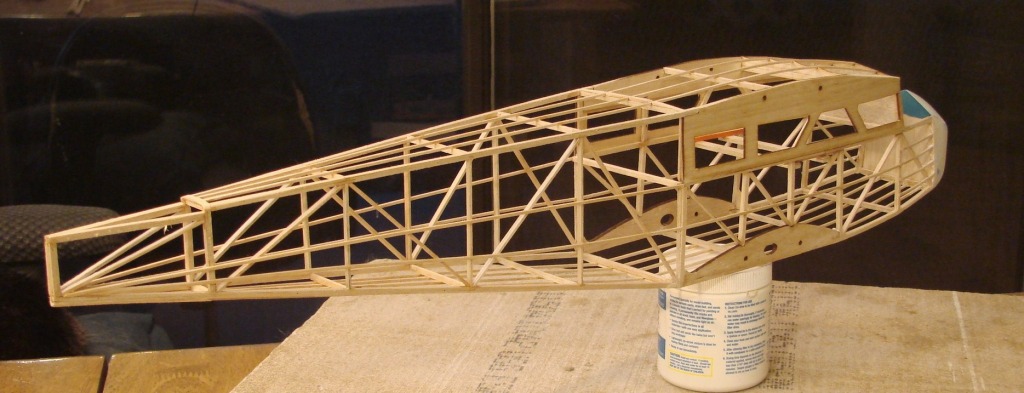
This is all the stringers. The 1/16" wood is fairly hard which is a plus. |
| David Duckett, Image # 17083 | 19 Mar 10 18:10 |
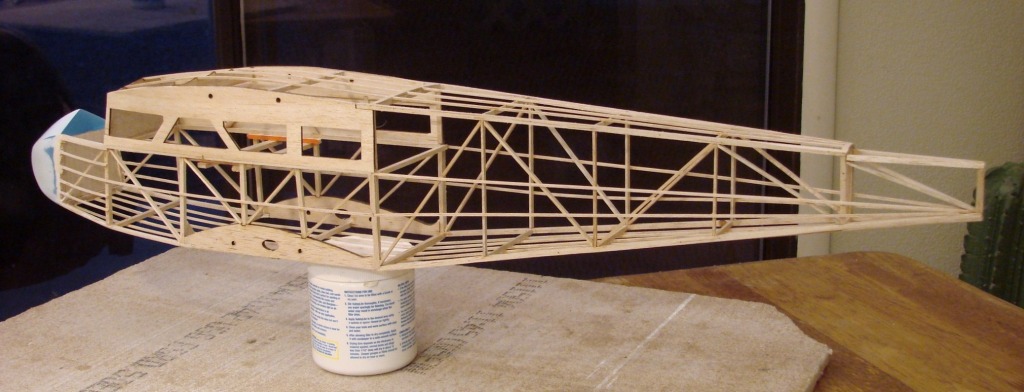
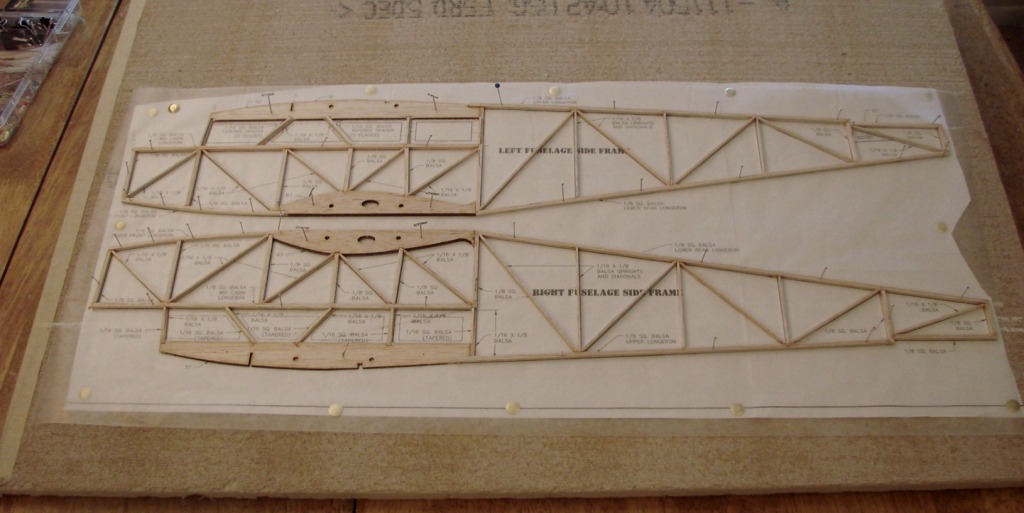
The instructions for gluing the sides together are easy to understand but getting the nose to curve that much isn't. After breaking it once, I made a piece from 3/32" balsa to fit between the sides and glued the sides to the piece. Leaving that top piece out, for now, made fitting the front plastic piece easier. |
| BillParker, Comment for image # 17081 | 19 Mar 10 18:07 |
| Way better sense of humor than I have. Mine's a whole lot BIGGER. My fumble thumbs will handle it better. |
| David Duckett, Image # 17082 | 19 Mar 10 18:06 |
Then these are glued over the tapered pieces and the resta of the window outline. |
| David Duckett, Image # 17081 | 19 Mar 10 18:05 |
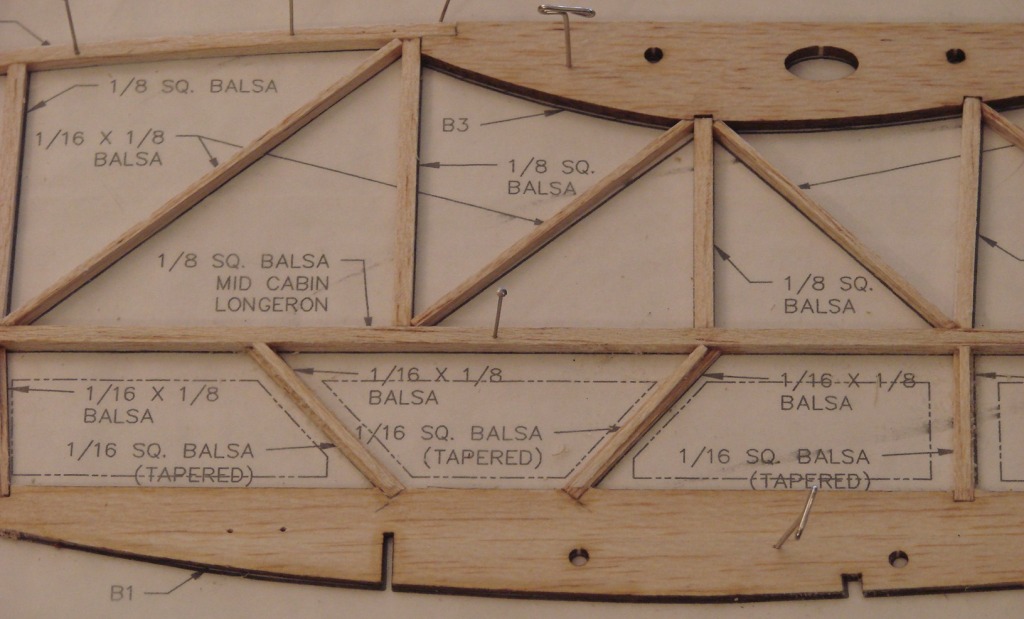
Tapering the 1/16" pieces |
| David Duckett, Image # 17080 | 19 Mar 10 18:03 |
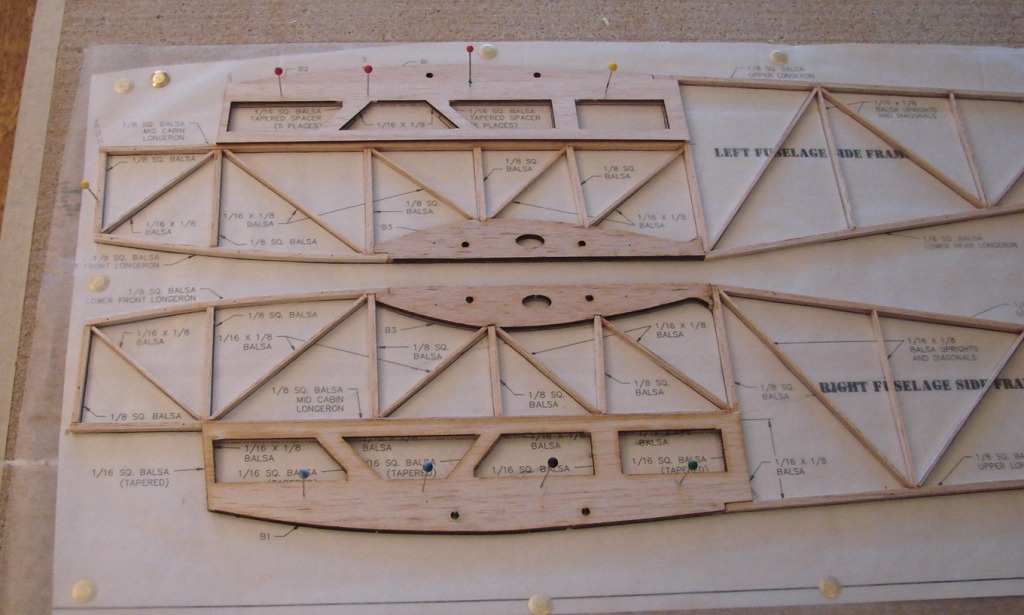
All 1/8" x 1/8" and 1/8" x 1/16" construction and 2 laser cut parts |
| David Duckett, Image # 17079 | 19 Mar 10 18:01 |
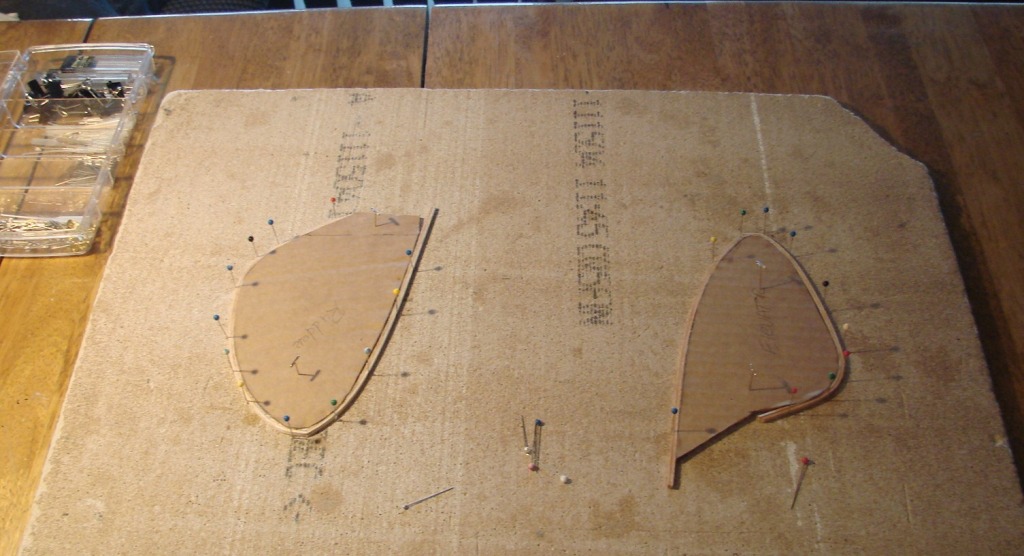
2 strips of 1/16" x 1/8" soaked and glued . I should have used a harder pattern but I didn't have the "artists foam board" called for. You can see that they bent at the ends. The plans say to set these aside and build the feathers later but I didn't. |
| David Duckett, Image # 17078 | 19 Mar 10 17:57 |
Venus it ain't! |
| David Duckett, Comment for image # 15961 | 27 Jan 10 09:10 |
| I honestly don't know what all is in the box but all the pieces look like "good stuff", whatever they are. |
| SteveM, Comment for image # 15961 | 27 Jan 10 08:07 |
| My kit came with two pieces of 0.035" styrene rod 14" long. |
| pfinn, Comment for image # 15961 | 19 Jan 10 08:37 |
| And remember all that Pat's site "Pat's custom models" has a link right here at VA on the links page too! |
| SteveM, Comment for image # 15961 | 19 Jan 10 06:35 |
| I can link again so everyone can easily find it. Here is Pat's build thread on RCGroups and here is his website. There are more than a few planes there I'd love to build. |
| Build Thread, Page :
<< 6 7 8 9 10 [ 11 ] 12 13 14 (267 posts, 20 posts per page, 14 pages in total)
|
[ < Prev ] [ Next > ] |
