| Build Thread, Page :
<< 6 7 8 9 10 [ 11 ] 12 13 14 15 16 (310 posts, 20 posts per page, 16 pages in total)
|
[ < Prev ] [ Next > ] |
| frwyflyer, Comment for image # 15246 | 02 Dec 09 12:22 |
| Excellent information. Ordering information, costs and source of materials. If i need any further information it should be included with the material. Perfect!! Thank You!! |
| David Duckett, Comment for image # 15252 | 02 Dec 09 11:33 |
| Bend the plastic away from the casting... |
| David Duckett, Comment for image # 15254 | 02 Dec 09 11:32 |
| realized |
| David Duckett, Image # 15254 | 02 Dec 09 11:25 |
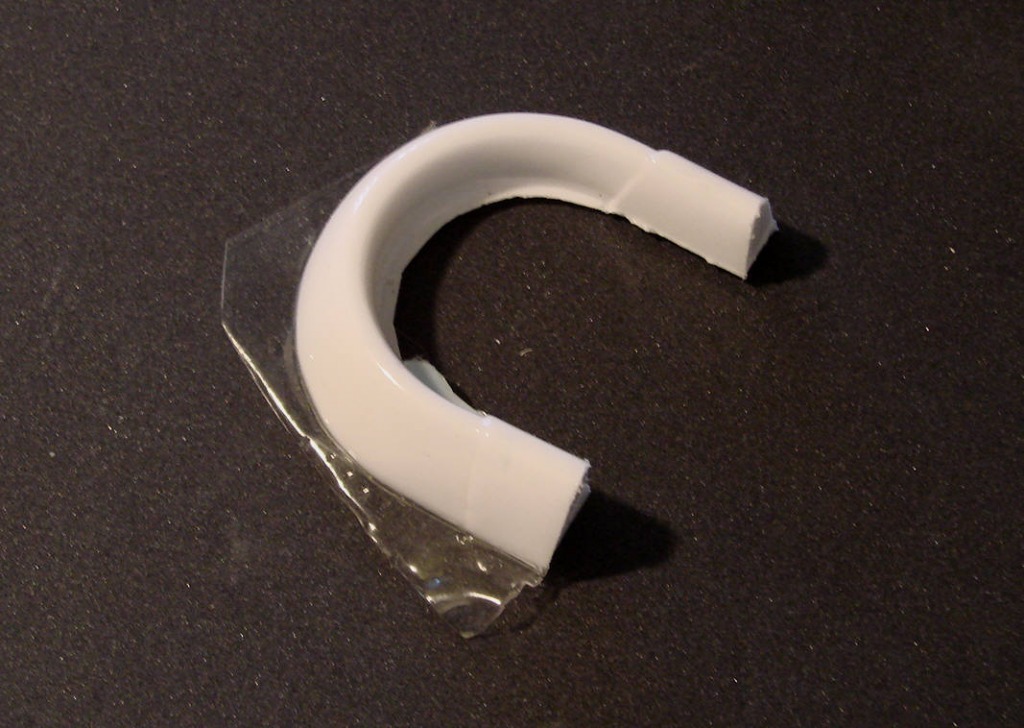
And finally... This is what happens if you remove the blue plastic from the clear part. It's absolutely permanently in there. Of course, there is a bright side I realizeed too late to use this piece. All the excess can be trimmed away and it would be just fine. In fact, that's exactly what I did with the front exhaust pieces. |
| David Duckett, Image # 15253 | 02 Dec 09 11:20 |
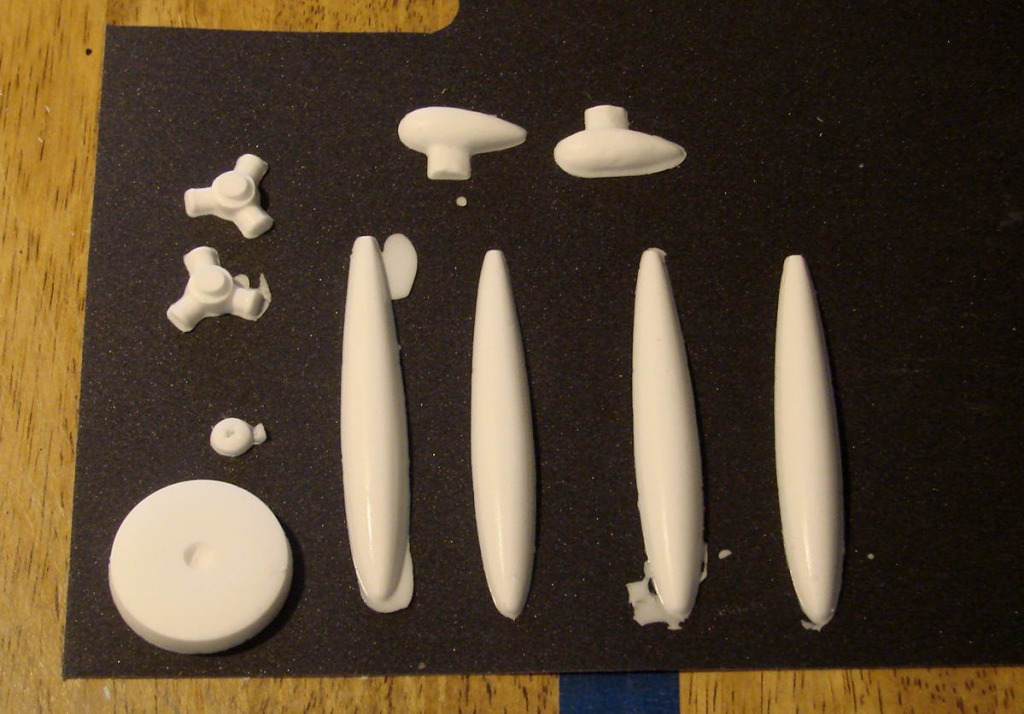
This is how they look unmolded. The pieces with the blue plastic practically fell out. The flash around the pieces can easily be trimmed away with a razor knife and then sanded. The halves can be glued together with plastic cement, or CA if you're brave, and then sanded and filled with filler before painting. They are fairly heavy for their size. The instructions also come with a pamphlet showing how to make molds from parts. This is all I do with the stuff, Pfinn makes much more with it. Much more. |
| David Duckett, Image # 15252 | 02 Dec 09 11:09 |
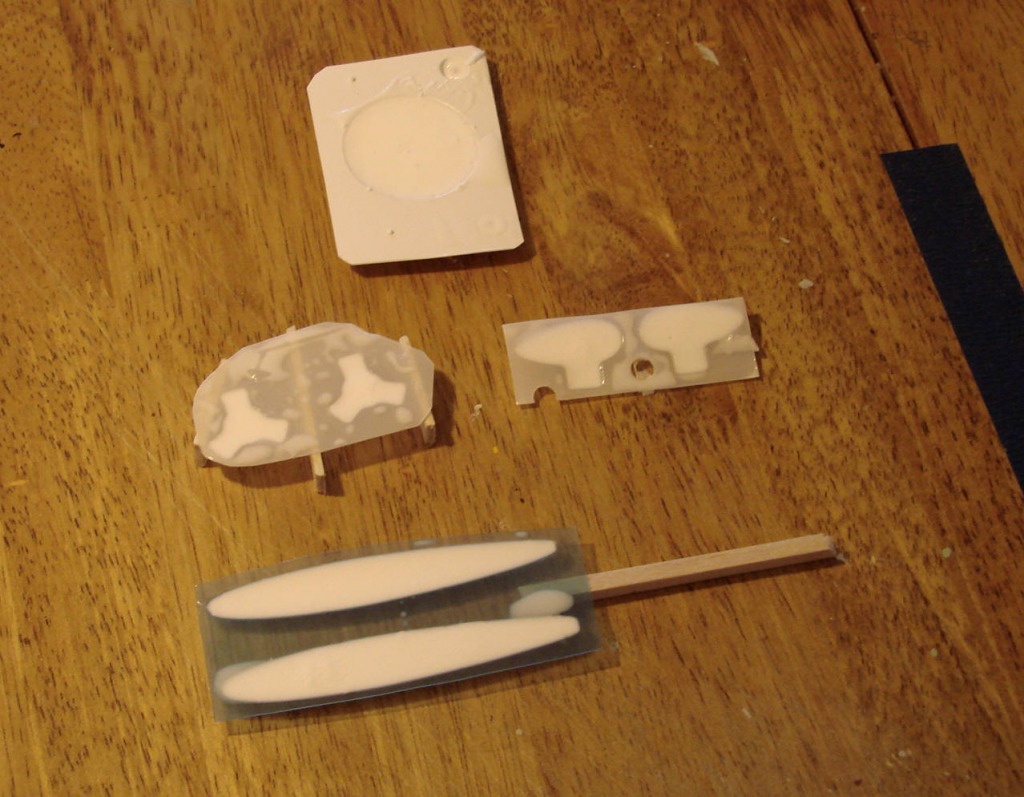
About 25 minutes into it and the curing is nearly complete. When it no longer feels sticky it's ready to unmold. It gets warm while curing and thicker concentrations cure faster. To unmold, bend the plastic away from the mold and..... |
| David Duckett, Image # 15251 | 02 Dec 09 11:06 |
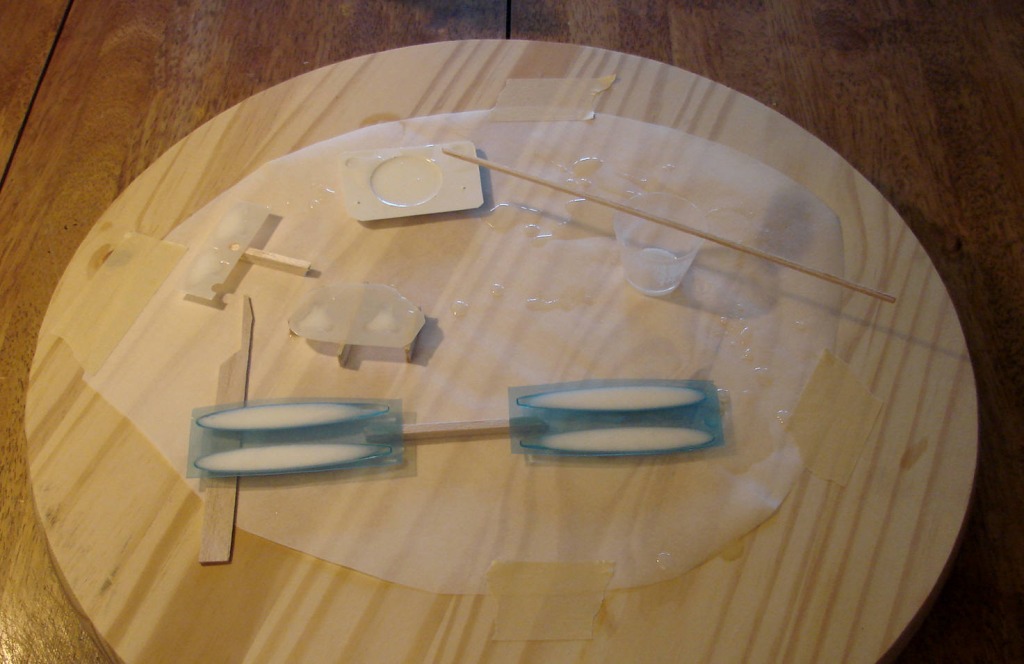
About 10 minutes later the curing process is well underway and my faith in chemistry restored. I always have serious doubts when I first pour the clear mixture in the mold. |
| David Duckett, Image # 15250 | 02 Dec 09 11:03 |
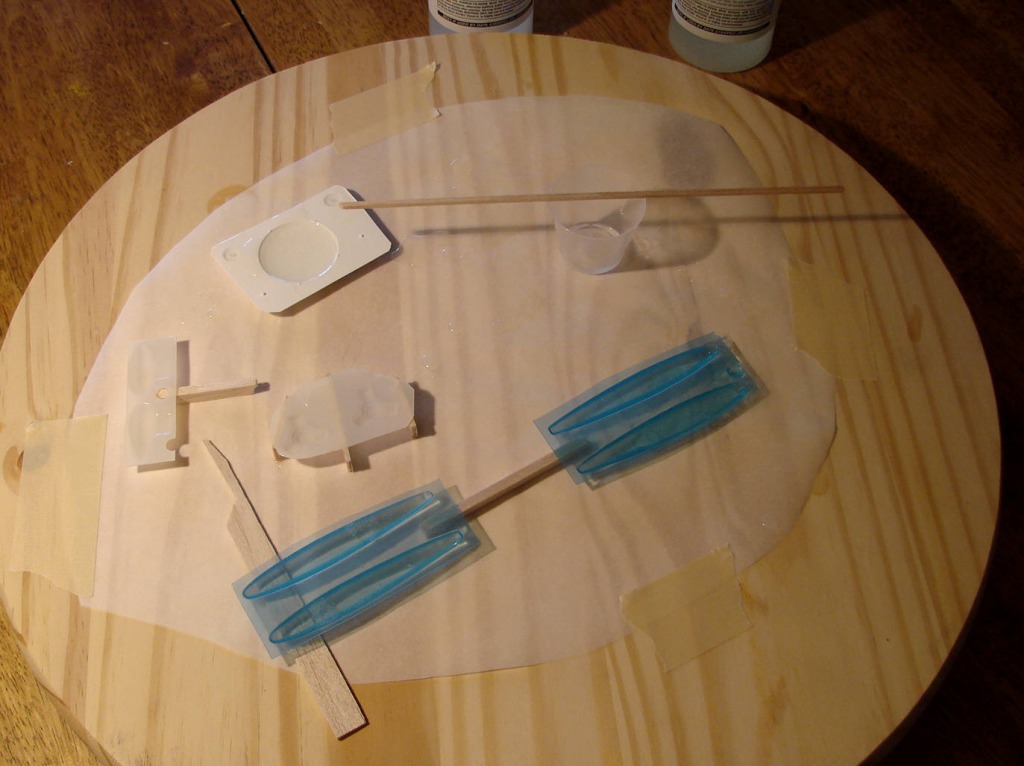
THe mixure has been poured into the molds and has cleared up. This is good. |
| David Duckett, Image # 15249 | 02 Dec 09 10:57 |
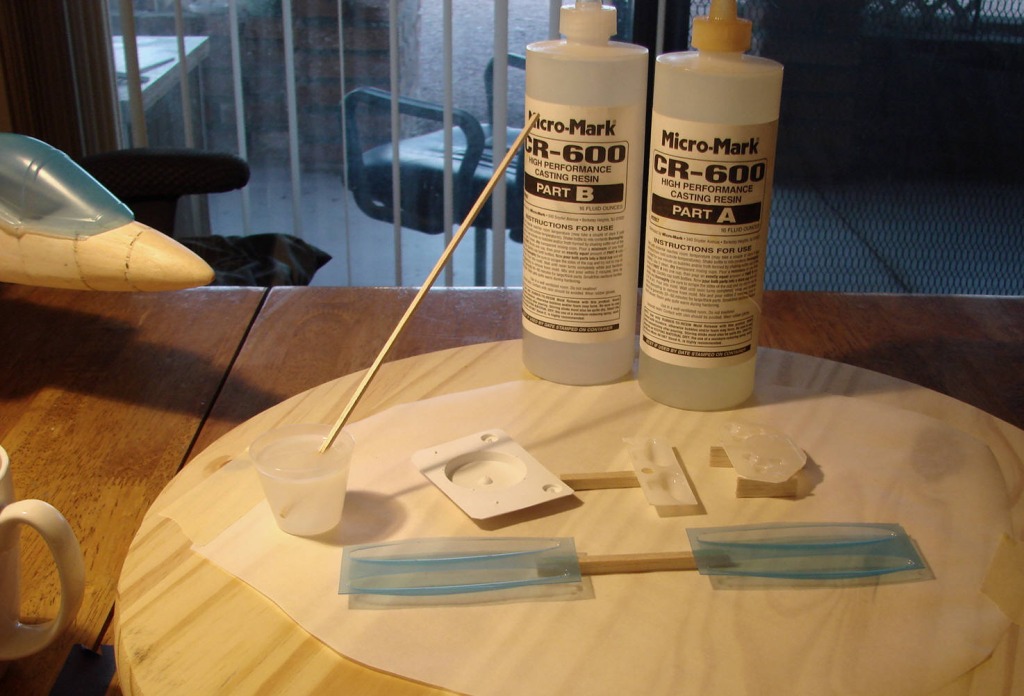
The two parts have been shaken and then allowed to sit for a minute or so. I poured in 1/2 oz of part A and then 1/2 oz of part B and have gently stirred the mixture with the stick and it still has a slightly milky look but that's OK. Instructions are included with the resin. The idea here is to get rid of all the tiny bubbles. |
| David Duckett, Image # 15248 | 02 Dec 09 10:52 |
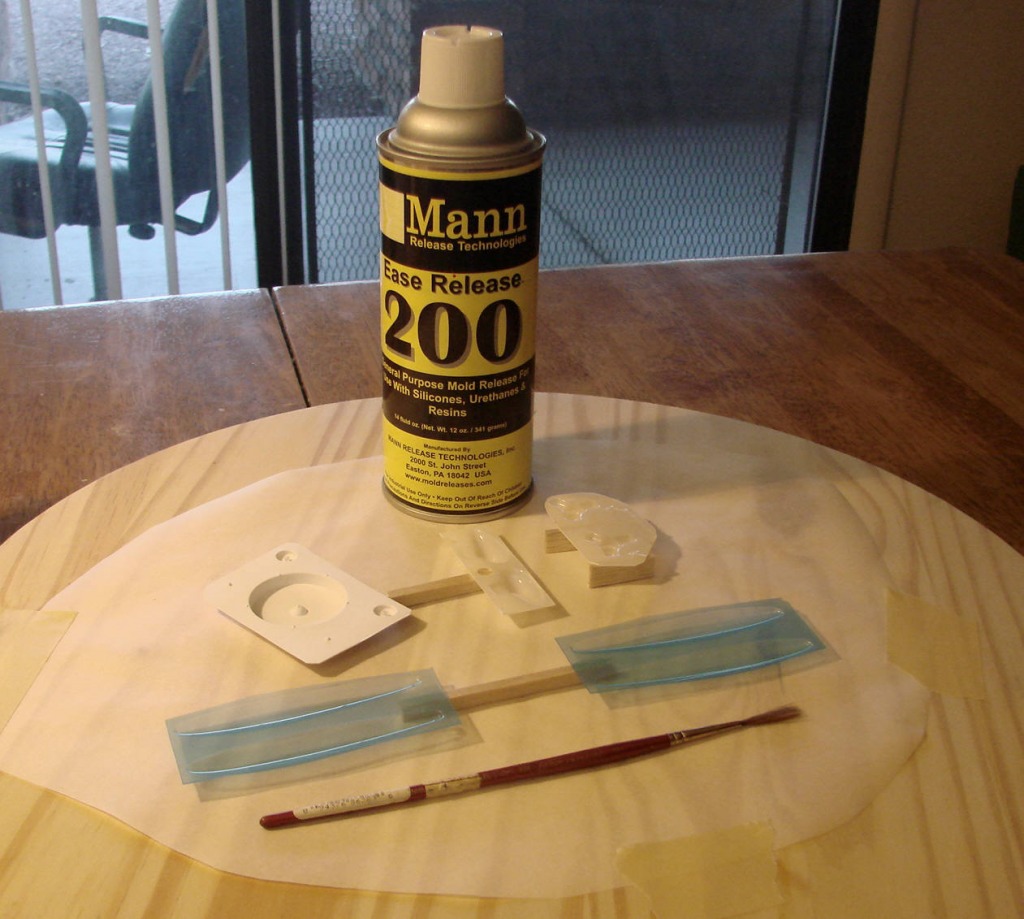
Step 1. Spray the inside of the pieces with the release agent and then wipe it with the soft brush. Spray again and let sit 5 minutes before using. NOTICE: The blue plastic covering the clear part has NOT been removed. |
| David Duckett, Image # 15247 | 02 Dec 09 10:49 |
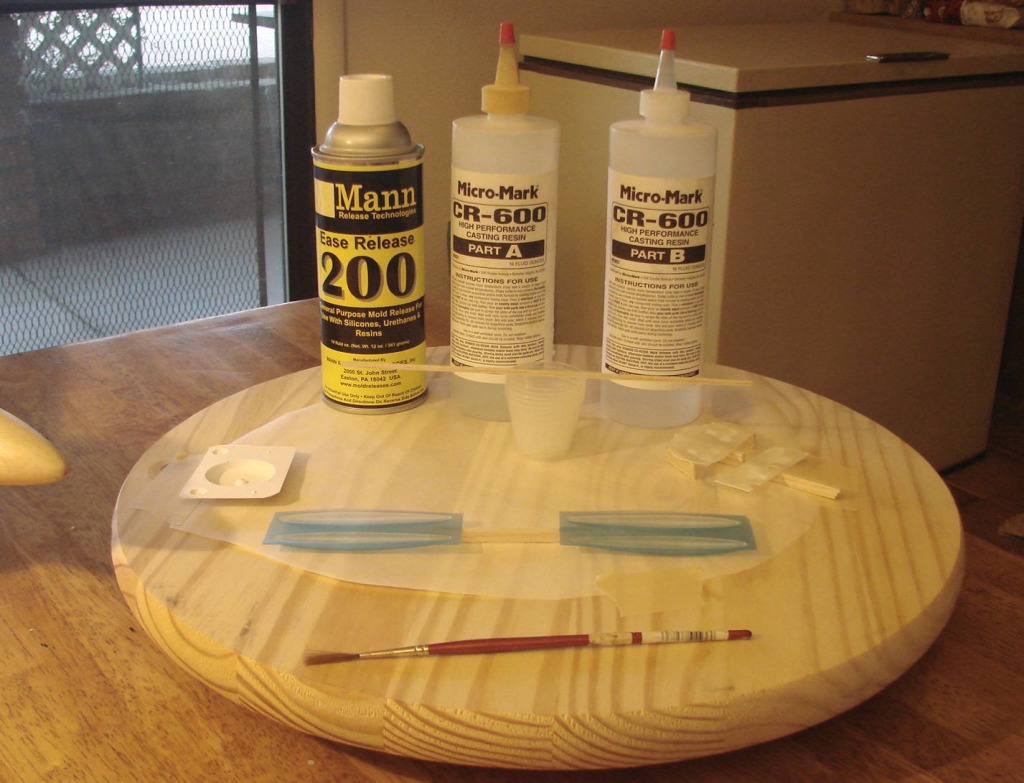
Materials: The resin set is #82057, CR-600 Casting Resin - $32.95. The release agent is #82664 Rubber To Resin Mold Release- $17.50. Mixing cups, a stick to stir it , and a soft brush are needed, as well. The plastice pieces are from Guillows and Dumas kits. |
| David Duckett, Image # 15246 | 02 Dec 09 10:44 |
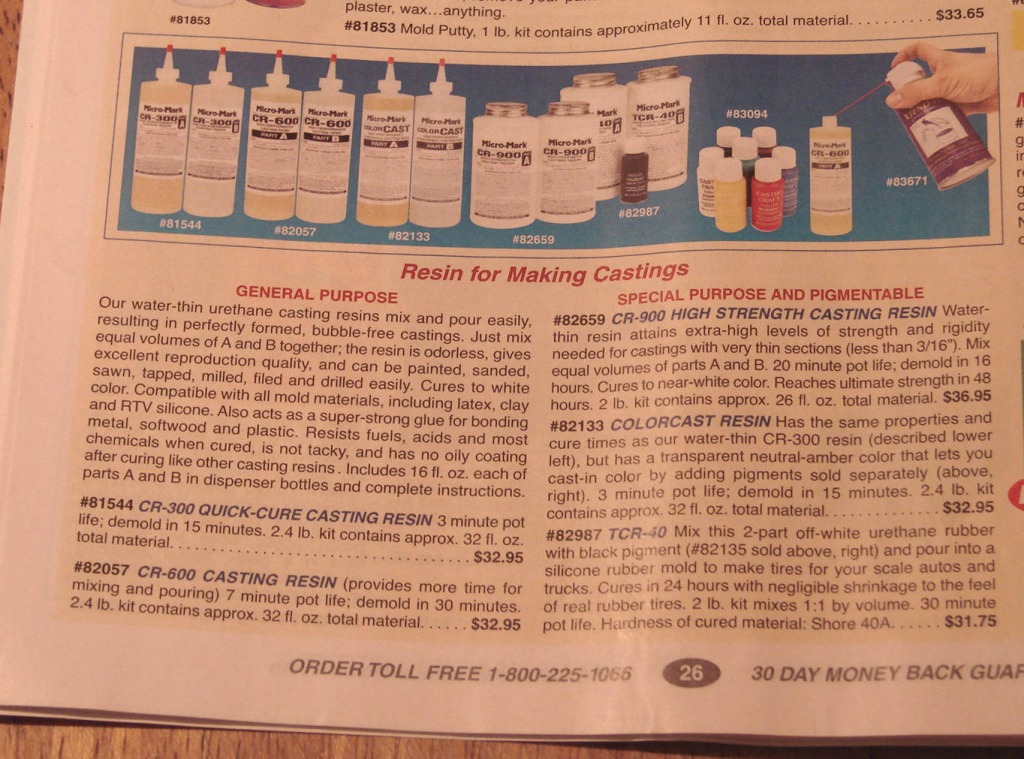
As per your request...Micromark.com has lots of goodies for modelers. This is part of the casting stuff and there's more but this has what I use. Following is a "how to" on using the stuff to make casts from the plastic pieces in typical balsa and tissue kit. Perhaps James can put it in the official place...:-) |
| David Duckett, Comment for image # 15239 | 02 Dec 09 00:00 |
| Roger, wilco. |
| frwyflyer, Comment for image # 15239 | 01 Dec 09 20:40 |
| I will try to express myself more clearly. Yes, I would like very much to see (view) a 'howto' on the entire casting process ie: making the patterns/masters, making the mold, preparing the casting media (resin)and filling the mold cavities avoiding trapping air bubbles. Please include the sources of materials and costs. I am in awe of the cast pieces that both you Mr Duckett and Mr. Finn produce. They are amazing! |
| David Duckett, Comment for image # 15239 | 01 Dec 09 18:19 |
| Do you mean making the cast pieces? |
| frwyflyer, Comment for image # 15239 | 01 Dec 09 18:13 |
| I would sure enjoy seeing a 'howto' about making plastic parts |
| jgood, Comment for image # 15239 | 01 Dec 09 17:27 |
| Anyone want to do a 'howto' on producing plastic parts? |
| Luke War, Comment for image # 15239 | 01 Dec 09 15:06 |
| Those are some great looking nozzles Mr. D...Im confused on the whole casting part though. Any previous builds by you or someone else that illustrate how to cast pieces? Just using your skills with this bird as an idea builder when I start my own Harrier! :) |
| David Duckett, Comment for image # 15239 | 01 Dec 09 13:51 |
| No, the cast piece is much easier to work with because it's hard and yet sandable and is a perfect shape. The front exhaust is also a cast piece from two halves and then glued together, filled and sanded. |
| BillParker, Comment for image # 15239 | 01 Dec 09 13:25 |
| What was the deal on the intake plastics that came with the kit? Too flimsey? |
| Build Thread, Page :
<< 6 7 8 9 10 [ 11 ] 12 13 14 15 16 (310 posts, 20 posts per page, 16 pages in total)
|
[ < Prev ] [ Next > ] |

