| Build Thread, Page :
1 2 3 4 5 [ 6 ] 7 8 9 10 11 >> (851 posts, 20 posts per page, 43 pages in total)
|
[ < Prev ] [ Next > ] |
| rgood, Comment for image # 37010 | 25 Oct 16 16:14 |
| Great chap Bob Hoover! Met and chatted to him once, couple of years ago at Reno Races. RIP Bob.
Super colour on the Maple Sky,D. |
| Skyediamonds1985, Comment for image # 36995 | 25 Oct 16 16:10 |
| Thank you Don. Everything about this model has been a challenge. Still working on it. About to do the fuel and coolant lines on top of the top wing. |
| Skyediamonds1985, Image # 37010 | 25 Oct 16 15:59 |

Guys: I purposely used this picture of the tree as seen in its glory during the Fall season so call to your attention, that the great Bob Hoover just passed away. I've had a chance to meet him several times and each time, he's always been gracious and easily approachable. He has truly "..Slipped the surely bonds of earth..." |
| Don C, Comment for image # 36995 | 25 Oct 16 10:45 |
| Definitely worth the effort. Looks great. |
| Skyediamonds1985, Comment for image # 36992 | 24 Oct 16 19:05 |
| Unfortunately, this concept didn't work out as planned and I wound up messing the plastic with tape and glue spreading all over the place. Decided to cut another piece of clear plastic and cut an even more thinner slice of tape and simply stuck it over the front side of the windshield. Another learning experience. |
| Skyediamonds1985, Comment for image # 36995 | 24 Oct 16 19:00 |
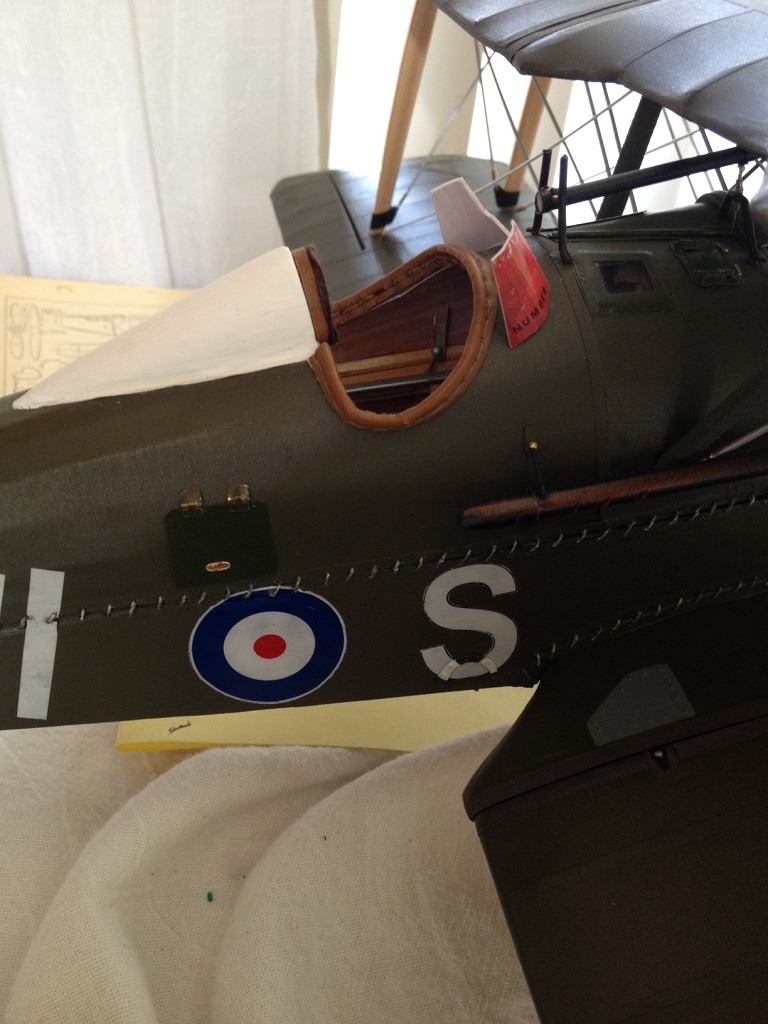
| Dang, hit that "send" button before finishing the sentence. Meant to say that I offset the windshield from the frame to give it more "expression and personality." |
| Skyediamonds1985, Image # 36995 | 24 Oct 16 18:57 |

Another view. I purposely offset the windshield from theper frame just to give it more " |
| Skyediamonds1985, Image # 36994 | 24 Oct 16 18:56 |

Finished windshield and framework. |
| Skyediamonds1985, Image # 36993 | 24 Oct 16 18:55 |
Vintage Aviator's photos show the spacing between the frame and windshield. I tried to replicate it here. |
| Skyediamonds1985, Image # 36992 | 24 Oct 16 18:54 |

Used Scotch tape. It's very thin. I offset the tape so I could wrap it around the plastic to create the metal frame with its slot for the glass. |
| Skyediamonds1985, Image # 36991 | 24 Oct 16 18:51 |

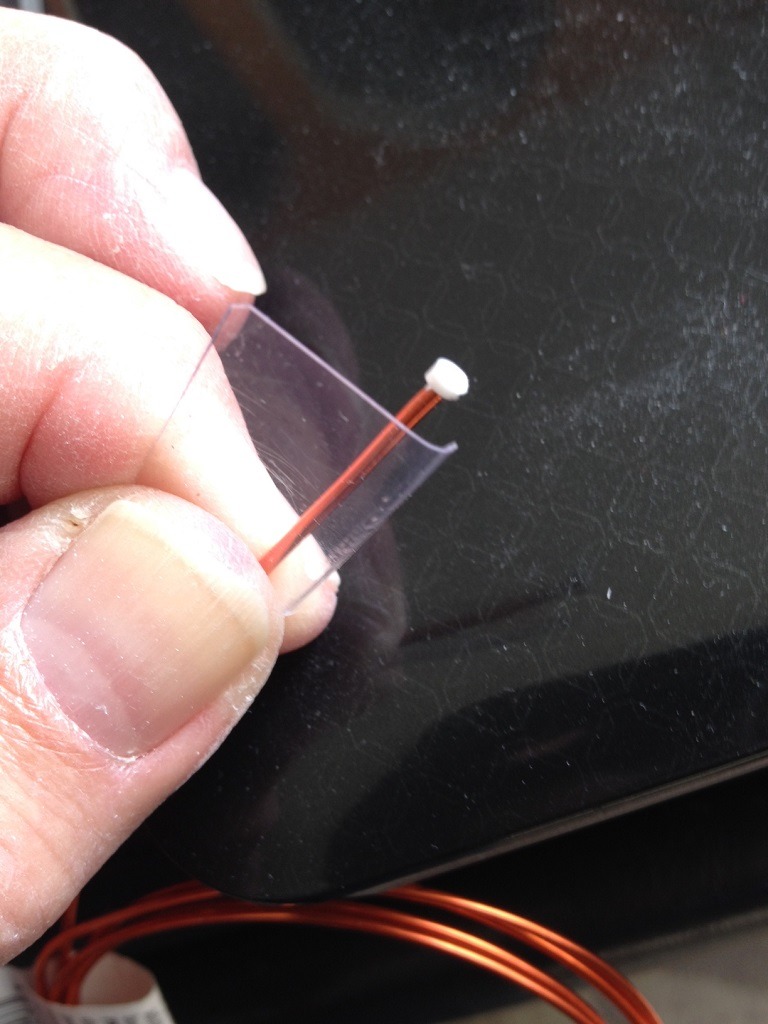
Painted the wiring with silver paint. I'm holing a thin strip of tape that was also painted silver. The tape will be used as the frame around the "glass" windshield |
| Skyediamonds1985, Image # 36990 | 24 Oct 16 18:49 |
Copper wire and plastic tubing at the ends. Notice the curved plastic to fit around the wire. |
| Skyediamonds1985, Image # 36989 | 24 Oct 16 18:47 |
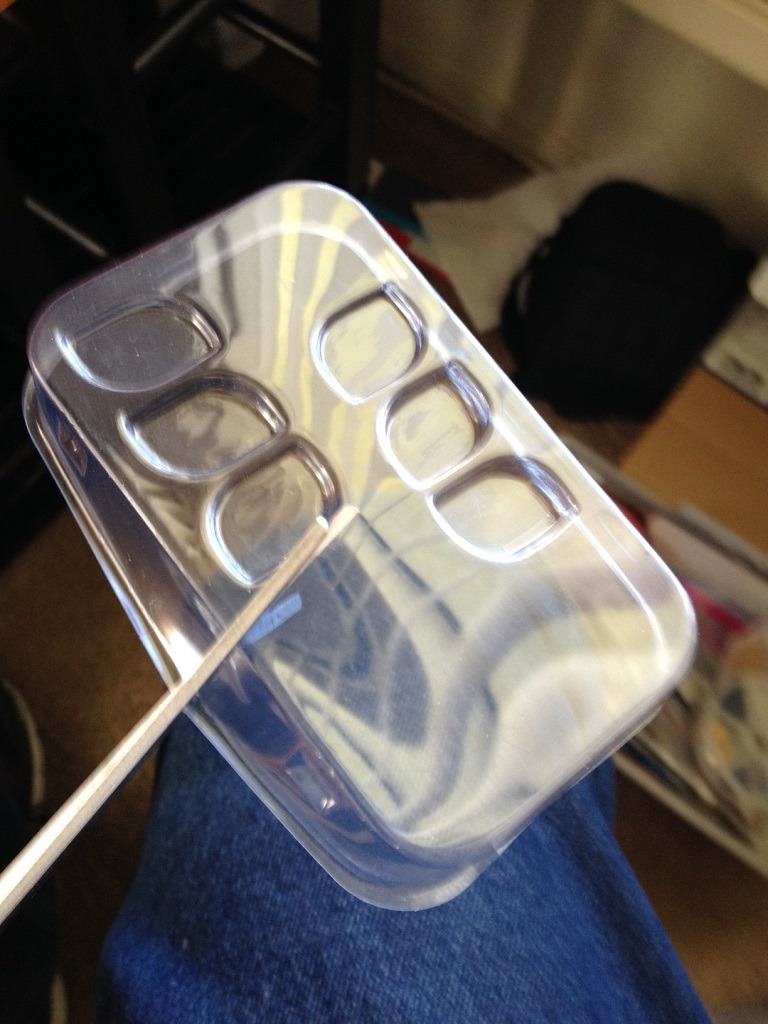
Cutting out the windshield. I'll take advantage of the rounded edges. |
| Skyediamonds1985, Image # 36988 | 24 Oct 16 18:46 |

Olive drab paint. |
| Skyediamonds1985, Image # 36987 | 24 Oct 16 18:45 |

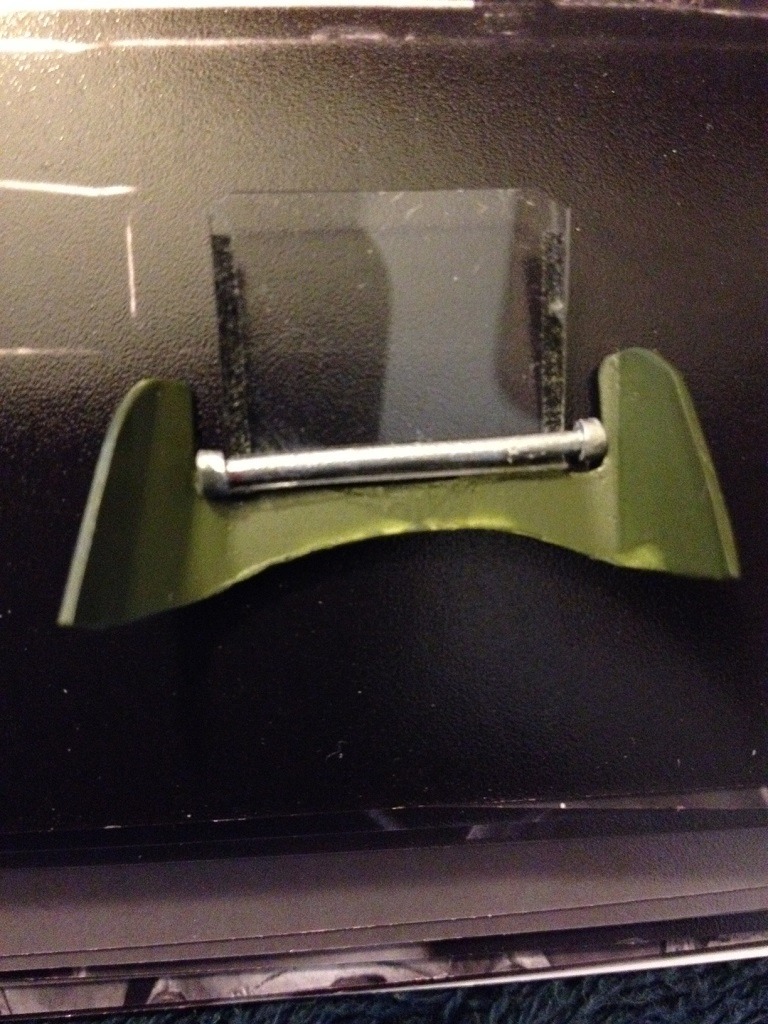
Final shape on both sides. The "frame" sits on the top of the fuselage nice and tight. |
| Skyediamonds1985, Image # 36986 | 24 Oct 16 18:43 |

Getting there.... |
| Skyediamonds1985, Image # 36985 | 24 Oct 16 18:43 |

Head-on view. Notice the left side appears too wide. Will start trimming down. |
| Skyediamonds1985, Image # 36984 | 24 Oct 16 18:42 |
As W.C. Fields once said: "This is only the beginning folks..." Rough fitting. |
| Skyediamonds1985, Image # 36983 | 24 Oct 16 18:40 |

Good day gentlemen and especially Jedi and John. Hope you're enjoying this. I said from the beginning, this build is dedicated to everyone on VA. I drilled holes to start the cut out. Reason being that my goal is to achieve a rounded corner where the windshield will be placed. |
| Skyediamonds1985, Comment for image # 36958 | 20 Oct 16 19:31 |
| LoL... Nice to know I've got some pretty observant friends on this site. |
| Build Thread, Page :
1 2 3 4 5 [ 6 ] 7 8 9 10 11 >> (851 posts, 20 posts per page, 43 pages in total)
|
[ < Prev ] [ Next > ] |
