| Build Thread, Page :
1 [ 2 ] 3 4 (63 posts, 20 posts per page, 4 pages in total)
|
[ < Prev ] [ Next > ] |
| Southborough_man, Comment for image # 42104 | 30 Apr 20 16:28 |
| I got almost no wrinkling. "Almost" because on the bottom of the tail things were really tight. If I had done a more careful job putting on the tissue there it would have come out better. Certainly the dope technique you told me about was a winner. |
| edtherenderman, Comment for image # 42104 | 30 Apr 20 11:45 |
| Did you get any tissue wrinkling when you painted the model? It's hard to tell from this picture. Just curious how well the dope technique worked for you. |
| Southborough_man, Comment for image # 42104 | 30 Apr 20 05:02 |
| Thanks Don! |
| Don C, Comment for image # 42104 | 29 Apr 20 18:44 |
| PO says he'll land on Saturday.
|
| Don C, Comment for image # 42104 | 29 Apr 20 18:40 |
| Good choice. The pilot is on his way. |
| Southborough_man, Comment for image # 42104 | 29 Apr 20 14:20 |
| I plan to borrow from the paint scheme done by jhrober which I like a lot |
| Southborough_man, Image # 42104 | 29 Apr 20 14:15 |

2 coats of paint. 1 more to go after new order arrives May 4 |
| Southborough_man, Comment for image # 42060 | 24 Apr 20 11:11 |
| I found out a week ago when I tried to buy a 1/16 scale pilot that they are closed down with the rest of our state until at least May 4. I think I have managed to repair the part however.... |
| edtherenderman, Comment for image # 42060 | 24 Apr 20 09:29 |
| Example of great minds thinking alike! BTW - Guillows sales replacement parts, so if the intake is not repairable, check out their website. |
| Southborough_man, Comment for image # 42060 | 24 Apr 20 08:24 |
| Thanks Ed (again). I just came up from downstairs having tried exactly that on the spinner. Creeping up on it definitely works. |
| edtherenderman, Comment for image # 42060 | 24 Apr 20 08:07 |
| Cutting these parts are very tricky. What I do is cut the part out with a little flash left, then sand the flash back until I have the correct part outline. That way you are not trying to cut at the point where the flash and part meet. Sanding gives a lot more control. |
| Southborough_man, Comment for image # 42060 | 23 Apr 20 15:05 |
| I could use some help on the issue of cleanly cutting out the plastic parts. I used a modeling knife to poke holes around the edges of the cowl which worked. The plastic was thinner around the intake and I wrecked the part. I have more parts to work on. What suggestions does anyone have for me please. |
| Southborough_man, Comment for image # 42060 | 23 Apr 20 14:05 |
| Thanks. I have had some invaluable help from people on this website. |
| edbecky, Comment for image # 42058 | 23 Apr 20 10:59 |
| Wow! Looks like a great surface for paint. |
| Don C, Comment for image # 42060 | 23 Apr 20 10:16 |
| Looks like we will reopen on Monday. For just killing time that's good work. |
| Southborough_man, Comment for image # 42060 | 23 Apr 20 08:45 |
| Hahaha. My real hobby is woodworking. I have a dresser I have to make for my son-in-law but I can't buy any wood in our state until at least May 4 so ....... |
| edtherenderman, Comment for image # 42060 | 23 Apr 20 08:13 |
| Looking good! And, "There is no more important safety rule than to wear these, safety glasses!" |
| Southborough_man, Image # 42060 | 23 Apr 20 07:15 |
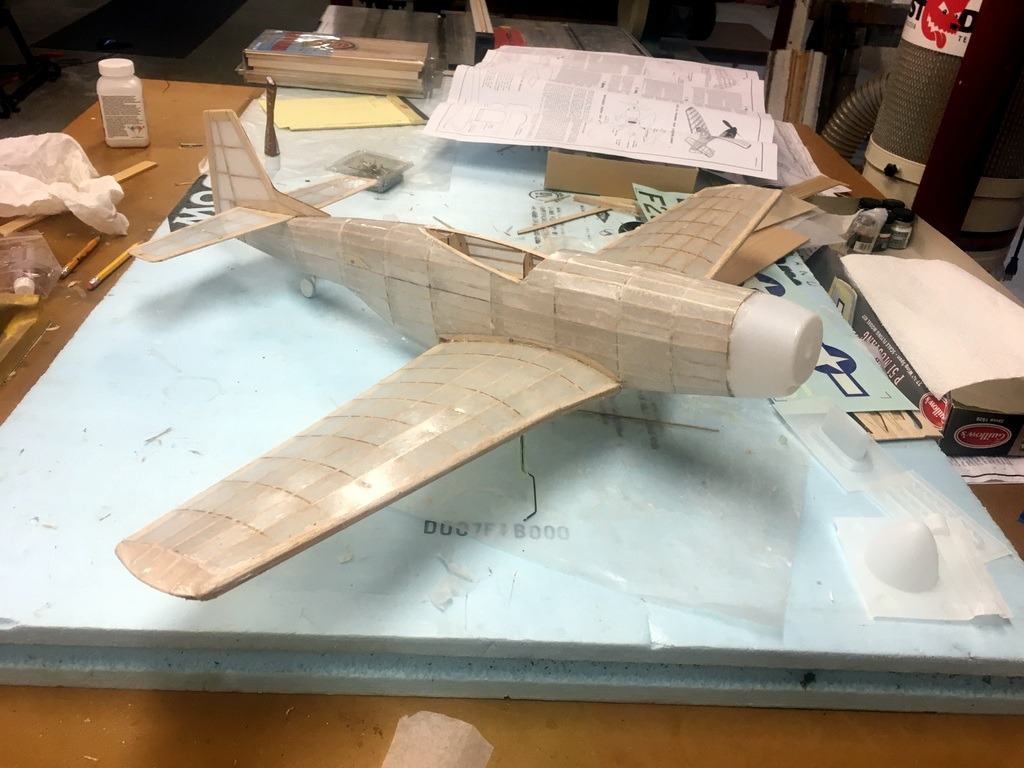
Time for some assembly (If you are a Norm Abrams fan you know where that quote came from) |
| edtherenderman, Comment for image # 42058 | 22 Apr 20 15:56 |
| That's a good looking model! Glad this process worked for you. Can't wait to see it painted! You may still get a little wrinkling when you paint, but fear not, I've found that it will tighten right back up again when it dries. It is always good to test it though. |
| Southborough_man, Comment for image # 42039 | 22 Apr 20 15:12 |
| Ed, I have finished with 5 coats on the fuse. The tissue is tight as a drum. Thanks again for the advice |
| Build Thread, Page :
1 [ 2 ] 3 4 (63 posts, 20 posts per page, 4 pages in total)
|
[ < Prev ] [ Next > ] |
