| Build Thread, Page :
1 2 3 [ 4 ] 5 (96 posts, 20 posts per page, 5 pages in total)
|
[ < Prev ] [ Next > ] |
| SteveM, Comment for image # 20876 | 30 Jan 11 00:26 |
| Recently in the period of 2 months I got married, moved, become a homeowner (by marriage), and got a new job; none of which was conducive to giving me time or space to work on the DH-89. Now that I'm back to working on it again I have no idea where around here I can fly it. |
| SteveM, Image # 20876 | 30 Jan 11 00:24 |
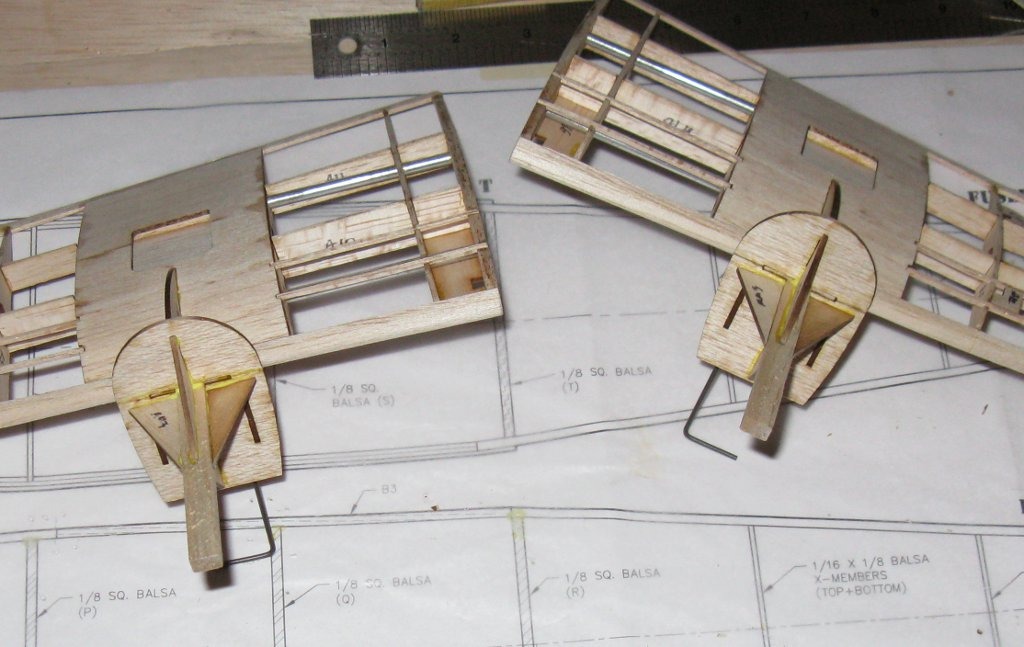
Both motor mounts are finished. I went with PVA glue again for strength and to have time to make sure all was aligned before the glue set. |
| SteveM, Comment for image # 18677 | 22 Jul 10 07:01 |
| Thanks guys, your builds alerted me to the troublesome front end so I was prepared to go very slowly and carefully. If I ever damage this front end it'll be impossible to repair. |
| jgood, Comment for image # 18677 | 22 Jul 10 06:33 |
| Looking good Steve. I should have taken more time on the front of mine. |
| David Duckett, Comment for image # 18677 | 22 Jul 10 01:15 |
| Looks fine, that's surely the most difficult part. |
| SteveM, Image # 18677 | 21 Jul 10 19:00 |

Fuselage is starting to come together. Bending the curves for the nose was a little tricky, but I brushed on water and let it soak and added a little more bend each day I worked on it till it was fully curved. Lots of butt joints, I hope they hold up. |
| SteveM, Image # 18555 | 10 Jul 10 00:55 |

The sides are complete, starting now on the bottom and top. |
| BillParker, Comment for image # 18480 | 01 Jul 10 11:26 |
| Now see?!? That's so much better than tying them on with a piece of string... (Mr. Guillow...) |
| SteveM, Image # 18480 | 30 Jun 10 20:59 |

I cleaned out the thread holes with a pin vice then hardened the end of the thread with CA to act as a sort of needle. Rather than use thin CA to held everything together I opted for some 30 minute epoxy. It does add a little weight but I think it is worth it considering how rough some of my landings can get. |
| SteveM, Image # 18374 | 23 Jun 10 21:33 |

Lower wings also assembled and sanded to shape. |
| David Duckett, Comment for image # 17285 | 30 Mar 10 03:28 |
| I can add to the list. |
| SteveM, Comment for image # 17285 | 29 Mar 10 22:08 |
| I have been compiling a list of errors and various tips that may be helpful when building this kit. For some reason I only find myself doing this on Dumas kits. Guillow's, Midwest, Peck-Poly, and Molt Models kits have never given me the trouble that Dumas kits do. That's pretty incredible considering Molt Models is a tiny one man show with only a few kits under his belt. |
| SteveM, Image # 17285 | 29 Mar 10 22:04 |

Upper wings assembled and sanded to shape. The plans give no indication of how many hinges to use and where to put them so I elected to put one near each end of the ailerons. |
| SteveM, Image # 17203 | 25 Mar 10 22:33 |
Ready for the leading edge laminations then the stringers. |
| SteveM, Image # 17202 | 25 Mar 10 22:32 |

I've decided to stick with the recommended MPI EPU-3 motors, GWS 7x6 props, and TP 2S 1350mAh battery. Each motor drew about 2.75A on a 50% full battery so I hope the little Pixie-7P will be able to handle the current of two motors on a fully charged battery. Regardless, there is no need for a 25A ESC as is recommended in the directions. |
| SteveM, Comment for image # 17180 | 24 Mar 10 16:15 |
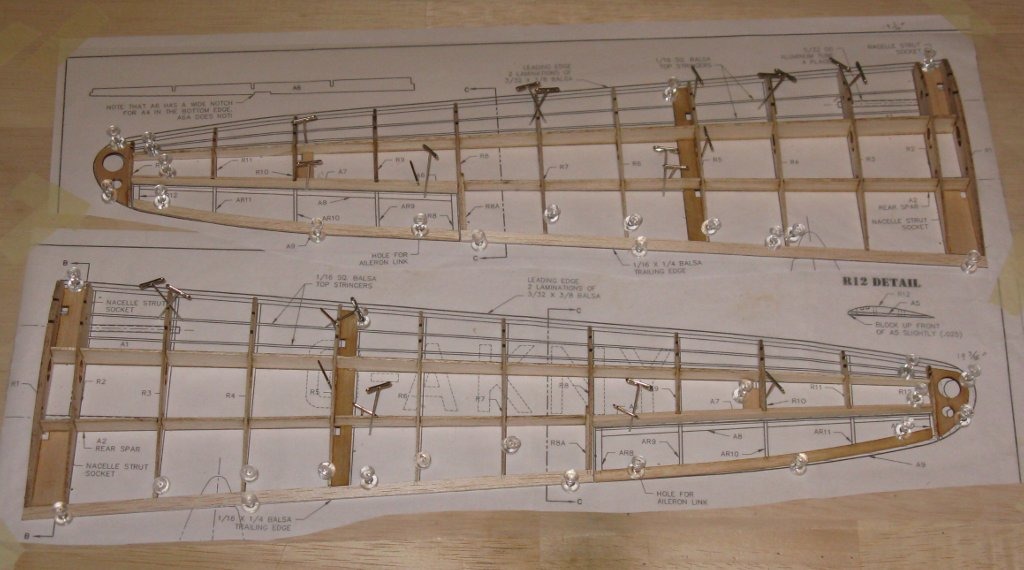
| James, I checked my MM Hellcat plans and found them to be dead on as well. At least with laser cut parts you can have confidence in the parts. What I am doing is using the shorter left wings as a guide to cut and place the parts for the right wings. I'd like this to fly true when trimmed neutrally. |
| SteveM, Image # 17180 | 24 Mar 10 16:12 |

The plans for the 53" Guillow's B-29 shown at the bottom are the largest I have on hand. By arranging the wing patterns across the path of the paper going through the printer any distortion will be applied to both wings. The Sopwith Camel plans above it have the same layout the DH-89 has, providing potential for the left wings to both be shorter than the right wings. But of course they were dead on. |
| jgood, Comment for image # 17164 | 24 Mar 10 14:53 |
| Steve. I had a similar problem with my Tiger Moth plans I think too. Also my Molt P-38. Here's the discussion about that. The consensus was it was probably caused by the duplication process, not paper itself. I'll check mine when I get it out of storage... |
| SteveM, Comment for image # 17164 | 24 Mar 10 13:25 |
| Thanks for the heads up on the errors, I'll make notes of them when I got home tonight. I too find issues with vague wording that could have been made crystal clear with just an extra word or two. For example, the Ambroid glue directions leave me in doubt as to whether the glue should be applied to one side of the joint or both. I don't recall the exact wording off the top of my head.
When I get home I'll measure the larger Guillow's plans for accuracy and see if it is common to their plans too. Since you have the same problem then there is no point in getting new plans from Dumas as those would just be stretched too. If I wasn't building to fly I'd just make it all fit and not sweat it. |
| David Duckett, Comment for image # 17164 | 24 Mar 10 07:09 |
| I don't know about normal but it's just one of several things about this kit that are not quite right. Although noted, I normally just build around whatever is wrong since often it's a matter of "the written word" and I'm used to dealing with bad grammar and spelling. There's an error regarding the ribs R3A and R4A on the bottom wing. The instructions say to glue them to the trailing edge but the ribs aren't made that way as they fit on top of the bottom sheeting and don't go all the way to the trailing edge. The plans show the ribs all the ways and that's not right. The plans are also wrong regarding the aluminum tubes that fit in the wings...the bottom wing shows them flush with the root rib but the top wing shows them extending past it. If the wings are built to be removeable the tube should be flush because it fits over another aluminum tube in the fuselage. The length of the wing tubes per instructions doesn't match the plans, either. |
| Build Thread, Page :
1 2 3 [ 4 ] 5 (96 posts, 20 posts per page, 5 pages in total)
|
[ < Prev ] [ Next > ] |
