| Build Thread, Page :
1 2 3 4 [ 5 ] 6 7 8 (144 posts, 20 posts per page, 8 pages in total)
|
[ < Prev ] [ Next > ] |
| David Duckett, Image # 5035 | 12 Nov 07 16:36 |
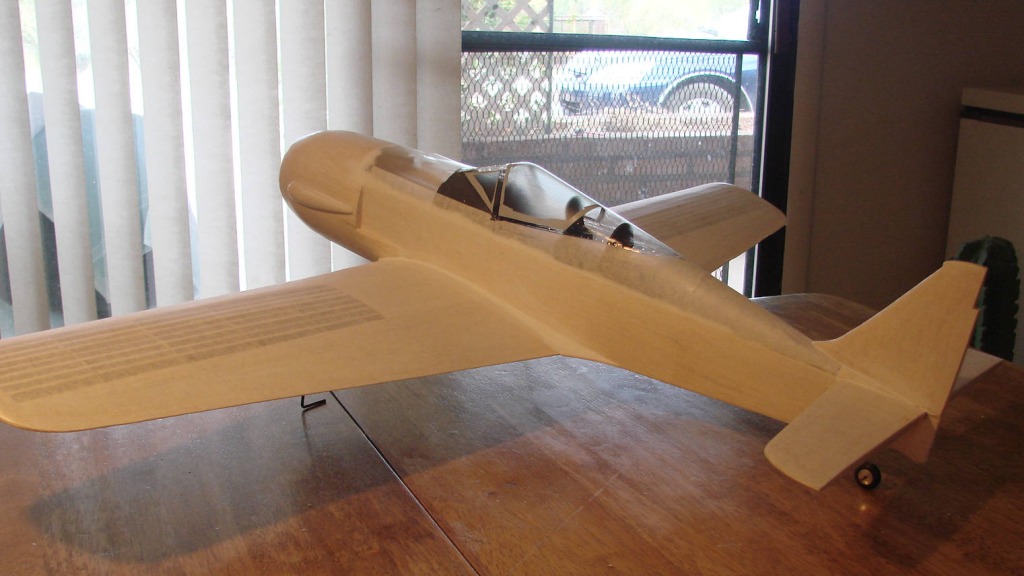
Ready to paint |
| David Duckett, Image # 5034 | 12 Nov 07 08:04 |

Fillets being made with Micro-fill |
| David Duckett, Image # 5033 | 12 Nov 07 08:03 |

Fuse covered, clear part of canopy masked, slot at rear enlarged to handle thickened stabilizer |
| David Duckett, Image # 5032 | 12 Nov 07 08:01 |

Lots of room |
| Barnstormer, Comment for image # 4990 | 10 Nov 07 19:59 |
| I'd sacrifice a leaf in my table to be able to accomplish this level of quality. |
| John M Oshust, Comment for image # 4982 | 10 Nov 07 18:27 |
| Xanadu... off topic but what are they getting for a gallon of gasoline in Canada? |
| moostang51, Comment for image # 4990 | 10 Nov 07 17:57 |
| Touche! At least you know your formers will be at 90 degrees. A small sacifice to achieve build quality like yours. |
| David Duckett, Comment for image # 4990 | 10 Nov 07 17:46 |
| I have destroyed the center leaf using it as a cutting board. |
| moostang51, Comment for image # 4990 | 10 Nov 07 17:44 |
| JFB, DD. Must be a big bird, cause it looks like you had to make the table bigger. Close that added leaf on the table will ya!!! Pullleeeaasse. Just being anal. |
| David Duckett, Image # 4991 | 10 Nov 07 17:28 |

Silkspan trimmed away, covering done. |
| David Duckett, Image # 4990 | 10 Nov 07 17:26 |

The silkspan has now dried and shrunk and conformed to the curvature of the edges. |
| moostang51, Comment for image # 4982 | 10 Nov 07 17:20 |
| Listen to your grandpa!!!! "A DD blast from the past". Will probably go the same route the next time I skin a bird. This is going to look great. |
| David Duckett, Comment for image # 4982 | 10 Nov 07 16:23 |
| Yes, same as always. |
| Xanadu, Comment for image # 4982 | 10 Nov 07 16:09 |
| So your putting tissue over the sheting as well? |
| SteveM, Comment for image # 4982 | 10 Nov 07 12:50 |
| This is a good clarification of the description you made in http://balsamodels.com/phpBB/viewtopic.php?t=744 |
| David Duckett, Comment for image # 4982 | 10 Nov 07 12:26 |
| With water. Dip the silkspan in water and lay it on a towel. Apply dope to surface and lay silkspan on it, add more dope and start pulling it taut. It will stay wet long enough to be manipulated and you can see the results right away. I always put on another coat of dope around the edges just to make sure and then let it all dry thoroughly before trimming the excess off. |
| John M Oshust, Comment for image # 4982 | 10 Nov 07 12:09 |
| Guru of covering, wet silkpan...wet with water or dope? |
| David Duckett, Comment for image # 4982 | 10 Nov 07 11:25 |
| NO, NO, NO NEVER DRY. Dope to attach the WET silkspan. The glue mixture seals the wood quite well and gives the dope and ideal surface to adhere to. It's also stronger than dope. But it does not work as well in sealing the silkspan for painting because it does not actually glue the silkspan to the surface in some cases and a bubble might appear where it shouldn't, even on a flat surface. Another, and most important reason to attach the silkspan with dope is that both shrink as they dry so wet silkspan attached around the edges with dope and pulled tight with your fingers and then left to dry/shrink...stay tuned (;-) |
| John M Oshust, Comment for image # 4982 | 10 Nov 07 10:43 |
| DD...Do I understand correctly. 50/50 glue and water to seal the wood then dope to mount dry tissue on the wood? |
| Xanadu, Comment for image # 4969 | 10 Nov 07 10:14 |
| Looking great...............
Looks so much better sheeted than tissue. Makes it look real beefy this way. |
| Build Thread, Page :
1 2 3 4 [ 5 ] 6 7 8 (144 posts, 20 posts per page, 8 pages in total)
|
[ < Prev ] [ Next > ] |
