| Build Thread, Page :
<< 37 38 39 40 41 [ 42 ] 43 (851 posts, 20 posts per page, 43 pages in total)
|
[ < Prev ] [ Next > ] |
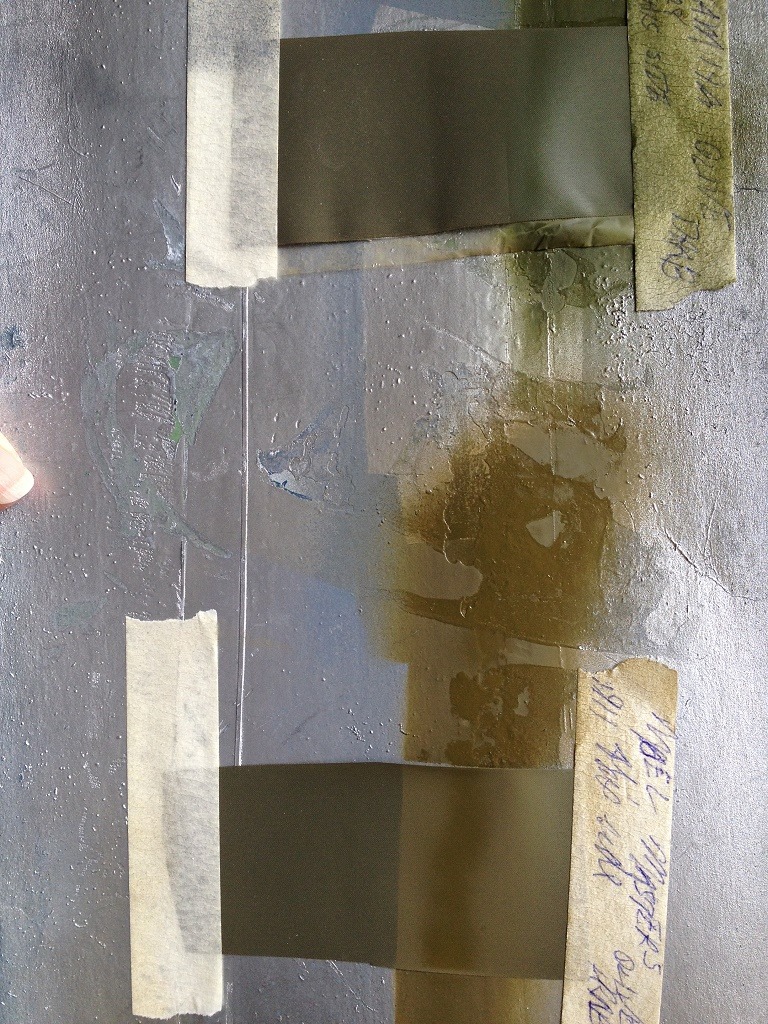
| Skyediamonds1985, Image # 34943 | 12 Nov 15 20:38 |

In my last "installment" I left it where I managed to have the fuselage constructed and covered in a manner to resemble the real aircraft's horizontal split by the pronounced stitching |
| Skyediamonds1985, Comment for image # 34890 | 06 Nov 15 14:57 |
| Meku, Thank you. I have always admired your beautiful S.E.5 model, and your comments are always welcomed. This is my very first attempt at using the heat shrink covering. I used Solartex, available through Balsa USA. I'll be starting on the fuselage today. |
| meku, Comment for image # 34890 | 05 Nov 15 04:01 |
| A very good way of sewing, especially in thermo foil, super !!! |
| Skyediamonds1985, Image # 34891 | 04 Nov 15 21:32 |
One final experiment, was the matching of olive drab color of the Solartex with spray paint from a can. Since I live in a small apartment, I don't have the room (Read that, luxury) of having an air gun with compressor. I was very happy to note that between Model Masters and Tamiya, Tamiya # TS-28 olive drab matches the Solartex beautifully. This means that I can add metal paneling around the engine area using plastic sheets (or glossy paper) and simply spray Tamiya's olive drab for a perfect match. That's it for now. It'll be a couple of days for me to work on the model. |
| Skyediamonds1985, Image # 34890 | 04 Nov 15 21:25 |

Yes. It appears to have worked. Among several prominent features of the S.E. 5, besides the radiator and top wing-mounted machine gun, was the fuselage stitching. Instead of simply adding cross stitching to the model, I thought it might be kind of cool to actually simulate the upper and lower halves of the fuselage and link the two with stitching, as you can see from the drawing of the real aircraft in the background. |
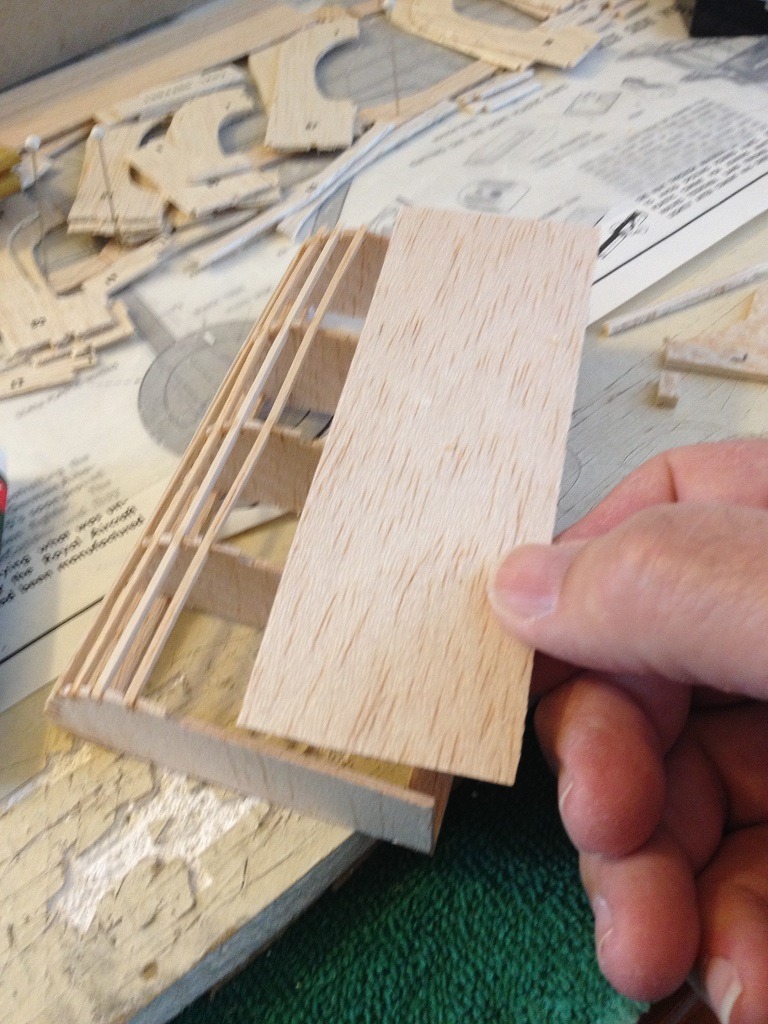
| Skyediamonds1985, Image # 34889 | 04 Nov 15 21:21 |

After covering the sheet balsa, I then glued it to the lower half of the "faux fuselage" for final view of my desire to simulate the fuselage on the real aircraft |
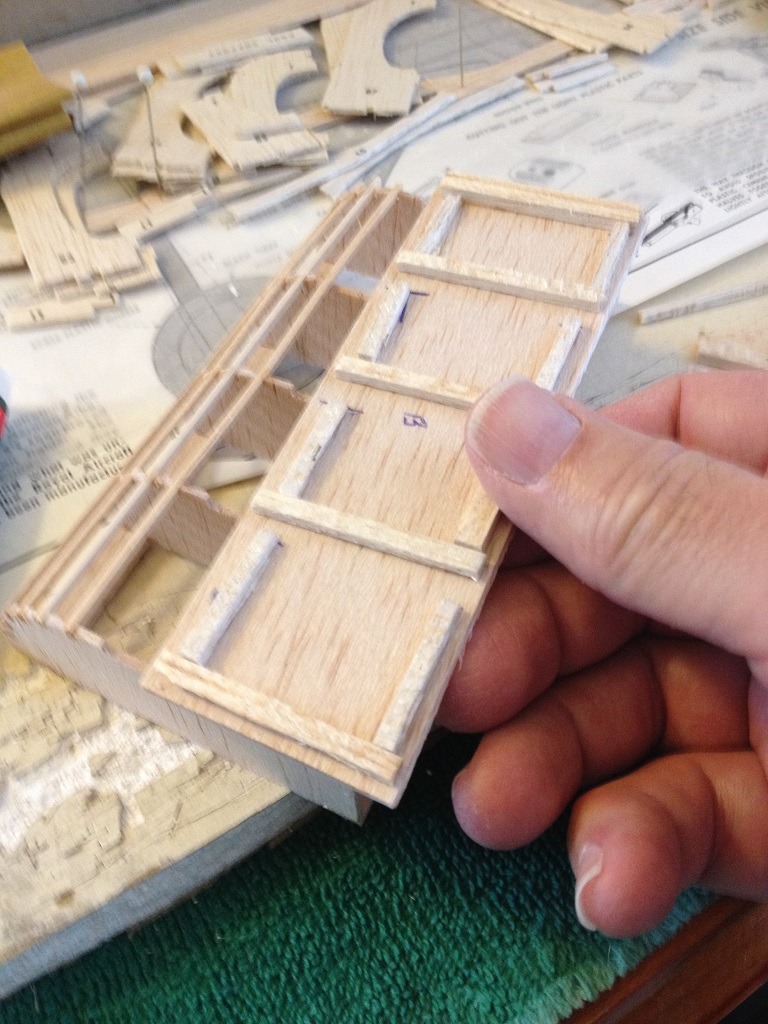
| Skyediamonds1985, Image # 34888 | 04 Nov 15 21:19 |

I gave my 1/16" sheet cut balsa one last check for fit before covering |
| Skyediamonds1985, Image # 34887 | 04 Nov 15 21:16 |

I then trimmed away some of the excess off the ends. Not bad, eh? |
| Skyediamonds1985, Image # 34886 | 04 Nov 15 21:13 |

This is the very first time I've ever used heat-shrink covering. In this case, at the advice of Meku, I used Solartex which has a very fine weave pattern and it comes in various colors. I chose olive drab. So this will help explain, in part, why I chose to fabricte a "faux fuselage" to practice my covering techniques. Its one thinkg to watch dozens of videos on "How to's" but it's another to actually do it myself. |
| Skyediamonds1985, Image # 34885 | 04 Nov 15 21:08 |

I decided to laminate the last two 1/16" strips of balsa to give it added strength to account for any covering shrinkage |
| meku, Comment for image # 34849 | 03 Nov 15 01:37 |
| So, depending on engine type. |
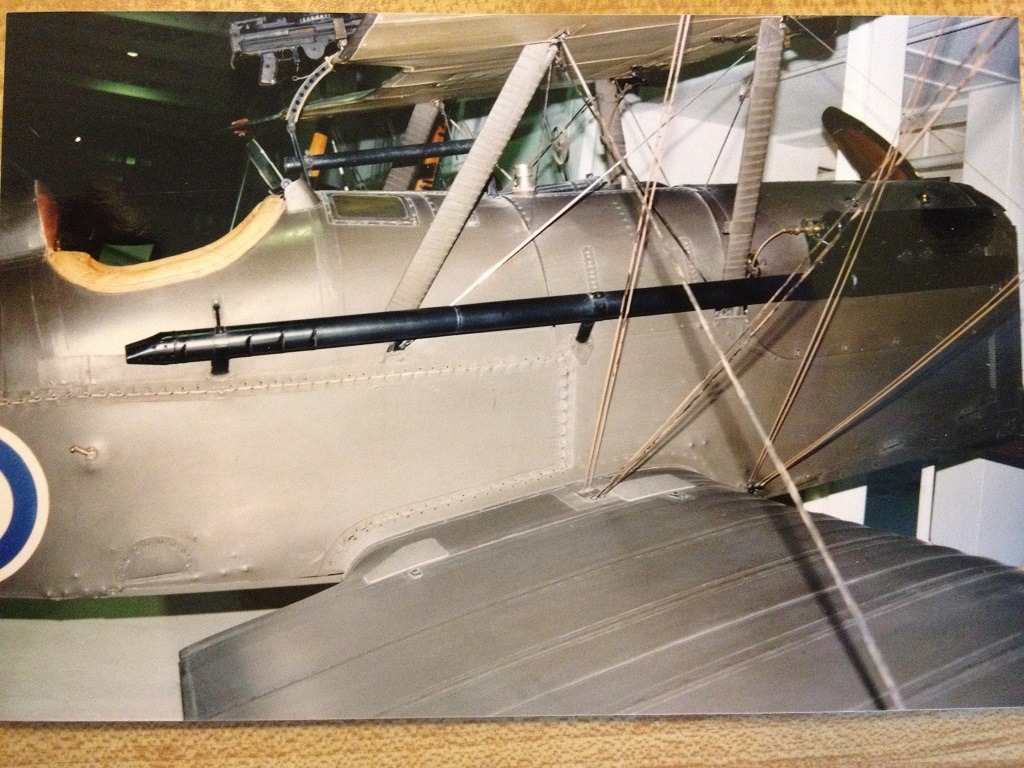
| John M Oshust, Comment for image # 34849 | 02 Nov 15 21:30 |
| Skye,
Please allow me to submit a possible solution to this enigma. Approximately 5k Se 5 bipes were produced. Off the top of my noodle, I recall two, maybe three engines used as power plants. The museum photo and the Guillows plan may be the same aircraft with a different engine. Hence the decrepancy in design. Just a brain puffer! |
| rayl, Comment for image # 34849 | 02 Nov 15 19:44 |
| Sky: An excellant resource is the "flickr" page of David Whitworth. He is pro photographer with semmingli unlimited acess to Duxford, Old Warden and others. worth the visit. |
| Skyediamonds1985, Image # 34869 | 02 Nov 15 17:23 |
Taking into account of the possible warpage from the shrinking of covering, I reinforced the back of the 1/16" sheet balsa |
| Skyediamonds1985, Image # 34868 | 02 Nov 15 17:22 |
This is the 1/16" sheet balsa to be used over the lower portions of my faux fuselage |
| Skyediamonds1985, Image # 34867 | 02 Nov 15 17:21 |
Another view of my faux fuselage for testing out my ideas. |
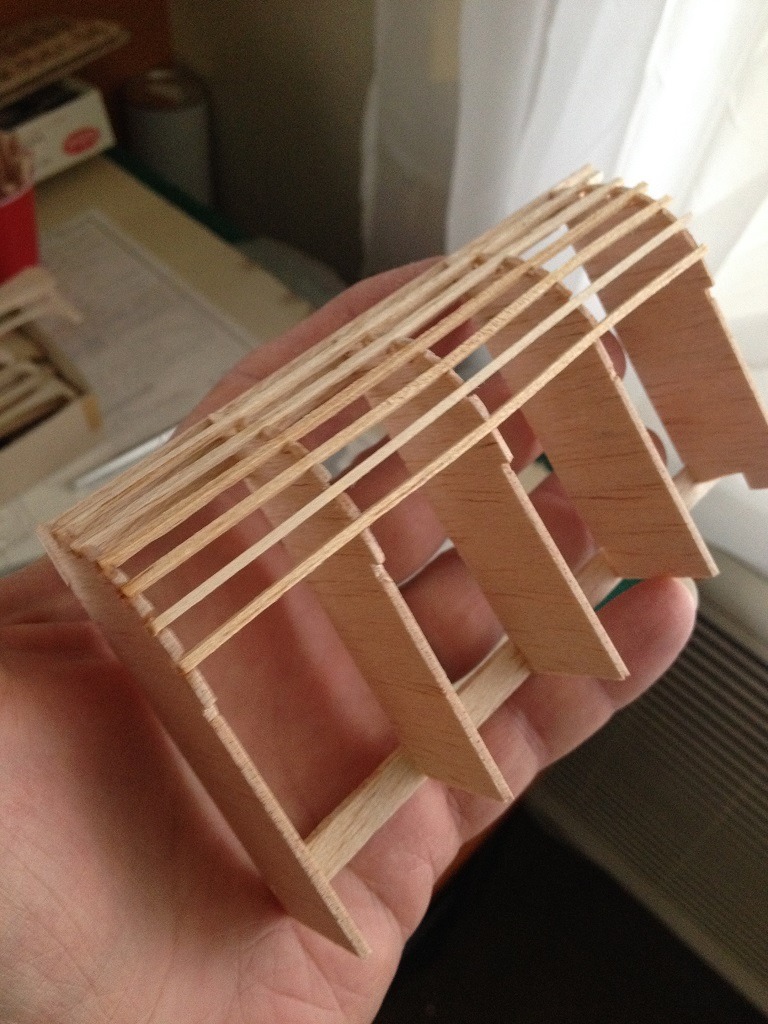
| Skyediamonds1985, Image # 34866 | 02 Nov 15 17:19 |
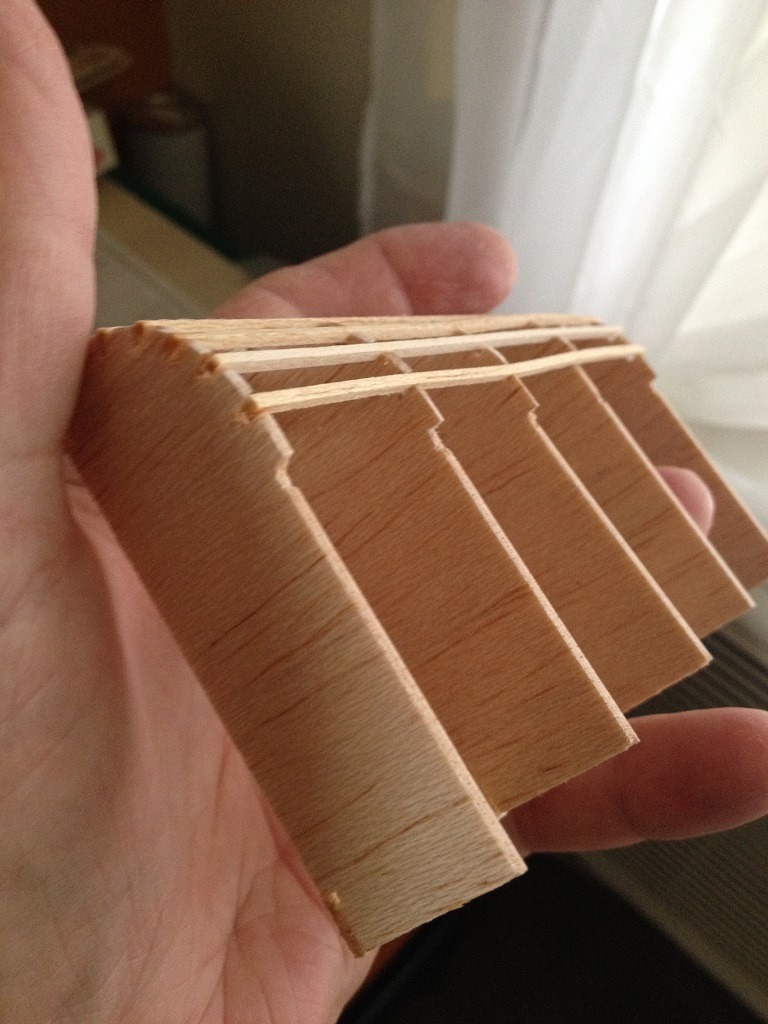
Note the cut out on the lower ends of the faux formers below the stringers. It is here, that I intend to glue on a 1/16" thick sheet balsa |
| Skyediamonds1985, Image # 34865 | 02 Nov 15 17:17 |

To help test my ideas, I borrowed one of the formers from the fuselage and duplicated it several times to make a faux test article to experiment. |
| Skyediamonds1985, Image # 34864 | 02 Nov 15 16:58 |
Still in the planning stage as I build this model, Meku's gorgeous S.E. 5 featured in this VA forum along with the both of us exchanging emails, has been a great source of inspiration and guidance. I am also inspired by Mr. John O's using of fuselage stitching of the fuselage on his JN4D "Jenny" medical biplane featured on this site a couple of years ago. I thank you both. |
| Skyediamonds1985, Image # 34863 | 02 Nov 15 16:48 |
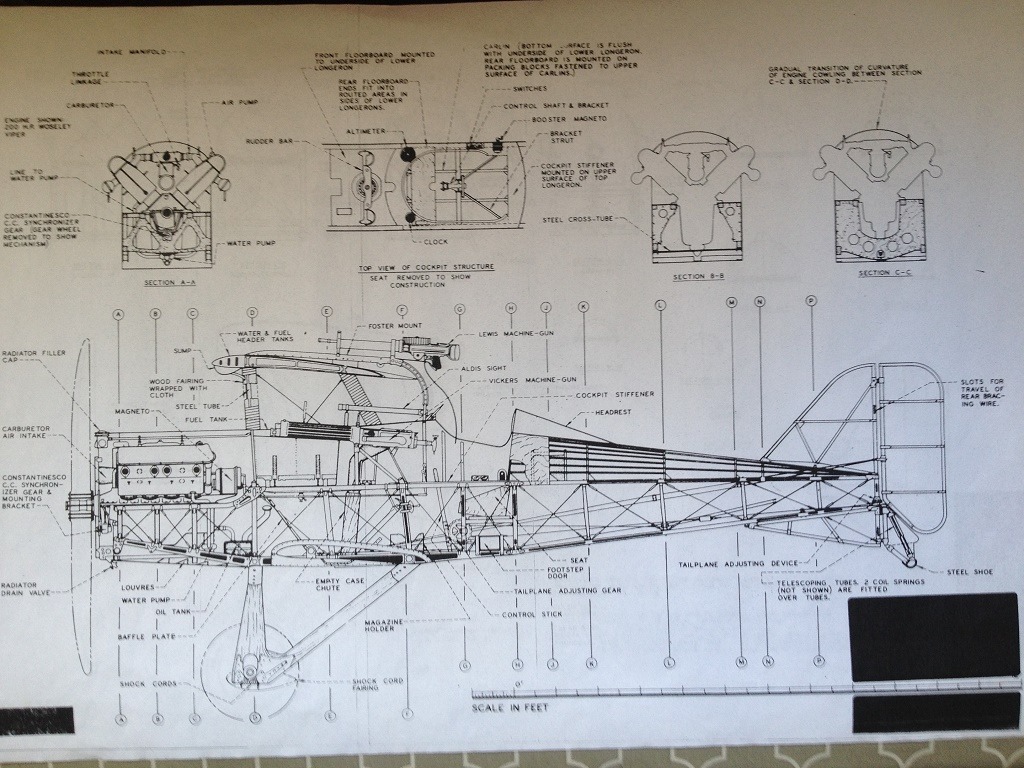
Reviewing the inboard profile drawing of the real aircraft we can see the general arrangement of the cockpit interior and just as importantly, the airfame structure as viewed from the cockpit. The challenge here, is how to emulate the girder-type construction around the cockpit area without actually constructing the whole fuselage in longerons, cross members and upright supports along with their complicated rigging. |
| Build Thread, Page :
<< 37 38 39 40 41 [ 42 ] 43 (851 posts, 20 posts per page, 43 pages in total)
|
[ < Prev ] [ Next > ] |
