| Build Thread, Page :
1 2 3 4 5 [ 6 ] 7 (136 posts, 20 posts per page, 7 pages in total)
|
[ < Prev ] [ Next > ] |
| edtherenderman, Comment for image # 41952 | 25 Mar 20 09:41 |
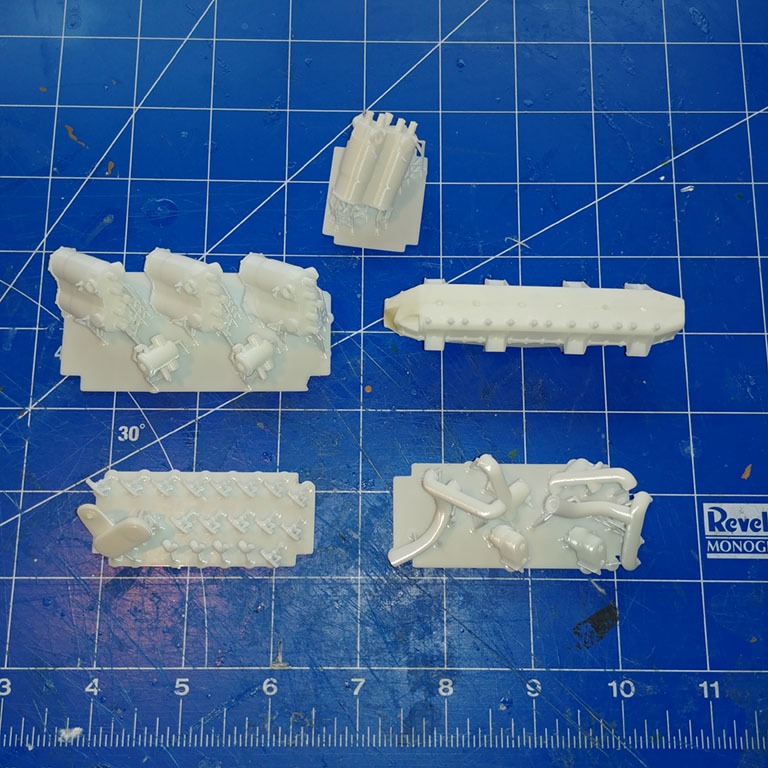
| Don, Yes the supports keep it off the sheet. The sheet is really a "pad" that holds everything onto the print bed and is printed along with all the parts. When it is done, it is one big object. There are two reasons for the supports: 1) The resin shrinks slightly as each layer is applied. The supports allow the print to flex as it shrinks, and 2) because this is printed one 50 micron layer at a time, some parts of the print need supports so that they can start off the object and "grow" back to the main object as it is printed layer by layer. The software figures all of this out for you. I use its recommendations, but add my own where I know that I've had failures in the past.
It really is a lot of effort, time and money. For me though, it combines four of my favorite hobbies; 3D modeling, 3D printing, balsa models and plastic models. Perfect storm, so I'm very willing to do it. I love being challenged too, and this is a way of keeping excited about all the hobbies. |
| Don C, Comment for image # 41952 | 24 Mar 20 18:54 |
| Do the supports hold it off the sheet, or do o have to cut it out of the sheet? This is really interesting, but I'm one of those "old dogs". I can learn, but not sure if it is worth the investment. |
| Don C, Comment for image # 41954 | 24 Mar 20 10:54 |
| Glad to hear everyone's healthy. My kids seem to have that problem of feeling stuck too, but being retired up on the mountain it doesn't make much difference. One day is pretty much the same as the next. May have to go fetch the mail one of these days, though. That's impressive stuff. Being sort of computer illiterate I have to stick to gluing little pieces together. |
| edtherenderman, Comment for image # 41954 | 23 Mar 20 15:51 |
| Yah, kind of, only much larger scale! I love detail and this is giving me a way to do it without carving all the parts. I get to combine my love of plastic and balsa model airplanes. But if you want to go really big, James May build a full size spitfire kit based on the Airfix kit he built as a kid. Fun to watch on YouTube. https://www.youtube.com/watch?v=k_5k9D5h2BY |
| rgood, Comment for image # 41954 | 23 Mar 20 15:42 |
| This is "Build your own Airfix Kit" - is it not? Amazing stuff. |
| edtherenderman, Comment for image # 41952 | 23 Mar 20 13:42 |
| No. I have software that creates the "supports." It does a pretty good job, but I've learned some tricks to help improve the print. For example, I will add supports on surfaces that are parallel to the print bed. The software can also optimize the position of the part so that it has the best print quality with the lest amount of supports. |
| Creosotewind, Comment for image # 41952 | 23 Mar 20 13:31 |
| When you draw these do you have to draw the suspension for each piece as well? |
| Creosotewind, Comment for image # 41954 | 23 Mar 20 13:29 |
| Dang, all this is really cool new technology. Great job! Looking forward to seeing these assembled. |
| edtherenderman, Image # 41954 | 23 Mar 20 10:48 |
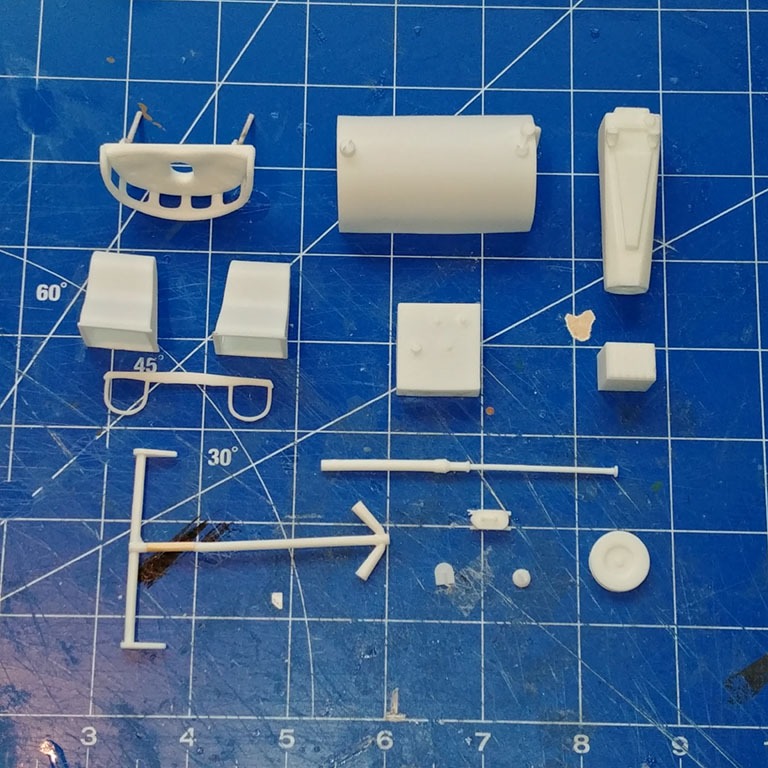
I also modeled and printed all the parts for the interior. Parts include: Seat, fuel tank, yoke, radio, radio antenna spool, camera, camera plate holder, fuel pump, rudder bar, rudder bar firewall insets, three switches for the dash. |
| edtherenderman, Image # 41953 | 23 Mar 20 10:43 |
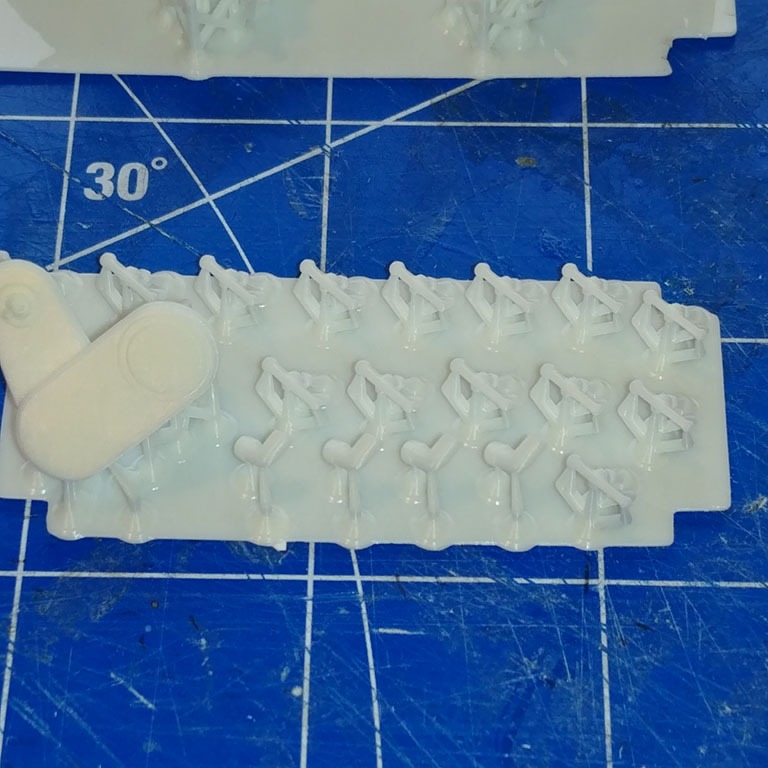
Rear power take-off, many rocker arms and coolant pipes |
| edtherenderman, Image # 41952 | 23 Mar 20 10:42 |
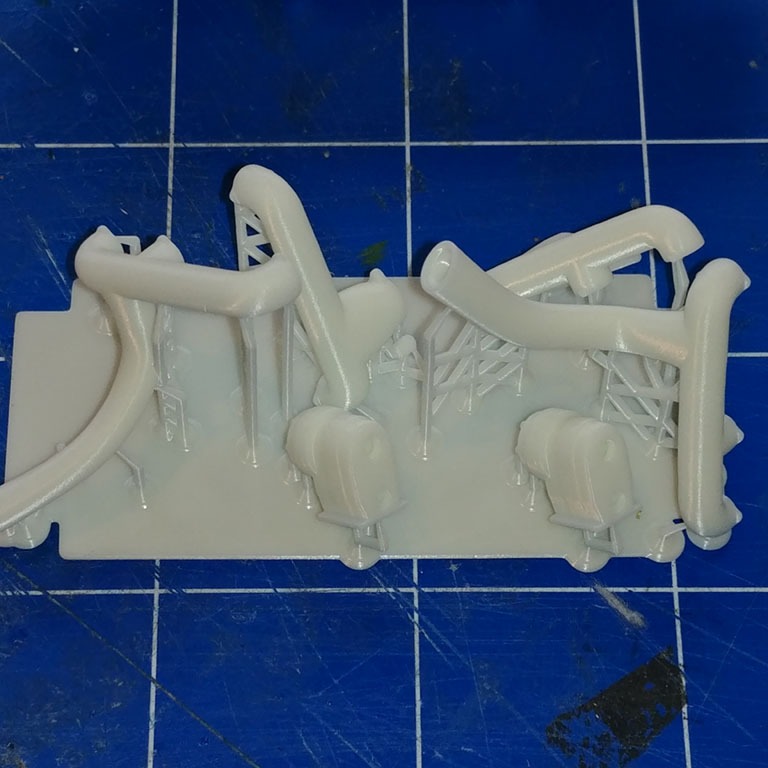
Intake and Exhaust Manifolds and magnitos |
| edtherenderman, Image # 41951 | 23 Mar 20 10:41 |

Cylinders and Carbs |
| edtherenderman, Image # 41950 | 23 Mar 20 10:41 |
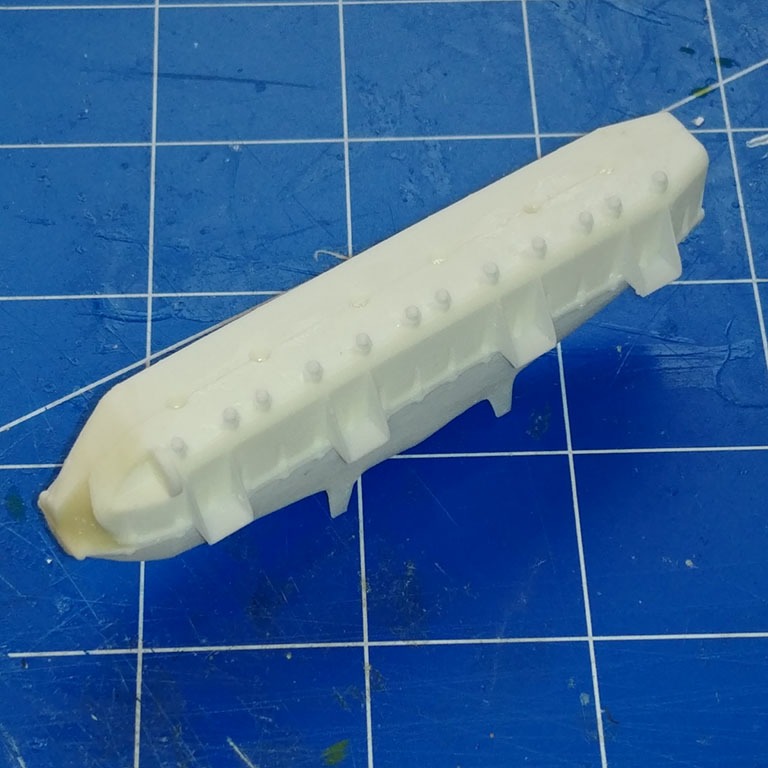
Argus III engine block assembled. I needed to do some filler in the front where the 3D print partially failed. |
| edtherenderman, Image # 41949 | 23 Mar 20 10:40 |
Been a trying time over the last few weeks. Working from home and social isolation has been challenging. But fortunetly, my family, friends and myself are healthy. I hope all the same for you! I have had some time (more time actually) to do some 3D printing. Here is the 3D print job for an 1/16 scale ARGUS (Opel) III six cylinder engine used in the Hannover CIIIa and serveral other German aircraft during WWI. I modeled this is Blender, then using my print pipeline, was able to print it out in five separate print jobs. Most of these only took 4 - 6 hours to print. Print time is proportial to the number of layers (hight in Z Axis) of the print, not the number of parts. I have found there tends to have more issues with lots of parts on one print, so I tend to keep the numbers smaller and do more prints. It took two weekends and a week of evenings to model the entire engine. However, now that I have it, I can print it in any scale I want down to about 1/24. Any smaller than that and I run into issues with parts being too small and would need to rework the model. |
| Don C, Comment for image # 41888 | 02 Mar 20 10:13 |
| The artistry in the design of these old planes is just beautiful |
| edtherenderman, Image # 41888 | 02 Mar 20 08:46 |
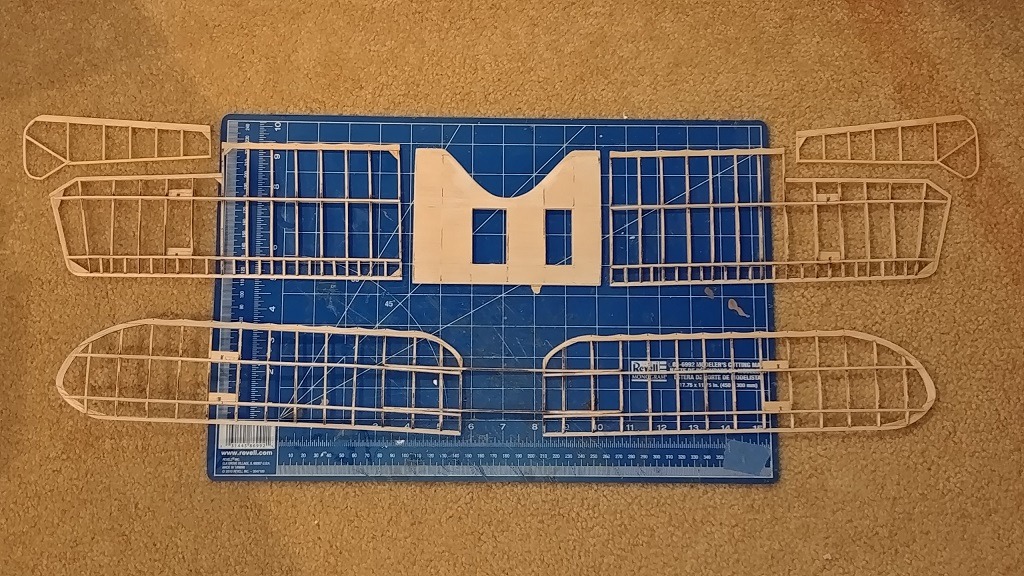
Not a lot of building going on right now. Was down with the flu last week (nope, not Corvid-19 although I live just north of Kirkland, WA!). I did spend a good bit of time refining the pipeline for using the laser etcher and found a couple of good shortcuts. I’m planning on putting together a how-to for those who are interested. Anyway, here is a picture of the upper and lower wings for the Hannover. The center section of the upper wing was sheeted in the original a/c and contained an aux fuel tank and radiator. I’m going to 3D model and print those parts. I’ve also spend a week (prior to the flu) modeling the interior details so I can print them. I still need to model the engine. Once I get all the parts done, I’ll fit them to the fuse before sheeting. Finally, I spent some time sheeting, filling and sanding the vertical fin and lower horz stab (no pictures yet). These were integral parts of the original a/c fuse, so wanted to get them sheeted before mounting them and sheeting the fuse. |
| edtherenderman, Comment for image # 41845 | 17 Feb 20 08:39 |
| Started building the wings this weekend and came to a horrible realization. The ziplock bag that I had put all of the wing parts into (ribs, false ribs, wingtips, spars, etc) into, had fallen off my desk into the garbage can next to my desk, which got dumped last week! This would be a horror story if this was a kit! But, since I had the laser cutter files, I was able to reproduce all the parts in about 1.5 hours! Of course, it’s a lot of wasted balsa, but at least I didn’t have to go back and cut 54 ribs out again by hand! |
| edtherenderman, Comment for image # 41847 | 17 Feb 20 08:29 |
| Thanks Haywoood. Funny thing, as I really looked at this build, something really didn't feel right. I did a bunch of research last week and realized that the width to height proportions are all wrong! Way too wide! So I spent a good four hours cutting and sanding the formers to get it into a shape that is much more accurate. Note to self: check out those “scale” drawings before committing them to balsa!
Now that I recognize the differences, I’m thinking of going back and re-engineering the plans and my laser files. I’m thinking of creating formers 5 – 9 as full formers instead of just the top and bottom so that I can build a more rounded fuse, which is more scale than these. These plans build easy and very light (which is good if you plan to fly since there is a lot of weight in the back with two stabs), but that’s not my plan. Still mulling it over.
BTW – http://www.wingnutwings.com/ww/ is a great source out of New Zealand for large scale (1/32) WWI plastic models. They have a lot of unique aircraft for purchase, but even more exciting to me is that they do a great deal of research and provide lots of original reference pictures. I’d pay them just for their research!
|
| heywooood, Comment for image # 41847 | 14 Feb 20 21:52 |
| I think you’re going to love this larger scale..
Your work thus far looks fair and square and very clean. I wish I had more familiarity with the full library of WWI aircraft. I only know of the most common types. |
| edtherenderman, Comment for image # 41845 | 13 Feb 20 08:08 |
| That's my definition of "scratch built"! Not quite up to drawing my own plans yet. I may do that for some of the imaginary aircraft I've drawn up though. Could be a fun new challenge. |
| Build Thread, Page :
1 2 3 4 5 [ 6 ] 7 (136 posts, 20 posts per page, 7 pages in total)
|
[ < Prev ] [ Next > ] |
