| Build Thread, Page :
1 2 3 [ 4 ] 5 6 7 (136 posts, 20 posts per page, 7 pages in total)
|
[ < Prev ] [ Next > ] |
| edtherenderman, Image # 42157 | 12 May 20 21:44 |
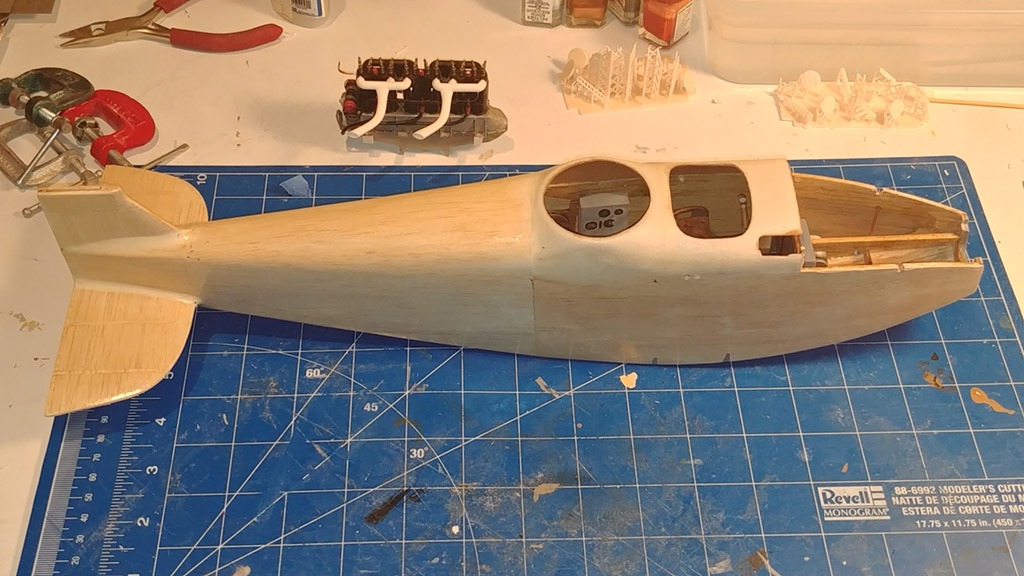
Hay everyone. Sorry I’ve been off line for a while. Major long work days these last two week. Finally got some time to post. This is the Hannover fuse filled, covered with tissue, doped and a thick coat of gloss clear acrylic. I’m going to be applying lozenge camp decals to the back section (horizontal stab, fin and fuse) and wanted a good smooth base. |
| BriandKilby, Comment for image # 42090 | 27 Apr 20 15:04 |
| thanks ed, i'm not doing anything right now, but maybe sometime in the future. |
| edtherenderman, Comment for image # 42090 | 27 Apr 20 13:39 |
| If this works, it may be a good way to go. I kept the photoshop files really generic. If you have a color inkjet printer, it would be possible to just print sheets of the pattern. The key would be scaling it correctly. I'm happy to share the files(that goes for everyone here). |
| BriandKilby, Comment for image # 42090 | 27 Apr 20 13:26 |
| I wanted to build that camo design for my comet D.VII, but it was a little too complicated for me. |
| edtherenderman, Comment for image # 42090 | 27 Apr 20 12:21 |
| He may have had this before he started painting his aircraft red. It was pretty standard for German A/C. From what I understand, they printed the linen fabric with the standard patterns. They would apply the printed,darker colors to the upward facing surfaces, and use the reverse, washed out colors on the downward sides. Many Jastas would paint over parts or all the aircraft to tone down the camo, or to make the aircraft easier to identify. Some sections of the aircraft where hand panted too. In my case, the fuse and center section of the upper wing were hand painted because they were sheeted, not fabric covered. |
| BriandKilby, Comment for image # 42090 | 27 Apr 20 12:01 |
| very nicely done! is that one of the red baron's camouflage? |
| Don C, Comment for image # 42090 | 27 Apr 20 11:00 |
| That worked well. Great idea.. |
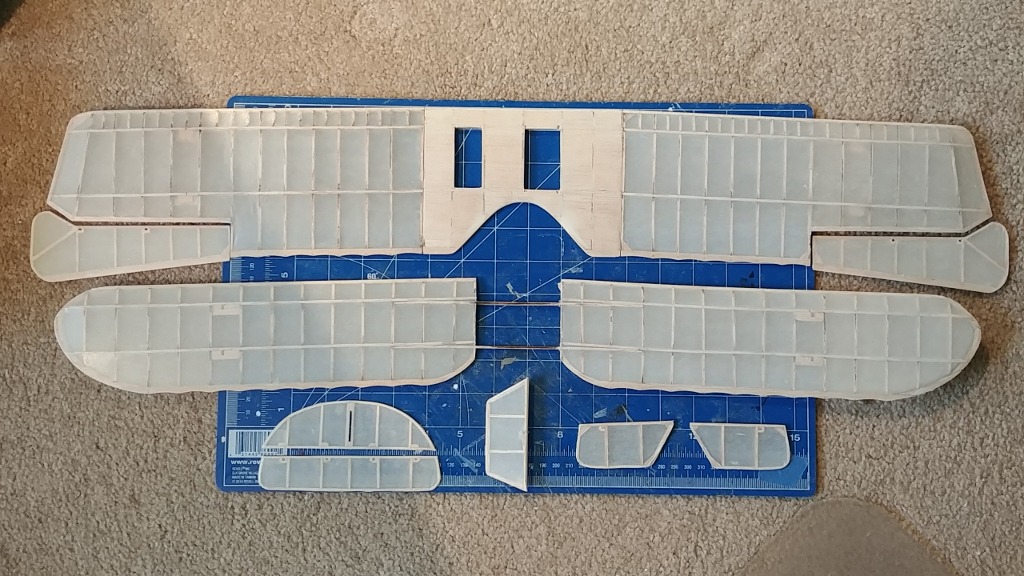
| edtherenderman, Image # 42090 | 27 Apr 20 10:21 |
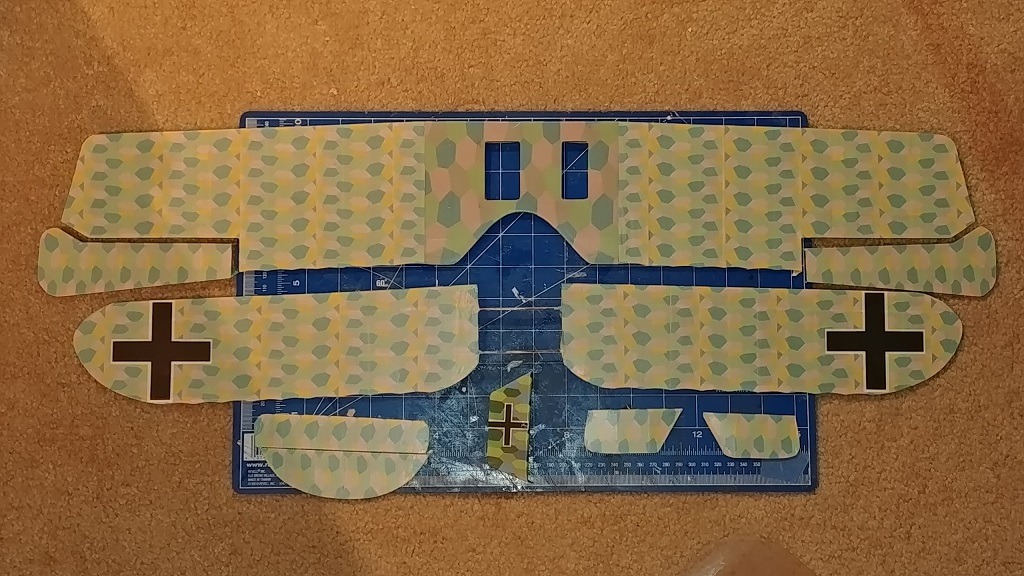
Here are the wings, elevators, ailerons and half the rudder with the underside camo decals applied. It was a pretty easy process because I spent so much time doping the tissue that I had almost no warping. I used Testers decal set to apply them. I still have to trim and apply the upper set of decals. Once those are done, I need to add seam tapes along each rib to finish it up. |
| edtherenderman, Image # 42089 | 27 Apr 20 10:16 |
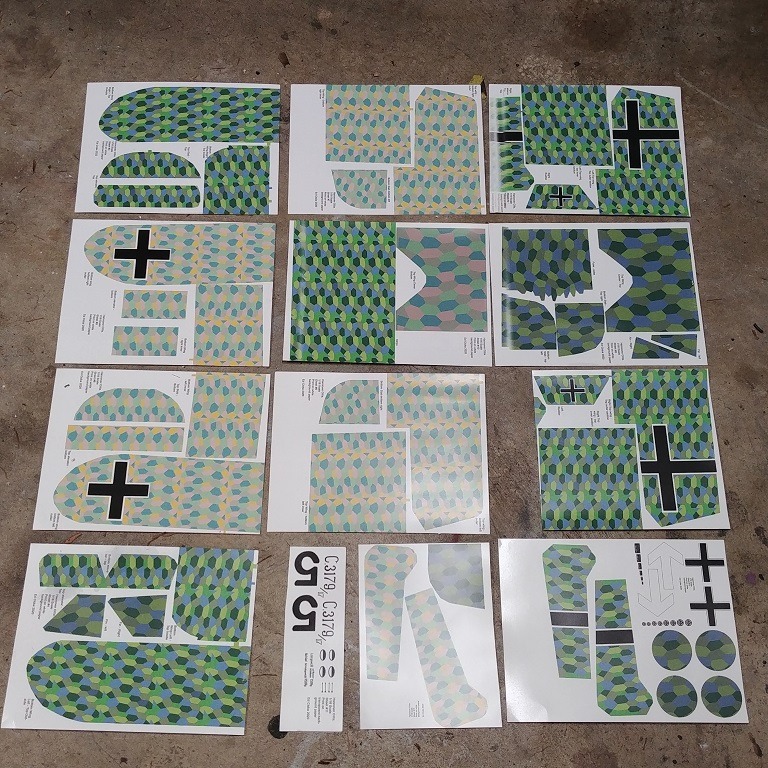
I’m experimenting with a new process. This airplane has four and five color lozenge camo, like many WWI German aircraft. I am not going to paint that many lozenges! So, using the internet to find examples, I used Photoshop to create water slide decals to cover the model. It took about a week of evenings and a full weekend to get the colors right, patterns made and all the pieces laid out. I then printed out 13 sheets of 8.5x11” on my high quality photo printer. 12 sheets are printed on white backed film. One is on transparent film. Once printed, I sprayed the decals with satin clear acrylic to fix the ink onto the film. |
| edtherenderman, Image # 42088 | 27 Apr 20 10:08 |

Work continues on the Hannover. Last weekend I completed the landing gear and center cabane struts. Both are made out of copper tubing. Took me almost an entire day to do the cabane struts. The plans had them way out of scale, so had to make about six sets out of bamboo skewers until I got the right height and wing angle. Then I transferred that to the copper tubing that I soldered together. Looks good now! |
| edtherenderman, Image # 42087 | 27 Apr 20 10:04 |
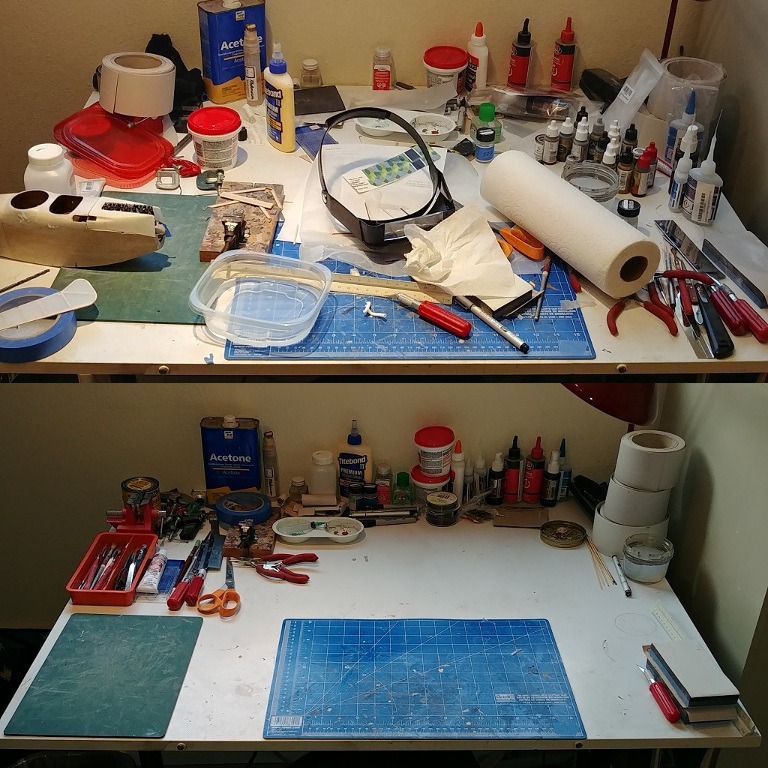
They say a clean desk is the sign of a sick mind, but…enough is enough! |
| edtherenderman, Comment for image # 42035 | 13 Apr 20 11:36 |
| She has me well trained! She shows up when she wants to go outside, then when she is done, sits by the back glass door and stares at me until I let her back in. Now that the weather is getting a bit warmer, I'll just leave the door open a little and she can come and go as she pleases. Like I said, I'm well trained :) |
| edtherenderman, Comment for image # 42036 | 13 Apr 20 11:34 |
| I like it a lot, primarily because of the lack of fumes! The 2:1 mix seems like a good solution. Doesn't dry too quickly. I also dampen the tissue before applying it, so that adds yet more moisture. I also cover the wings in four pieces per side (two on top, two on the bottom), so I'm working a smaller area. I have to admit it doesn't work as well as the older acetate dopes, but I'm willing to deal with it because of the lack of smell. |
| Don C, Comment for image # 42036 | 13 Apr 20 10:56 |
| Nice work. What do you think of that EZ-Dope? I tried it once, but it dried too quickly to stick the silkspan. It sure would be easier on the lungs. |
| Don C, Comment for image # 42035 | 13 Apr 20 10:54 |
| The only time I see mine is when she wants me to let her back in the house.
|
| Don C, Comment for image # 42034 | 13 Apr 20 10:52 |
| Smooooth. |
| edtherenderman, Image # 42036 | 13 Apr 20 09:26 |
I’ve also covered and doped the wings, ailerons, rudder, upper and lower elevators and upper horizontal stabilizer. Using EZ-Dope, I found that a 2:1 Dope to Water mixture worked best for applying and sealing the tissue. Thin enough to apply and work without globs, but thick enough to stick the tissue and fill in the pores. It still took between five and seven coats to get them completely sealed though. |
| edtherenderman, Image # 42035 | 13 Apr 20 08:58 |
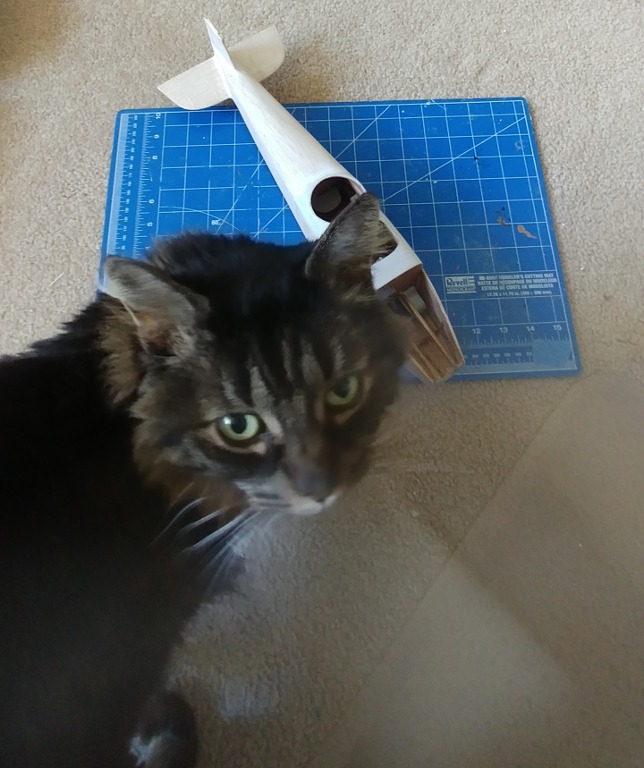
Evan my cat Chuck got into the act. She usually doesn’t care about this stuff, but I guess today, curiosity got the best of her! |
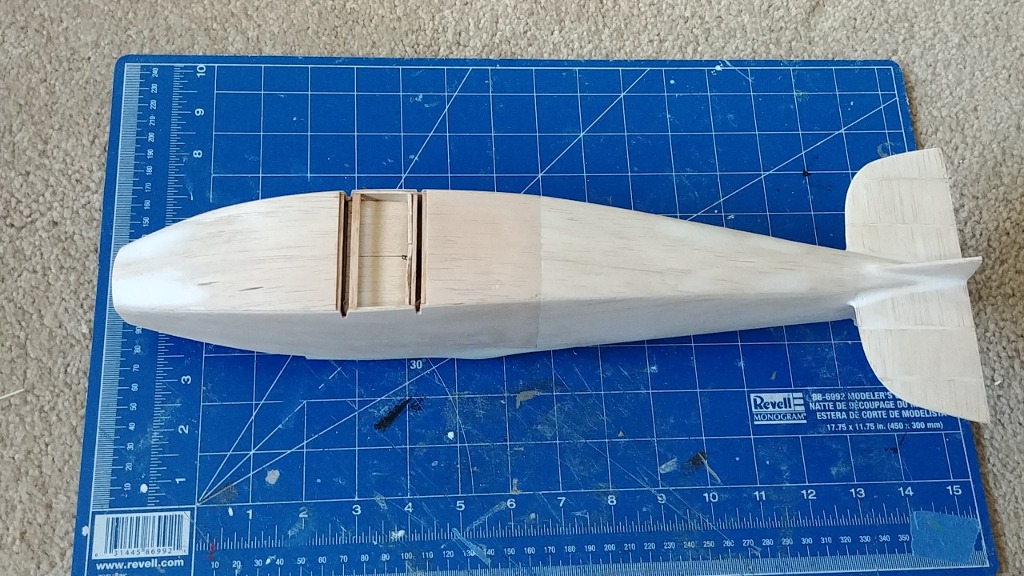
| edtherenderman, Image # 42034 | 13 Apr 20 08:57 |
The bottom. I left a section open where the wing spars pass through the fuse. I'll fill that in during assembly. |
| edtherenderman, Image # 42033 | 13 Apr 20 08:56 |
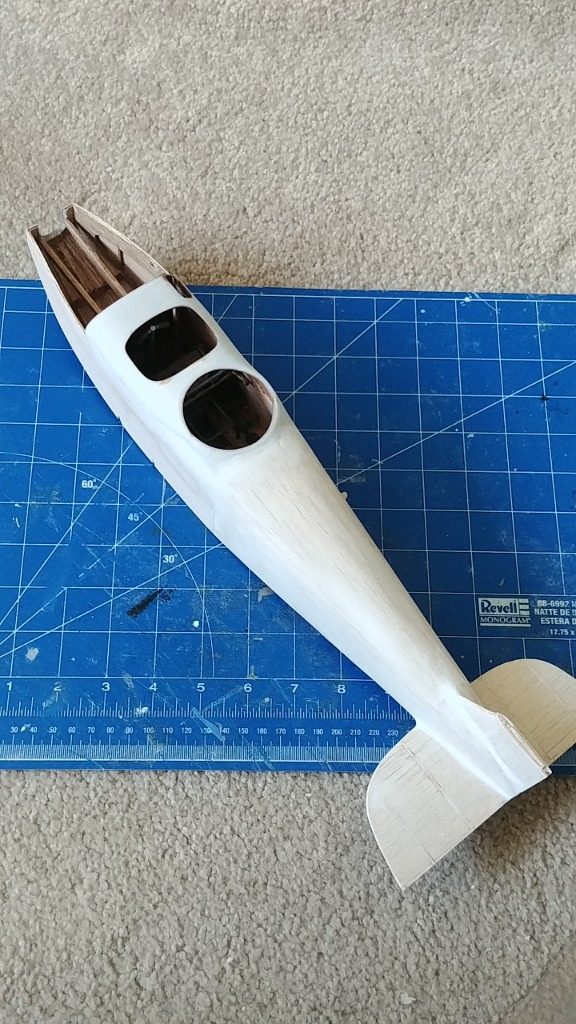
The back |
| Build Thread, Page :
1 2 3 [ 4 ] 5 6 7 (136 posts, 20 posts per page, 7 pages in total)
|
[ < Prev ] [ Next > ] |
