| Build Thread, Page :
<< 5 6 7 8 9 [ 10 ] 11 12 13 14 15 >> (423 posts, 20 posts per page, 22 pages in total)
|
[ < Prev ] [ Next > ] |
| JohnG., Comment for image # 21338 | 25 Feb 11 17:22 |
| Man, this is a load..are you a modeler or a lumberjack??? |
| moostang51, Comment for image # 21338 | 25 Feb 11 16:43 |
| 6 ailerons on a tripe. NICE. |
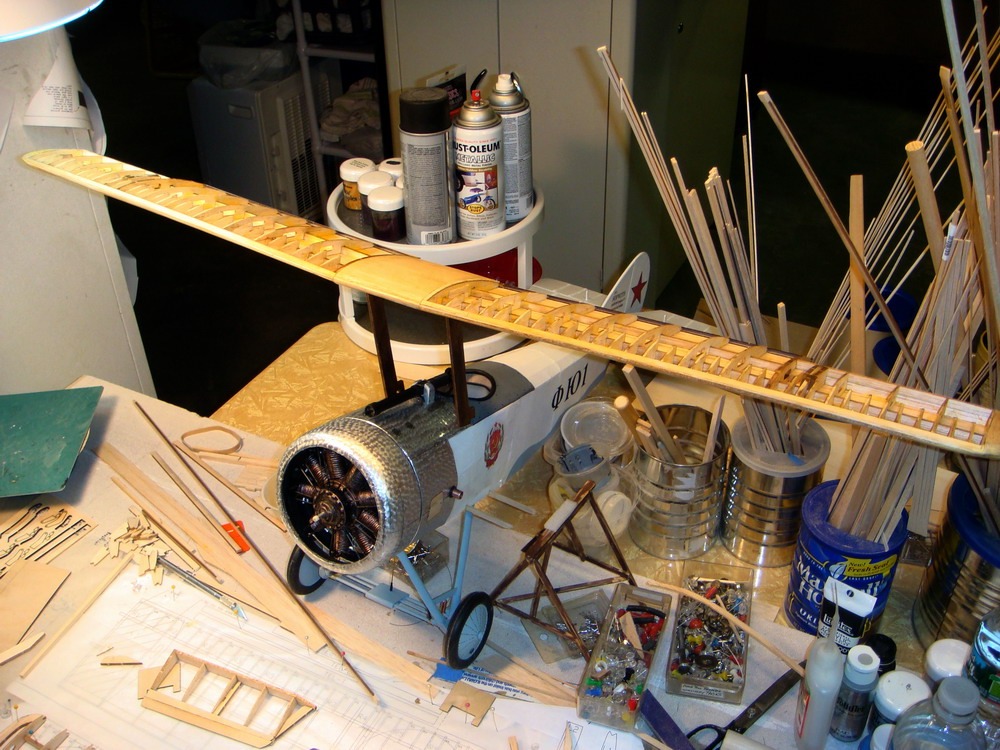
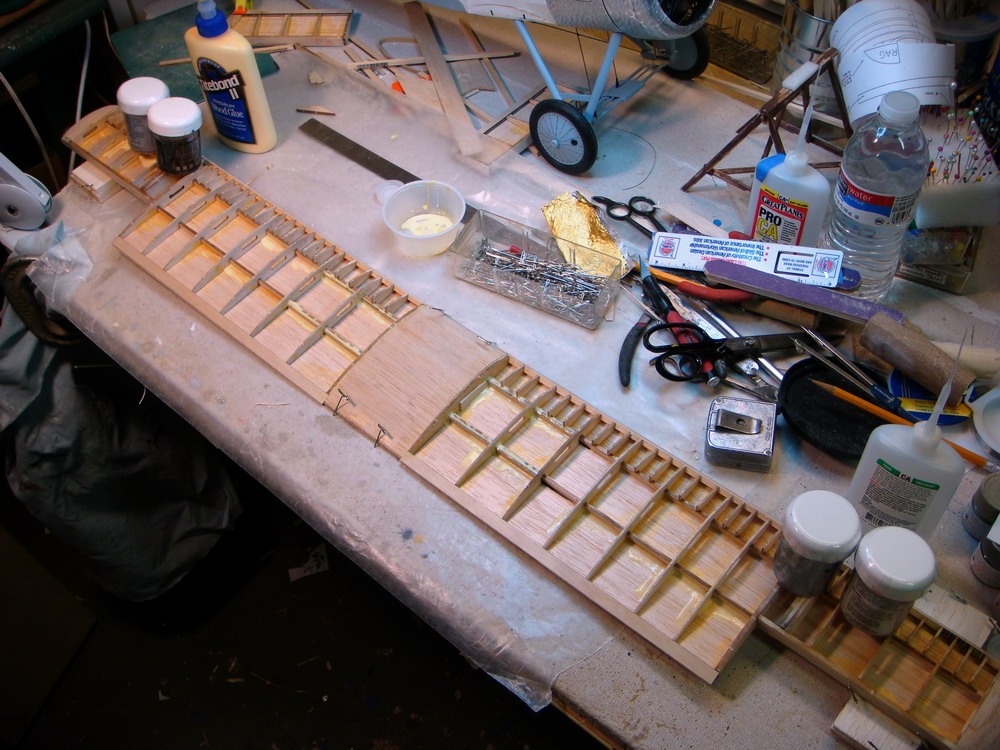
| John M Oshust, Image # 21338 | 25 Feb 11 15:23 |

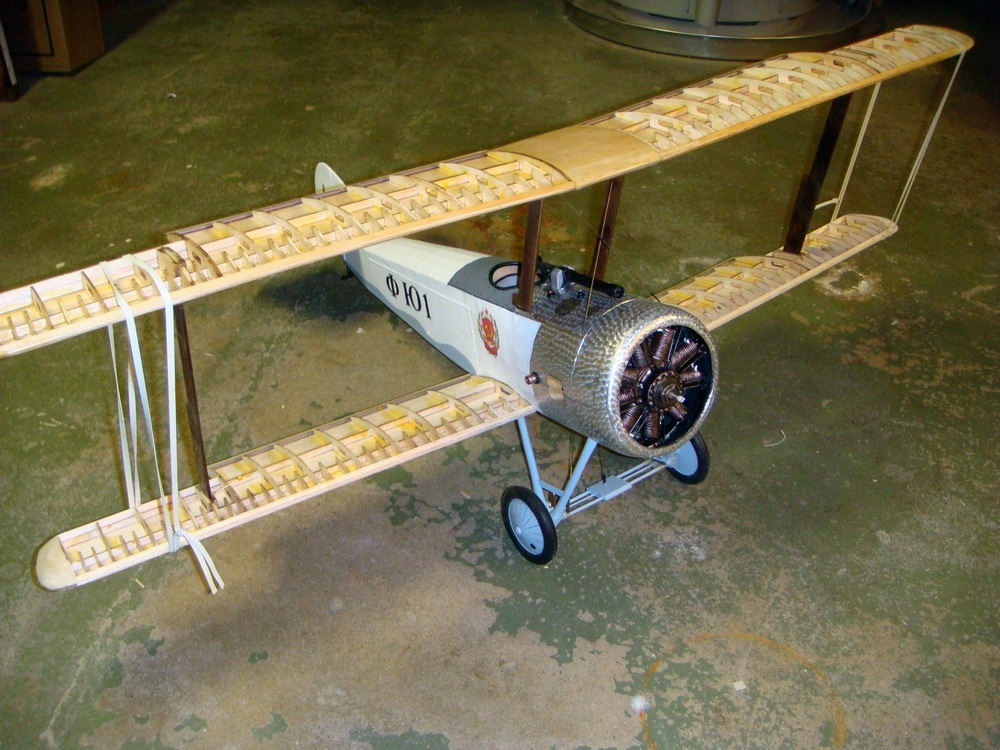
The lumber yard...guess what I have been doing the past 5 days!!! The computer that cut this kit shorted 9 of the most popular wing component and made 9 extras of another. Everything worked out and no parts are left over....I think! |
| JohnG., Comment for image # 21322 | 24 Feb 11 15:12 |
| Beautiful work, John!!! |
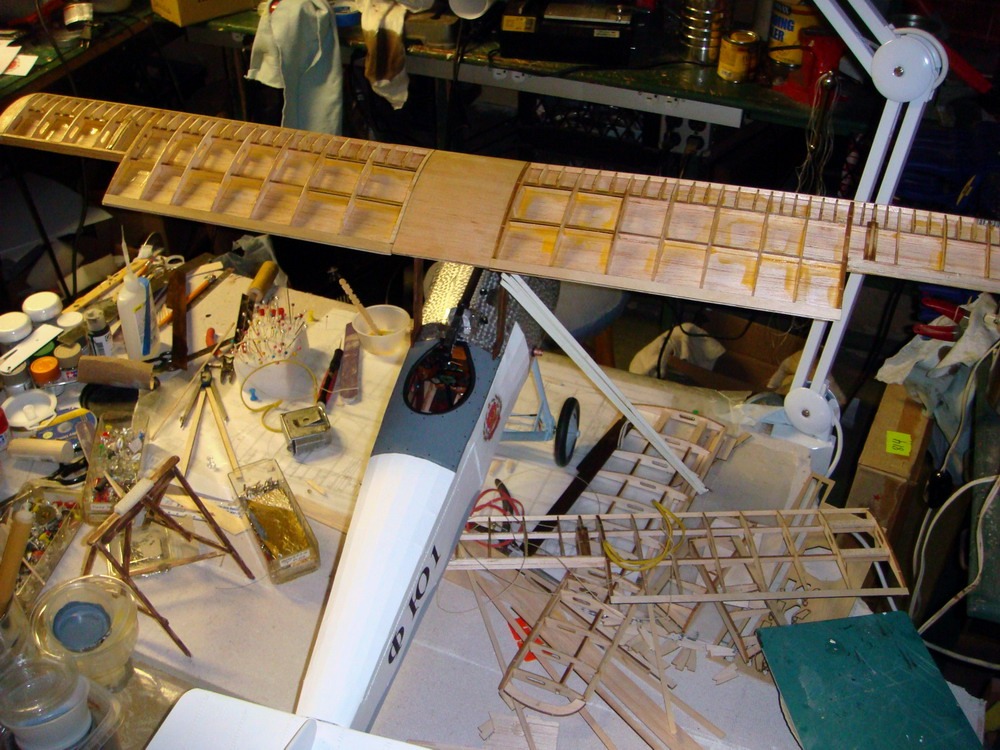
| John M Oshust, Image # 21322 | 24 Feb 11 13:51 |
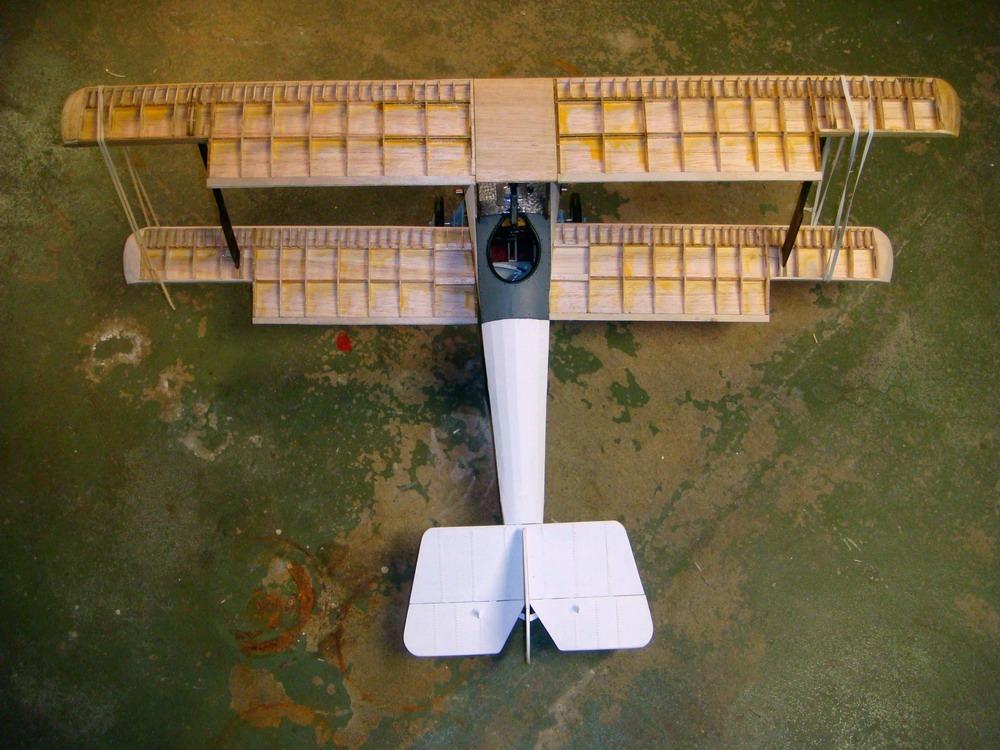
Now on to construction of the middle wing. |
| John M Oshust, Image # 21321 | 24 Feb 11 13:51 |
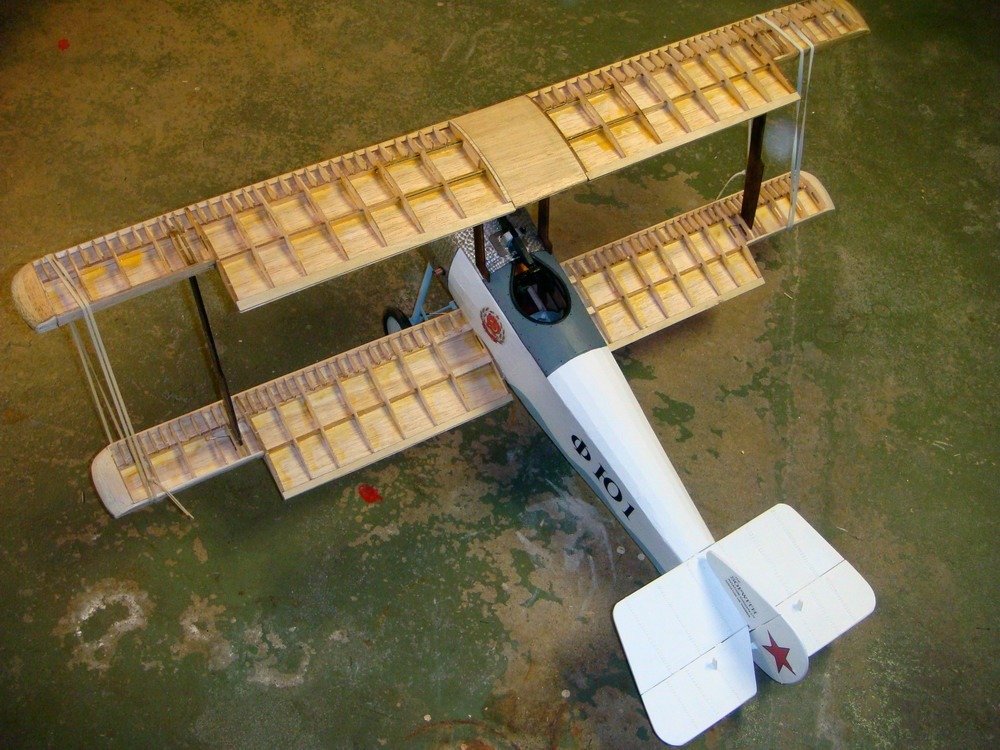
So far everthing seems to fit. Permanent attachment and perfect alignment way down the road |
| John M Oshust, Image # 21320 | 24 Feb 11 13:49 |
|
| John M Oshust, Image # 21319 | 24 Feb 11 13:49 |
|
| John M Oshust, Comment for image # 21315 | 23 Feb 11 21:05 |
| Moos forgot to mention that I am doing it with the plane upside down. I plan to use rubber bands not chord! |
| frwyflyer, Comment for image # 21315 | 23 Feb 11 18:49 |
| NICE WORK!! |
| JohnG., Comment for image # 21313 | 23 Feb 11 17:23 |
| Ingenious arrangement....another top drawer effort. |
| moostang51, Comment for image # 21315 | 23 Feb 11 17:08 |
| Nice work. As someone who oversaw the construction of many of the hi-rise buildings with floating balconies in the skyline of Manhattan. I would suggest you set the bottom wing first and (chord) measure it from say the bottom of the top strut opening and also a rear point of the fuse to a reference point for the bottom wing. This will give you even to the sides of the fuse and also even spacing for the wing angle attachment (up and down). Once this in is in place, wood spreaders could be used to set the other wings. Just a thought. |
| John M Oshust, Image # 21315 | 23 Feb 11 16:20 |
"Winging it!" again today. Fitting the upper wing and constructiong the lower wings. My logic....when the top and bottom are in place, the middle wing will fall somewhere in between...I hope!! |
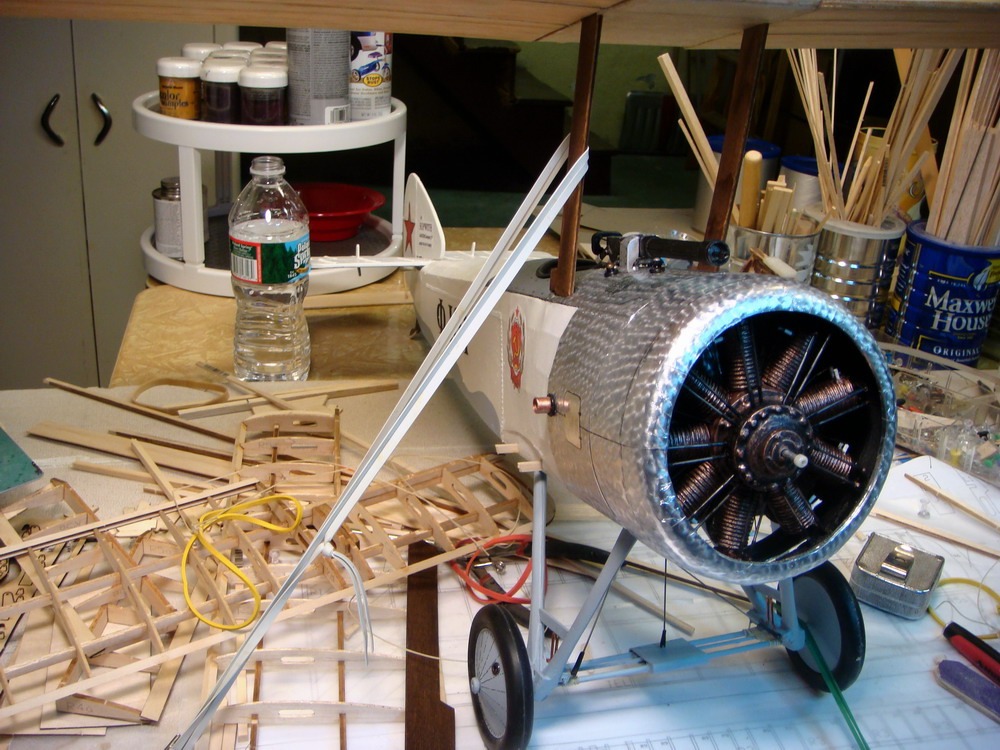
| John M Oshust, Image # 21314 | 23 Feb 11 16:17 |
Dry fitting the upper wing and cabane struts. |
| John M Oshust, Image # 21313 | 23 Feb 11 16:16 |
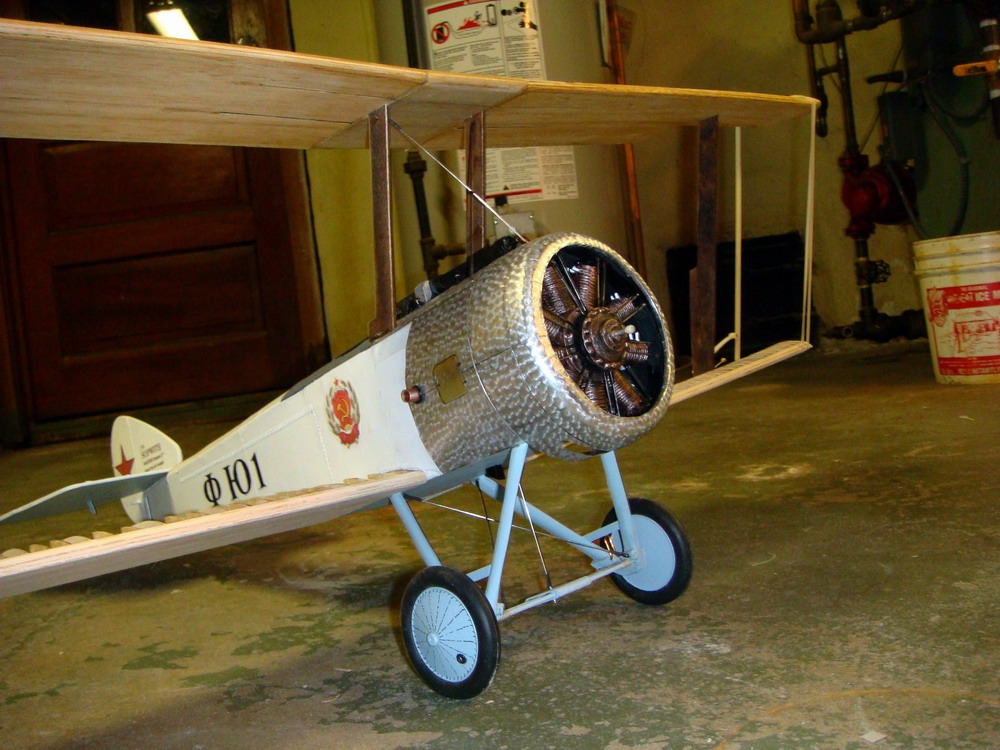
Another "High tech" jig for setting the wings. The cabane struts are the foundation for the tripe's wings. The struts and top wing are square to the fine and the wing is equally spaced to the table. This time the wings are attached top to bottom....I hope!!! No instructions with this kit. |
| John M Oshust, Image # 21312 | 23 Feb 11 16:12 |
Setting the cabane struts |
| BriandKilby, Comment for image # 21277 | 23 Feb 11 07:15 |
| big is beautiful! |
| moostang51, Comment for image # 21309 | 23 Feb 11 03:58 |
| All the prep time and effort is worth it. When you cover with the poly span it should look grand. |
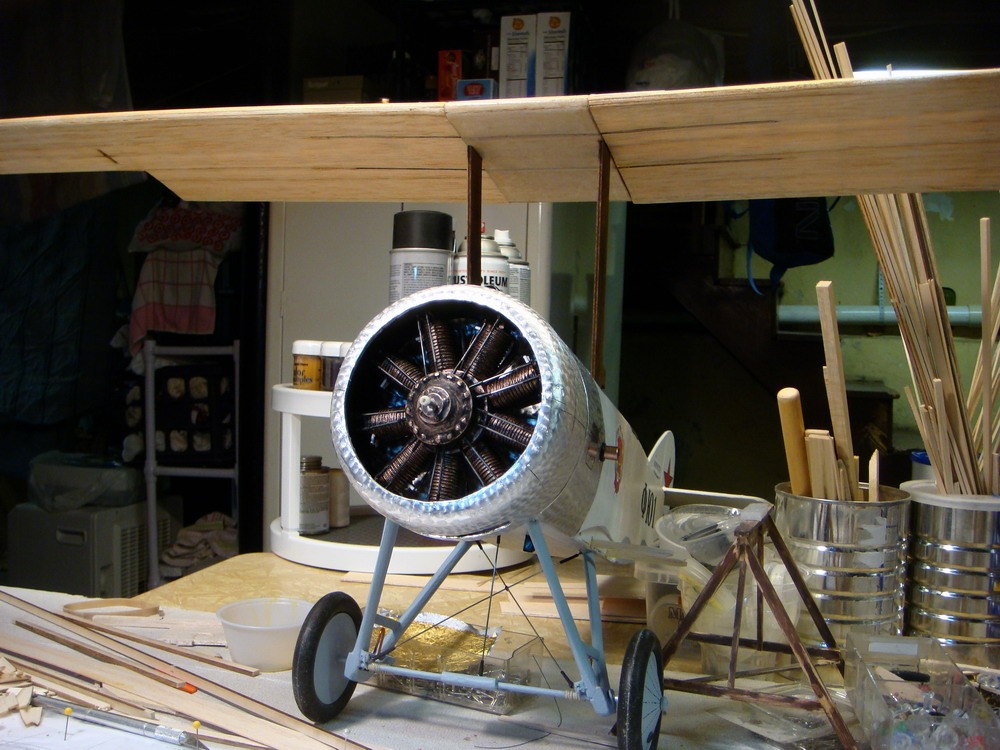
| John M Oshust, Image # 21309 | 22 Feb 11 18:38 |
Whoopie, I get to make two more, really four more, of these. Two days to get the top wing to this stage. |
| John M Oshust, Comment for image # 21277 | 21 Feb 11 19:10 |
| Seriously thinking of finishing this with wing roots and no full wings. Worked on one of the 6 wings today....I hate framing wings. "TANKS" |
| Build Thread, Page :
<< 5 6 7 8 9 [ 10 ] 11 12 13 14 15 >> (423 posts, 20 posts per page, 22 pages in total)
|
[ < Prev ] [ Next > ] |
