| Build Thread, Page :
<< 28 29 30 31 32 [ 33 ] 34 35 36 37 38 >> (851 posts, 20 posts per page, 43 pages in total)
|
[ < Prev ] [ Next > ] |
| Creosotewind, Comment for image # 35471 | 29 Jan 16 10:54 |
| Obviously you don't have cats. |
| David Duckett, Comment for image # 35477 | 29 Jan 16 07:49 |
| Maybe you can build a tiny door for the bottom of the fuselage to show it off. |
| Don C, Comment for image # 35477 | 28 Jan 16 23:55 |
| But now the world knows to look for it.
And it's really cool!
|
| Skyediamonds1985, Comment for image # 35477 | 28 Jan 16 21:52 |
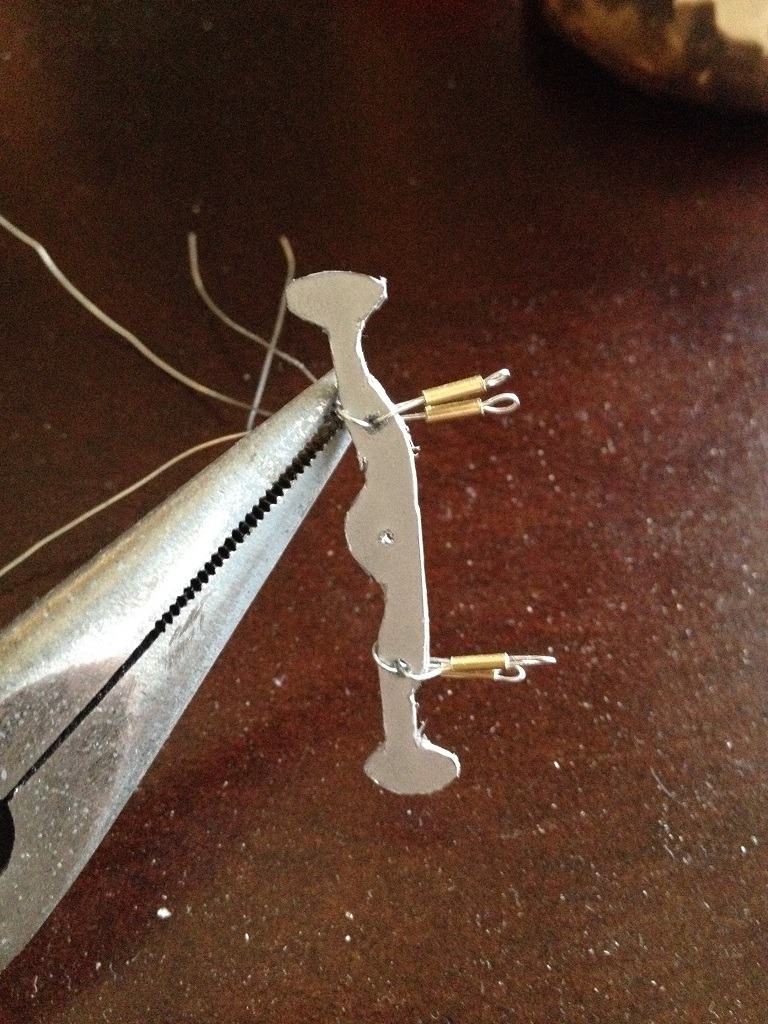
| I should add that the rudder bar itself is pretty rough around the edges. I could've taken the time to sand smooth, but the whole thing is deep inside the cockpit laying on the floor under the instrument panel, which itself is also recessed deep within the cockpit. OCD not withstanding, I figured I could allow myself a little bit of latitude here. At 1/20th scale, things are pretty small as it is, and its very doubtful anyone would notice these itsy, bitsy, teeny frayed edges. At least that's my theory. |
| Skyediamonds1985, Image # 35477 | 28 Jan 16 20:15 |

Clipped off the excess wires. Had to carefully look at the photos. The three turnbuckles on each side are lumped together. Two each side for the rudder and one for the steerable tail skid. I'll add the foot straps |
| Skyediamonds1985, Image # 35476 | 28 Jan 16 20:12 |

Wiring up the rudder bar with my homemade turnbuckles |
| Skyediamonds1985, Image # 35475 | 28 Jan 16 20:11 |

One more picture of our home. A very special painting by renown artist. Thank you, DD |
| Skyediamonds1985, Image # 35471 | 28 Jan 16 17:45 |

This is for Rayl. My first display stand for the PT-17 was slightly modified as a refrigerator. Making use of small space. |
| Skyediamonds1985, Comment for image # 35465 | 28 Jan 16 17:43 |
| LoL... Thank you guys for the compliments... Only my imagination and some limited tools here. |
| Skyediamonds, Comment for image # 35461 | 28 Jan 16 10:21 |
| Oops. I mean Bailey's. Darn spell check (ahem). |
| Skyediamonds, Comment for image # 35461 | 28 Jan 16 10:20 |
| I'll take some photos of my "display area" which doubles as a refrigerator & bed side table. I wish it was Bally's. Alas, don't think I could pass for 21 (will celebrate my 67th on the 31st of this month). Might pass for 66, tho😁 |
| rgood, Comment for image # 35461 | 27 Jan 16 17:26 |
| Super cozy Skyediamonds! Is that a Baileys cream lower left?
|
| rayl, Comment for image # 35465 | 27 Jan 16 16:27 |
| Eyestrain!!! |
| rayl, Comment for image # 35461 | 27 Jan 16 16:26 |
| Some fine work emanating from that small space. Where is the display area? |
| poppy, Comment for image # 35465 | 27 Jan 16 11:37 |
| Jeweler's work! |
| Skyediamonds1985, Image # 35465 | 26 Jan 16 23:41 |

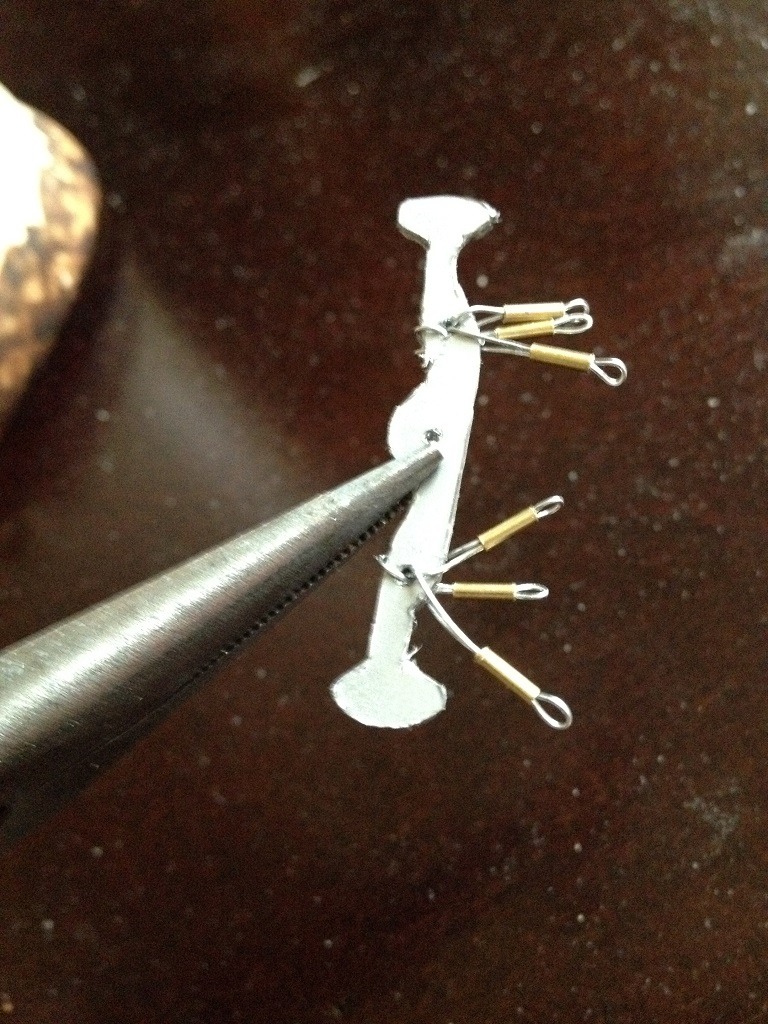
Here's the (semi) finished turnbuckle being held by hand to help lend itself to the scale desired. I'll be using the open end to wire to the rudder bar. I could also twist the open end to form a closed turnbuckle. I borrowed this idea from one of the many modeling techniques shown on YouTube. |
| Skyediamonds1985, Image # 35464 | 26 Jan 16 23:38 |

Taking one needle nose pliers and carefully clasping it at the end of the small tube, so as to not crush it, I then used the other needle nose pliers to help pull the tube such that the wired loop closed down to a more realistic scale. This is one end of the "turnbuckle." I'll be using the other end to fasten to the rudder bar |
| Skyediamonds1985, Image # 35463 | 26 Jan 16 23:27 |

As in most (if not all) biplanes and older types, there are turnbuckles. Since there are no commercially available turnbuckles in the modeling world needed this scale of 1/20th, I decided to fabricate my own. I simply used very tiny tubes purchased from a local arts and crafts store (Hobby Lobby) and threaded 28 gauge wire through and looped back out the other end. |
| Skyediamonds1985, Image # 35462 | 26 Jan 16 23:22 |

I cut up two pieces of plastic from discarded credit cards and laminated them together to form the rudder bar. I'm now drilling holes for the cables that will l(simulate) lead to the rudder. |
| Skyediamonds1985, Image # 35461 | 26 Jan 16 23:19 |

As everyone has at one time or another shared their workshop or home with our fellow VA members, thought I'd allow all to see my (truly) humble abode which consists of my little corner used as a workshop in our equally little one-room apartment. Considering my limitations on tools, accessories, and space to work, one can appreciate the old adage "Wherever there's a will, there's a way" to build models. |
| Build Thread, Page :
<< 28 29 30 31 32 [ 33 ] 34 35 36 37 38 >> (851 posts, 20 posts per page, 43 pages in total)
|
[ < Prev ] [ Next > ] |

