| Build Thread, Page :
<< 30 31 32 33 34 [ 35 ] 36 37 38 39 40 >> (851 posts, 20 posts per page, 43 pages in total)
|
[ < Prev ] [ Next > ] |
| Skyediamonds1985, Image # 35422 | 21 Jan 16 22:35 |

At first, I tried to simply cut out the instruments from those published online. Discovered they were all fuzzy and out of focus. |
| Skyediamonds1985, Image # 35421 | 21 Jan 16 22:33 |

Punch and die on the thin brass to be used on each individual instrument. |
| Skyediamonds1985, Image # 35420 | 21 Jan 16 22:32 |

Started the project by duplicating the instruments. The ones you see here are left overs from the PT-17 model. |
| Skyediamonds1985, Image # 35419 | 21 Jan 16 22:30 |
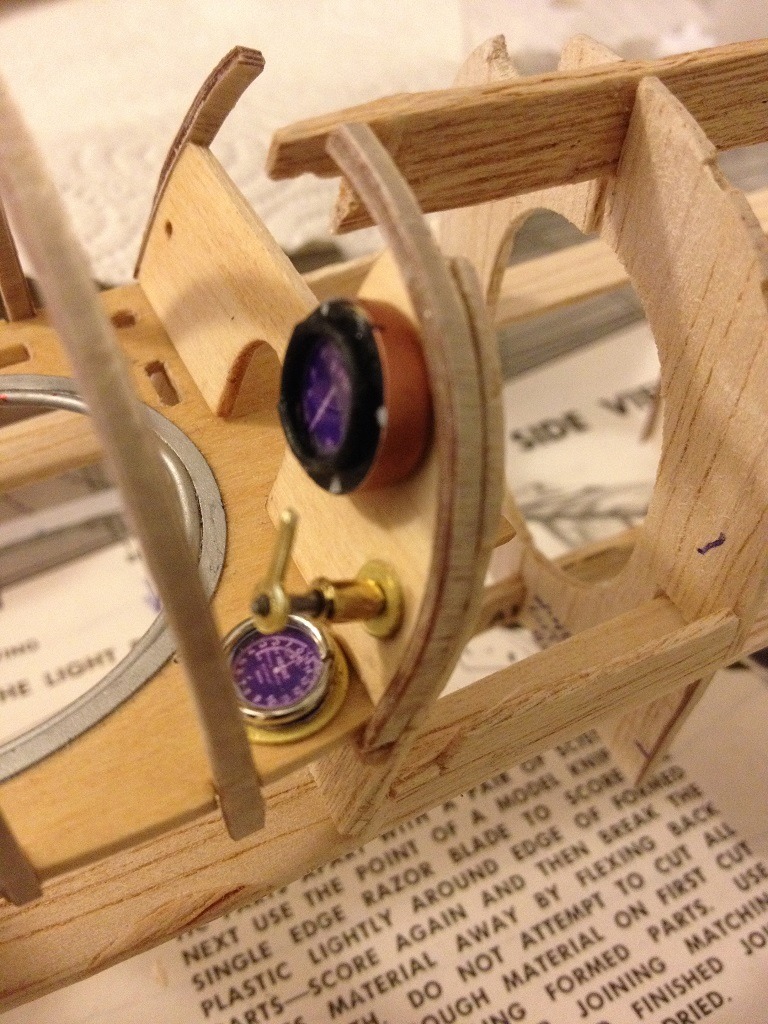
Another view of the instrument panel project. |
| Skyediamonds1985, Image # 35418 | 21 Jan 16 22:28 |

Good evening guys. The S.E. 5 is still coming along. My little "friend" Mr. OCD kicked in and I wound up duplicating the instruments exactly as those of the real aircraft on display at the Royal Air Force Museum.... At first glance, the S.E. 5 appears to be a simple, boxy, biplane until one gets up close and personal. I understand now, why the folks at "The Vintage Aviator" website bemoaned their first project being this plane. |
| Skyediamonds1985, Comment for image # 35360 | 14 Jan 16 20:22 |
| LoL... I stand corrected Creo. Come to think about it, you're right. |
| Creosotewind, Comment for image # 35360 | 14 Jan 16 16:42 |
| The pilot's seat is for "bun" placement. |
| Skyediamonds1985, Comment for image # 35360 | 14 Jan 16 16:06 |
| That "gun" placement. Sorry |
| Skyediamonds1985, Comment for image # 35356 | 11 Jan 16 20:52 |
| Forgot to mention this part prior to laminating the strips of plywood. Sorry guys. |
| Skyediamonds1985, Comment for image # 35361 | 11 Jan 16 20:49 |
| Tried a bit of "weathering" on the machine gun. |
| Skyediamonds1985, Image # 35364 | 11 Jan 16 20:47 |

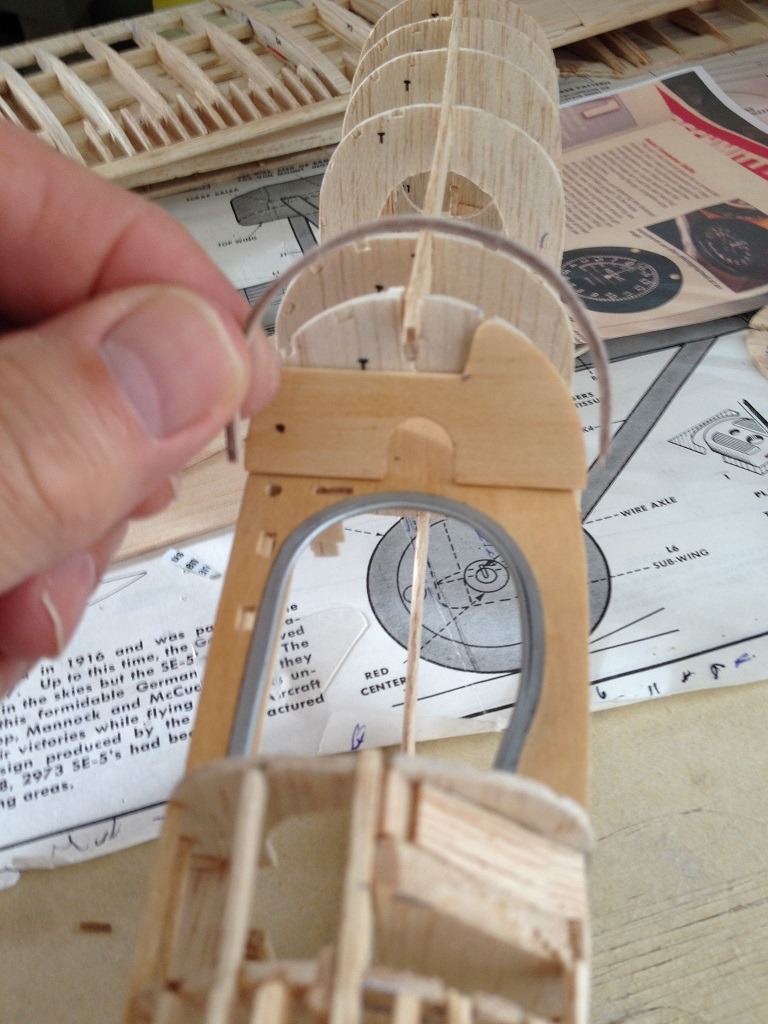
The cockpit coaming area is slightly higher than the forward fuselage outline. Really not that noticeable. Will cover from the large ring to the 2nd former so as to reduce the downward slant to more realistically reflect the true outline . That's it for today. Eyeballs need break |
| Skyediamonds1985, Image # 35363 | 11 Jan 16 20:44 |

|
| Skyediamonds1985, Image # 35362 | 11 Jan 16 20:43 |
|
| Skyediamonds1985, Image # 35361 | 11 Jan 16 20:42 |

Carefully checking out placement of the machine gun. Comparing to photos and drawings, it cants upwards just above the forward fuselage outline |
| Skyediamonds1985, Image # 35360 | 11 Jan 16 20:40 |

Original former backing the instrument panel has almost been completely cut away. Second former behind is grooved for machine bun placement |
| Skyediamonds1985, Image # 35359 | 11 Jan 16 20:38 |

|
| Skyediamonds1985, Image # 35358 | 11 Jan 16 20:37 |

Saving a bit of money here. Why buy expensive saws, when for five bucks....... |
| Skyediamonds1985, Image # 35357 | 11 Jan 16 20:36 |
Double checking the correct size of the curved laminations (Measure twice, cut once) |
| Skyediamonds1985, Image # 35356 | 11 Jan 16 20:34 |

Carefully trimmed the duplicate former down t(roughly, as in eyeballing it) to 3/32" allow clearance for the curved laminations |
| Skyediamonds1985, Image # 35355 | 11 Jan 16 20:31 |

|
| Build Thread, Page :
<< 30 31 32 33 34 [ 35 ] 36 37 38 39 40 >> (851 posts, 20 posts per page, 43 pages in total)
|
[ < Prev ] [ Next > ] |
